Lenovo ThinkPad T430s Hardware Maintenance Manual - ThinkPad T430s and T430si - Page 87
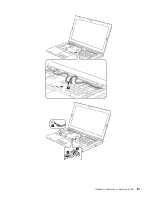
Keyboard bezel assembly with fingerprint reader, smart card reader, and speaker assembly - how to remove smart card
 |
View all Lenovo ThinkPad T430s manuals
Add to My Manuals
Save this manual to your list of manuals |
Page 87 highlights
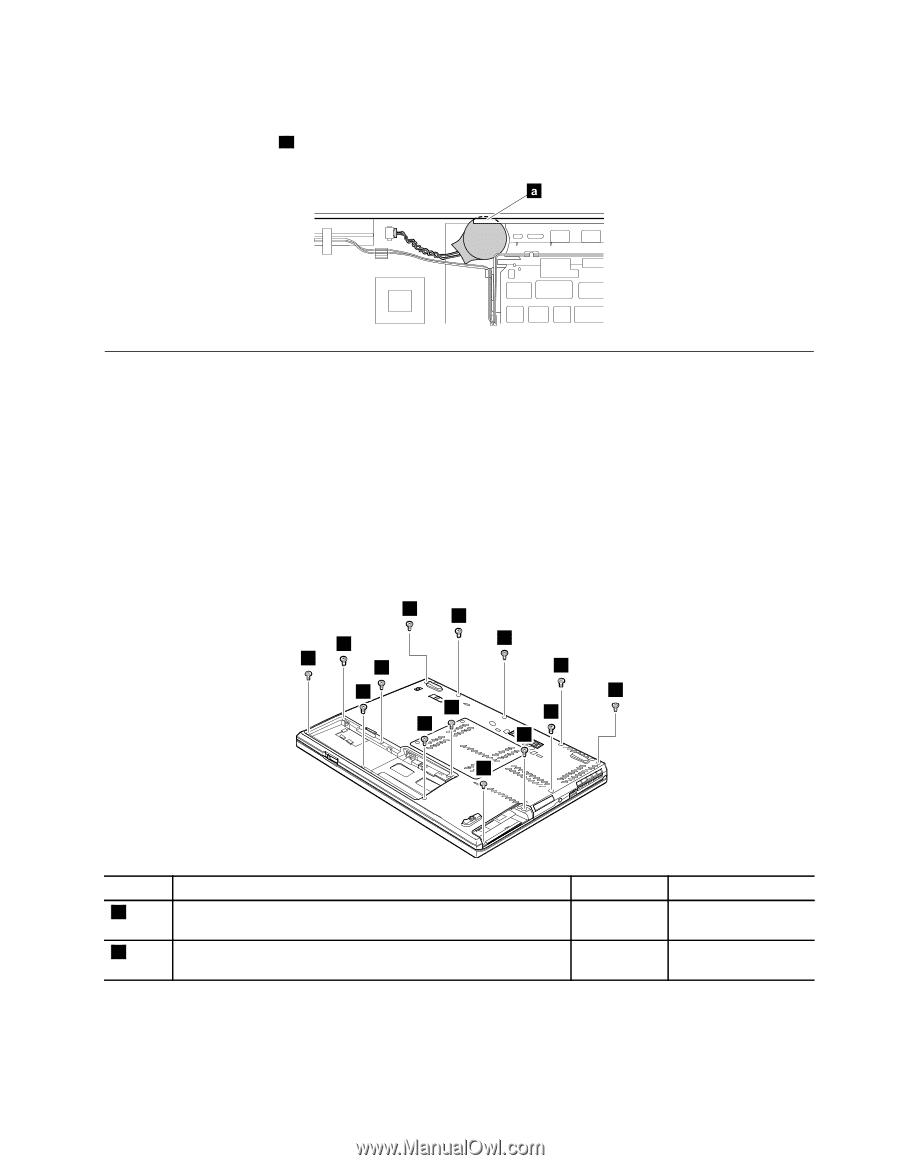
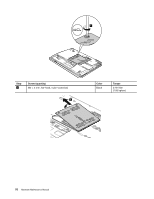
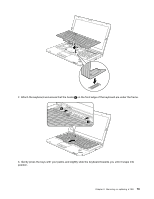
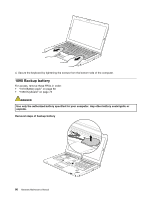
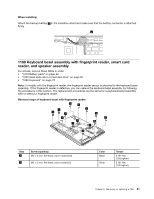
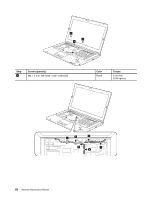
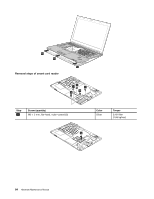
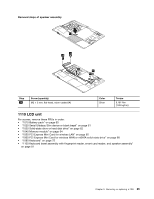
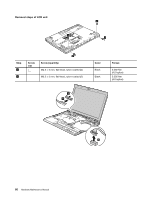
When installing: Attach the backup battery a in the insulation sheet and make sure that the battery connector is attached firmly. a 1100 Keyboard bezel assembly with fingerprint reader, smart card reader, and speaker assembly For access, remove these FRUs in order: • "1010 Battery pack" on page 60 • "1030 Solid-state drive or hard disk drive" on page 62 • "1080 Keyboard" on page 75 Note: In models with the fingerprint reader, the fingerprint reader sensor is attached to the keyboard bezel assembly. If the fingerprint reader is defective, you can replace the keyboard bezel assembly by following the procedures in this section. The replacement procedures are the same for a keyboard bezel assembly with or without a fingerprint reader. Removal steps of keyboard bezel with fingerprint reader 1 1 1 1 1 1 1 1 1 1 1 1 1 2 Step 1 2 Screw (quantity) M2 × 5 mm, flat-head, nylon-coated (13) M2 × 3 mm, flat-head, nylon-coated (1) Color Black Silver Torque 0.181 Nm (1.85 kgfcm) 0.181 Nm (1.85 kgfcm) Chapter 9. Removing or replacing a FRU 81
-
 1
1 -
2
-
3
-
4
-
5
-
6
-
7
-
8
-
9
-
10
-
11
-
12
-
13
-
14
-
15
-
16
-
17
-
18
-
19
-
20
-
21
-
22
-
23
-
24
-
25
-
26
-
27
-
28
-
29
-
30
-
31
-
32
-
33
-
34
-
35
-
36
-
37
-
38
-
39
-
40
-
41
-
42
-
43
-
44
-
45
-
46
-
47
-
48
-
49
-
50
-
51
-
52
-
53
-
54
-
55
-
56
-
57
-
58
-
59
-
60
-
61
-
62
-
63
-
64
-
65
-
66
-
67
-
68
-
69
-
70
-
71
-
72
-
73
-
74
-
75
-
76
-
77
-
78
-
79
-
80
-
81
-
 82
82 -
 83
83 -
 84
84 -
 85
85 -
 86
86 -
 87
87 -
 88
88 -
 89
89 -
 90
90 -
 91
91 -
 92
92 -
93
-
94
-
95
-
96
-
97
-
98
-
99
-
100
-
101
-
102
-
103
-
104
-
105
-
106
-
107
-
108
-
109
-
110
-
111
-
112
-
113
-
114
-
115
-
116
 |
 |