Lenovo ThinkPad W700ds (English) Service and Troubleshooting Guide - Page 83
Performance and Maintenance
 |
View all Lenovo ThinkPad W700ds manuals
Add to My Manuals
Save this manual to your list of manuals |
Page 83 highlights
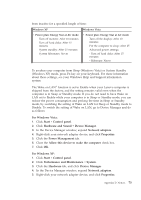
been inactive for a specified length of time: Windows XP v Power plan: Energy Star at AC mode Turn off monitor: After 10 minutes Turn off hard disks: After 15 minutes System standby: After 25 minutes System hibernates: Never Windows Vista v Power plan: Energy Star at AC mode Turn off the display: After 10 minutes Put the computer to sleep: After 25 Advanced power settings: - Turn off hard disks: After 15 minutes - Hibernate: Never To awaken your computer from Sleep (Windows Vista) or System Standby (Windows XP) mode, press Fn key on your keyboard. For more information about these settings, see your Windows Help and Support information system. The Wake on LAN® function is set to Enable when your Lenovo computer is shipped from the factory, and the setting remains valid even when the computer is in Sleep or Standby mode. If you do not need to have Wake on LAN set to Enable while your computer is in Sleep or Standby mode, you can reduce the power consumption and prolong the time in Sleep or Standby mode, by switching the setting of Wake on LAN for Sleep or Standby mode to Disable. To switch the setting of Wake on LAN, go to Device Manager and do as follows: For Windows Vista: 1. Click Start → Control panel. 2. Click Hardware and Sound → Device Manager. 3. In the Device Manager window, expand Network adapters. 4. Right-click your network adapter device, and click Properties. 5. Click the Power Management tab. 6. Clear the Allow this device to wake the computer check box. 7. Click OK. For Windows XP: 1. Click Start → Control panel. 2. Click Performance and Maintenance → System. 3. Click the Hardware tab, and click Device Manager. 4. In the Device Manager window, expand Network adapters. 5. Right-click your network adapter device, and click Properties. Appendix D. Notices 75
-
 1
1 -
2
-
3
-
4
-
5
-
6
-
7
-
8
-
9
-
10
-
11
-
12
-
13
-
14
-
15
-
16
-
17
-
18
-
19
-
20
-
21
-
22
-
23
-
24
-
25
-
26
-
27
-
28
-
29
-
30
-
31
-
32
-
33
-
34
-
35
-
36
-
37
-
38
-
39
-
40
-
41
-
42
-
43
-
44
-
45
-
46
-
47
-
48
-
49
-
50
-
51
-
52
-
53
-
54
-
55
-
56
-
57
-
58
-
59
-
60
-
61
-
62
-
63
-
64
-
65
-
66
-
67
-
68
-
69
-
70
-
71
-
72
-
73
-
74
-
75
-
76
-
77
-
 78
78 -
 79
79 -
 80
80 -
 81
81 -
 82
82 -
 83
83 -
 84
84 -
 85
85 -
 86
86 -
 87
87 -
 88
88 -
89
-
90
 |
 |