Lexmark 2050 Color Jetprinter Service Manual - Page 25
Transport Service Check, Diagnostic Information 2-15
 |
View all Lexmark 2050 Color Jetprinter manuals
Add to My Manuals
Save this manual to your list of manuals |
Page 25 highlights
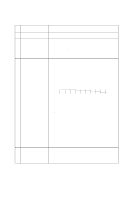
Transport Service Check FRU Action 1 Transport Motor Check the motor for binds, or loose motor pulley. Disconnect the transport motor (J6) from the system board. Check for 8 to 18 ohms between pins 2 and 3 on the motor cable. If the reading is incorrect, replace the motor. Check for motor pins shorted to the motor housing. If you find a pin shorted to the housing, replace the motor. If the failure remains, replace the system board. 2 System Board Turn the printer off and disconnect J6 from the system board. Turn the printer on and check for a pulse of 6 to 8 V dc between J6-2 and ground as the printer goes through POST. 3 Carrier Guide Rod Clean the carrier rod. 4 Transport Belt Idler Pulley Parts Carrier Frame 5 Encoder Strip Lubricate the rod or the carrier rod bearing surface with grease P/N 1329301. Check for worn, loose or broken parts. Check for obstructions blocking carrier movement. Carrier to carrier frame engagement should be lubricated with grease P/N 1329301. Check for wear and dirt. 6 Printhead Cable Be sure connector J4 is fully seated. Check the cable for damage. Encoder Strip Encoder Card System Board 7 Maintenance Station Perform the 'Encoder Sensor Test' on page 3-1. If you cannot enter the test, replace the system board. A problem with the maintenance station can cause carrier movement problems at the right margin. Go to the 'Maintenance Station Service Check' on page 2-7. Diagnostic Information 2-15
-
 1
1 -
2
-
3
-
4
-
5
-
6
-
7
-
8
-
9
-
10
-
11
-
12
-
13
-
14
-
15
-
16
-
17
-
18
-
19
-
 20
20 -
 21
21 -
 22
22 -
 23
23 -
 24
24 -
 25
25 -
 26
26 -
 27
27 -
 28
28 -
 29
29 -
 30
30 -
31
-
32
-
33
-
34
-
35
-
36
-
37
-
38
-
39
-
40
-
41
-
42
-
43
-
44
-
45
-
46
-
47
-
48
-
49
-
50
-
51
-
52
-
53
-
54
-
55
-
56
-
57
-
58
-
59
-
60
-
61
-
62
-
63
-
64
-
65
-
66
-
67
-
68
-
69
-
70
-
71
-
72
-
73
-
74
-
75
-
76
-
77
-
78
-
79
-
80
-
81
-
82
-
83
-
84
 |
 |
