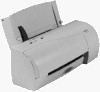
Lexmark 2050 Color Jetprinter Service Manual - Page 39
Exit Drive Belt Removal, Exit Roller Removal, Feed Arm Assembly Removal, Repair Information 4-7
 |
View all Lexmark 2050 Color Jetprinter manuals
Add to My Manuals
Save this manual to your list of manuals |
Page 39 highlights
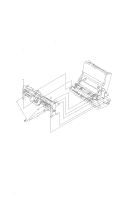
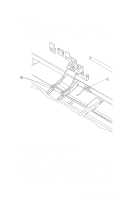
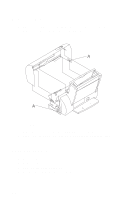
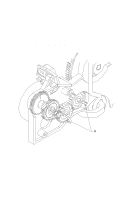
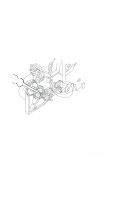
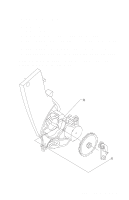
Exit Drive Belt Removal 1. Remove the front cover. 2. Remove the rear cover. 3. Remove the carrier frame assembly. 4. Remove the paper load door and manual insert tray. 5. Remove the small feed roll shaft. 6. Unlatch the left side of the exit roller shaft and work the belt off the exit roller pulley. 7. Pull up the four clips securing the mid frame to the large feed roll and work the mid frame out of both side frames. 8. Spread the right side frame apart far enough to allow removal of the exit drive belt. Exit Roller Removal 1. Remove the front cover. 2. Remove the two screws from the star roller assembly and remove the assembly. 3. Unlatch the left side of the exit roller and remove the exit drive belt from the exit roller pulley. 4. Remove the exit roller. Feed Arm Assembly Removal 1. Remove the front cover. 2. Remove the rear cover. 3. Remove the C-clip from the feed arm and remove the assembly. Repair Information 4-7
-
 1
1 -
2
-
3
-
4
-
5
-
6
-
7
-
8
-
9
-
10
-
11
-
12
-
13
-
14
-
15
-
16
-
17
-
18
-
19
-
20
-
21
-
22
-
23
-
24
-
25
-
26
-
27
-
28
-
29
-
30
-
31
-
32
-
33
-
 34
34 -
 35
35 -
 36
36 -
 37
37 -
 38
38 -
 39
39 -
 40
40 -
 41
41 -
 42
42 -
 43
43 -
 44
44 -
45
-
46
-
47
-
48
-
49
-
50
-
51
-
52
-
53
-
54
-
55
-
56
-
57
-
58
-
59
-
60
-
61
-
62
-
63
-
64
-
65
-
66
-
67
-
68
-
69
-
70
-
71
-
72
-
73
-
74
-
75
-
76
-
77
-
78
-
79
-
80
-
81
-
82
-
83
-
84
 |
 |
