Lexmark 7000 Color Jetprinter Service Manual - Page 37
Adjustments, Removal Procedures, Releasing Plastic Latches
 |
View all Lexmark 7000 Color Jetprinter manuals
Add to My Manuals
Save this manual to your list of manuals |
Page 37 highlights
4092-001 Adjustments The user is directed, in the Printer Control program, to perform the head to head and bidirectional alignment adjustments after replacing a print cartridge. Removal Procedures The following procedures are arranged according to the name of the printer part discussed. Unplug the power cord before removing any parts. Releasing Plastic Latches Many of the parts are held in place with plastic latches. The latches break easily; release them carefully. To remove such parts, press the hook end of the latch away from the part to which it is latched. Repair Information 4-2
-
 1
1 -
2
-
3
-
4
-
5
-
6
-
7
-
8
-
9
-
10
-
11
-
12
-
13
-
14
-
15
-
16
-
17
-
18
-
19
-
20
-
21
-
22
-
23
-
24
-
25
-
26
-
27
-
28
-
29
-
30
-
31
-
 32
32 -
 33
33 -
 34
34 -
 35
35 -
 36
36 -
 37
37 -
 38
38 -
 39
39 -
 40
40 -
 41
41 -
 42
42 -
43
-
44
-
45
-
46
-
47
-
48
-
49
-
50
-
51
-
52
-
53
-
54
-
55
-
56
-
57
-
58
-
59
-
60
-
61
-
62
-
63
-
64
-
65
-
66
-
67
-
68
-
69
-
70
-
71
-
72
-
73
-
74
-
75
-
76
-
77
-
78
-
79
-
80
-
81
 |
 |

Repair Information 4-2
4092-001
Adjustments
The user is directed, in the Printer Control program, to perform the
head to head and bidirectional alignment adjustments after replacing
a print cartridge.
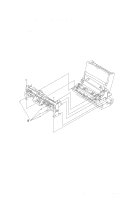
Removal Procedures
The following procedures are arranged according to the name of the
printer part discussed. Unplug the power cord before removing any
parts.
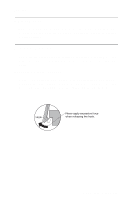
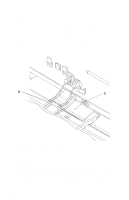
Releasing Plastic Latches
Many of the parts are held in place with plastic latches. The latches
break easily; release them carefully. To remove such parts, press the
hook end of the latch away from the part to which it is latched.