Lexmark Apps Card Copy Premium Administrator's Guide - Page 5
Configuring scanning options, Configuring confirmation options - esf
 |
View all Lexmark Apps manuals
Add to My Manuals
Save this manual to your list of manuals |
Page 5 highlights
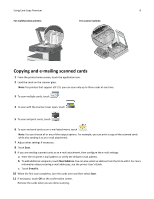
Configuring Card Copy Premium 5 Configuring scanning options 1 Access the application configuration settings from the Embedded Web Server. 2 Change the default scanning options as necessary: • Default tray-Select the default paper tray to be used for printing scanned images. • Default number of copies-Specify the number of copies that should automatically print when the application is used. • Default contrast setting-Specify a setting to increase or decrease the level of contrast when a copy of the scanned card is printed. Select Best for Content if you want the printer to adjust the contrast automatically. • Default scale setting-Set the size of the scanned card when printed. The default is 100% (full size). • Color Output-Select the check box to print the scanned card in color, or clear it to scan in black and white. • Resolution setting-Adjust the quality of the scanned card. Notes: - When scanning a card, make sure the scan resolution is not more than 200 dpi for color, and 400 dpi for black and white. - When scanning multiple cards, make sure the scan resolution is not more than 150 dpi for color, and 300 dpi for black and white. • Multi Card Scan-Select the check box option to enable the application to scan multiple cards at one time by default. Notes: - Your printer must have a hard disk installed to be able to use this feature. - For printers that support eSF 2.0, you can only scan up to three cards at one time. • Print Borders-Select the check box to print the scanned image with a border around it. • Open Lid Scan-Select the check box to scan cards with the scanner cover open and to remove any unnecessary scan data around the cards. 3 Do one of the following: • Click Restore Defaults to restore all fields to factory default settings. • Click Reset to cancel changes to all fields and begin again. • Click Apply to save changes to the profile. Note: Reset and Apply are the only options available on certain devices. Configuring confirmation options 1 Access the application configuration settings from the Embedded Web Server. 2 In the Confirmation Page section, select the Display Confirmation Page check box to see a confirmation page on the printer control panel after copying or scanning the card. 3 Save or discard your changes. Do one of the following: • Click Return to go back to the main configuration page without making any changes. • Click Restore Defaults to return all fields to factory default settings.
-
 1
1 -
 2
2 -
 3
3 -
 4
4 -
 5
5 -
 6
6 -
 7
7 -
 8
8 -
 9
9 -
 10
10 -
 11
11 -
12
-
13
-
14
-
15
-
16
-
17
-
18
 |
 |
