Lexmark Apps Card Copy Premium Administrator's Guide - Page 8
Copying and e, mailing scanned cards - application list
 |
View all Lexmark Apps manuals
Add to My Manuals
Save this manual to your list of manuals |
Page 8 highlights
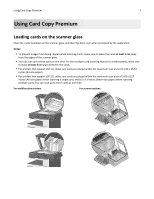
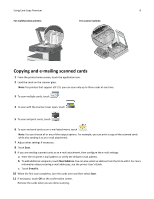
Using Card Copy Premium 8 For multifunction printers: For scanner options: Copying and e‑mailing scanned cards 1 From the printer home screen, touch the application icon. 2 Load the cards on the scanner glass. Note: For printers that support eSF 2.0, you can scan only up to three cards at one time. 3 To scan multiple cards, touch . 4 To scan with the scanner cover open, touch . 5 To scan and print cards, touch . 6 To scan and send cards as an e‑mail attachment, touch . Note: You can choose all or any of the output options. For example, you can print a copy of the scanned cards while also sending it as an e‑mail attachment. 7 Adjust other settings if necessary. 8 Touch Scan. 9 If you are sending scanned cards as an e‑mail attachment, then configure the e‑mail settings: a Enter the recipient e-mail address or verify the default e-mail address. b To add additional recipients, touch Next Address. You can also select an address from the list to edit it. For more information about entering e-mail addresses, see the printer User's Guide. c Touch E‑mail It. 10 When the first scan completes, turn the cards over and then select Scan. 11 If necessary, touch OK on the confirmation screen. Remove the cards when you are done scanning.
-
 1
1 -
2
-
 3
3 -
 4
4 -
 5
5 -
 6
6 -
 7
7 -
 8
8 -
 9
9 -
 10
10 -
 11
11 -
 12
12 -
 13
13 -
14
-
15
-
16
-
17
-
18
 |
 |
