Lexmark C720 User's Guide - Page 19
Accessing held jobs from the operator panel, Recognizing when format errors occur, Job Menu, Ready - specifications
 |
View all Lexmark C720 manuals
Add to My Manuals
Save this manual to your list of manuals |
Page 19 highlights
Accessing held jobs from the operator panel 1 To access held jobs from the operator panel: - If the printer is Busy, press Menu> to display the Job Menu. - If the printer is Ready, continue with step 2. 2 Press Menu> or or and and
-
 1
1 -
2
-
3
-
4
-
5
-
6
-
7
-
8
-
9
-
10
-
11
-
12
-
13
-
 14
14 -
 15
15 -
 16
16 -
 17
17 -
 18
18 -
 19
19 -
 20
20 -
 21
21 -
 22
22 -
 23
23 -
 24
24 -
25
-
26
-
27
-
28
-
29
-
30
-
31
-
32
-
33
-
34
-
35
-
36
-
37
-
38
-
39
-
40
-
41
-
42
-
43
-
44
-
45
-
46
-
47
-
48
-
49
-
50
-
51
-
52
-
53
-
54
-
55
-
56
-
57
-
58
-
59
-
60
-
61
-
62
-
63
-
64
-
65
-
66
-
67
-
68
-
69
-
70
-
71
-
72
-
73
-
74
-
75
-
76
-
77
-
78
-
79
-
80
-
81
-
82
-
83
-
84
-
85
-
86
-
87
-
88
-
89
-
90
-
91
-
92
-
93
-
94
-
95
-
96
-
97
-
98
-
99
-
100
-
101
-
102
-
103
-
104
-
105
-
106
-
107
-
108
-
109
-
110
-
111
-
112
-
113
-
114
-
115
-
116
-
117
-
118
-
119
-
120
-
121
-
122
-
123
-
124
-
125
-
126
-
127
-
128
-
129
-
130
-
131
-
132
-
133
-
134
-
135
-
136
-
137
-
138
-
139
-
140
-
141
-
142
-
143
-
144
-
145
-
146
-
147
-
148
-
149
-
150
-
151
-
152
-
153
-
154
-
155
-
156
-
157
-
158
-
159
-
160
-
161
-
162
-
163
-
164
-
165
-
166
-
167
-
168
-
169
-
170
-
171
-
172
-
173
-
174
-
175
-
176
-
177
-
178
-
179
-
180
-
181
-
182
-
183
-
184
-
185
-
186
-
187
-
188
-
189
-
190
-
191
-
192
-
193
-
194
-
195
-
196
-
197
-
198
-
199
-
200
-
201
-
202
-
203
-
204
-
205
-
206
-
207
-
208
-
209
-
210
-
211
-
212
-
213
-
214
-
215
-
216
-
217
-
218
-
219
-
220
-
221
-
222
-
223
-
224
-
225
-
226
-
227
-
228
-
229
-
230
-
231
-
232
-
233
-
234
-
235
-
236
-
237
-
238
-
239
-
240
-
241
-
242
-
243
-
244
-
245
-
246
-
247
-
248
-
249
-
250
-
251
-
252
-
253
-
254
-
255
-
256
-
257
-
258
-
259
-
260
-
261
-
262
-
263
-
264
-
265
-
266
-
267
-
268
-
269
-
270
-
271
-
272
-
273
-
274
-
275
-
276
-
277
-
278
-
279
-
280
-
281
-
282
-
283
-
284
-
285
-
286
-
287
-
288
-
289
-
290
-
291
-
292
-
293
-
294
-
295
-
296
-
297
-
298
-
299
 |
 |

19
Accessing held jobs from the operator panel
1
To access held jobs from the operator panel:
–
If the printer is
Busy
, press
Menu>
to display the
Job Menu
.
–
If the printer is
Ready
, continue with step 2.
2
Press
Menu>
or
<Menu
until either
HELD JOBS
or
CONFIDENTIAL JOB
shows on the operator
panel, depending on the type of job you want to access.
3
Press
Select
.
Note:
If you are looking for a confidential job, you are prompted to enter your PIN. See
Confidential Jobs
for more information.
4
Press
Menu>
or
<Menu
until the action you want to take appears on the second line of the
operator panel (print a job, delete a job, and so on).
5
Press
Select
.
–
If you are looking for one particular job, press
Menu>
and
<Menu
to scroll through the list of
jobs available, and press
Select
when the correct job is displayed. An asterisk (*) appears
next to the job name indicating you have chosen to print or delete that job.
–
If you are prompted to enter the number of copies you want to print, use the
Menu>
and
<Menu
buttons to increase or decrease the number on the operator panel, and press
Select
.
6
Press
Go
to print or delete specific jobs you have marked.
The printer briefly displays messages indicating what print and hold functions it is performing,
and then returns to the
Ready
state.
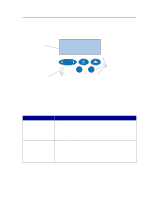
Recognizing when format errors occur
If the
symbol appears on the operator panel, it indicates the printer had trouble formatting one or
more of the held jobs. These formatting problems are most commonly the result of insufficient printer
memory or invalid data that might cause the printer to discard the job.
When a
symbol appears next to a held job, you can:
•
Print the job. Be aware, however, that only part of the job may print.
•
Delete the job. You may want to free up additional printer memory by scrolling through the list
of held jobs and deleting others you have sent to the printer.
If formatting errors are a recurring problem with held jobs, your printer requires more memory (see
Printer memory
).