Lexmark MX510 User's Guide - Page 49
Lexmark MX510 Manual
 |
View all Lexmark MX510 manuals
Add to My Manuals
Save this manual to your list of manuals |
Page 49 highlights
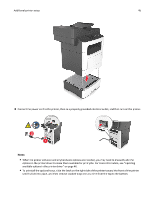
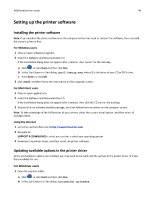
Additional printer setup 49 Networking Notes: • Purchase a MarkNet N8350 wireless network adapter for MX510de, MX511de, and MX511dhe printer models or MarkNet N8352 wireless network adapter for MX410de printer model first before setting up the printer on a wireless network. For more information on installing the wireless network adapter, see the setup sheet that came with the adapter. • A Service Set Identifier (SSID) is a name assigned to a wireless network. Wired Equivalent Privacy (WEP), Wi-Fi Protected Access (WPA), and WPA2 are types of security used on a network. Preparing to set up the printer on an Ethernet network To configure your printer to connect to an Ethernet network, organize the following information before you begin: Note: If your network automatically assigns IP addresses to computers and printers, continue on to installing the printer. A valid, unique IP address for the printer to use on the network The network gateway The network mask A nickname for the printer (optional) Note: A printer nickname can make it easier for you to identify your printer on the network. You can choose to use the default printer nickname, or assign a name that is easier for you to remember. You will need an Ethernet cable to connect the printer to the network and an available port where the printer can physically connect to the network. Use a new network cable when possible to avoid potential problems caused by a damaged cable. Installing the printer on an Ethernet network For Windows users 1 Insert the Software and Documentation CD. If the installation dialog does not appear after a minute, then launch the CD manually: a Click , or click Start and then click Run. b In the Start Search or Run dialog, type D:\setup.exe, where D is the letter of the CD or DVD drive. c Press Enter, or click OK. 2 Click Install, and then follow the instructions on the computer screen. 3 Select Ethernet connection, and then click Continue. 4 Attach the Ethernet cable when instructed to do so. 5 Select the printer from the list, and then click Continue. Note: If the configured printer does not appear in the list, then click Modify Search. 6 Follow the instructions on the computer screen.
-
 1
1 -
2
-
3
-
4
-
5
-
6
-
7
-
8
-
9
-
10
-
11
-
12
-
13
-
14
-
15
-
16
-
17
-
18
-
19
-
20
-
21
-
22
-
23
-
24
-
25
-
26
-
27
-
28
-
29
-
30
-
31
-
32
-
33
-
34
-
35
-
36
-
37
-
38
-
39
-
40
-
41
-
42
-
43
-
 44
44 -
 45
45 -
 46
46 -
 47
47 -
 48
48 -
 49
49 -
 50
50 -
 51
51 -
 52
52 -
 53
53 -
 54
54 -
55
-
56
-
57
-
58
-
59
-
60
-
61
-
62
-
63
-
64
-
65
-
66
-
67
-
68
-
69
-
70
-
71
-
72
-
73
-
74
-
75
-
76
-
77
-
78
-
79
-
80
-
81
-
82
-
83
-
84
-
85
-
86
-
87
-
88
-
89
-
90
-
91
-
92
-
93
-
94
-
95
-
96
-
97
-
98
-
99
-
100
-
101
-
102
-
103
-
104
-
105
-
106
-
107
-
108
-
109
-
110
-
111
-
112
-
113
-
114
-
115
-
116
-
117
-
118
-
119
-
120
-
121
-
122
-
123
-
124
-
125
-
126
-
127
-
128
-
129
-
130
-
131
-
132
-
133
-
134
-
135
-
136
-
137
-
138
-
139
-
140
-
141
-
142
-
143
-
144
-
145
-
146
-
147
-
148
-
149
-
150
-
151
-
152
-
153
-
154
-
155
-
156
-
157
-
158
-
159
-
160
-
161
-
162
-
163
-
164
-
165
-
166
-
167
-
168
-
169
-
170
-
171
-
172
-
173
-
174
-
175
-
176
-
177
-
178
-
179
-
180
-
181
-
182
-
183
-
184
-
185
-
186
-
187
-
188
-
189
-
190
-
191
-
192
-
193
-
194
-
195
-
196
-
197
-
198
-
199
-
200
-
201
-
202
-
203
-
204
-
205
-
206
-
207
-
208
-
209
-
210
-
211
-
212
-
213
-
214
-
215
-
216
-
217
-
218
-
219
-
220
-
221
-
222
-
223
-
224
-
225
-
226
-
227
-
228
-
229
-
230
-
231
-
232
-
233
-
234
-
235
-
236
-
237
-
238
-
239
-
240
-
241
-
242
-
243
-
244
-
245
-
246
-
247
-
248
-
249
-
250
-
251
-
252
-
253
-
254
-
255
-
256
-
257
-
258
-
259
-
260
-
261
-
262
-
263
-
264
-
265
-
266
-
267
-
268
-
269
-
270
-
271
-
272
-
273
-
274
-
275
-
276
-
277
-
278
-
279
-
280
-
281
-
282
-
283
-
284
-
285
-
286
-
287
-
288
-
289
-
290
-
291
-
292
-
293
-
294
-
295
-
296
-
297
-
298
-
299
-
300
-
301
-
302
-
303
-
304
-
305
-
306
-
307
-
308
-
309
-
310
-
311
-
312
-
313
-
314
-
315
-
316
-
317
-
318
-
319
-
320
-
321
-
322
-
323
-
324
-
325
-
326
-
327
-
328
-
329
 |
 |