Lexmark Network Printer Device N8050 User Guide - Page 12
For Advanced Mode, Installing the printer on the network - shared
 |
View all Lexmark Network Printer Device manuals
Add to My Manuals
Save this manual to your list of manuals |
Page 12 highlights
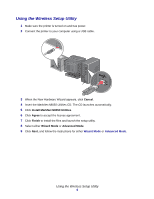
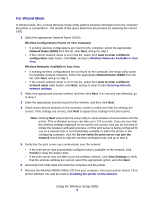
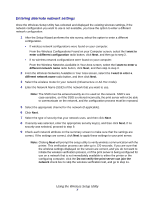
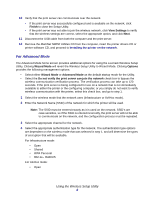
10 Verify that the print server can communicate over the network. • If the print server was successfully configured and is available on the network, click Finish to close the Setup Utility. • If the print server was not able to join the wireless network, click View Settings to verify that the wireless settings are correct, select the appropriate option, and click Next. 11 Disconnect the USB cable from both the computer and the print server. 12 Remove the MarkNet N8050 Utilities CD from the computer, insert the printer drivers CD or printer software CD, and proceed to Installing the printer on the network. For Advanced Mode The Advanced Mode home screen provides additional options for using the Lexmark Wireless Setup Utility. Clicking Wizard Mode will revert the Wireless Setup Utility to Wizard Mode. Clicking Options provides the following management options: • Select either Wizard Mode or Advanced Mode as the default startup mode for the Utility. • Select the Do not verify the print server can join the network check box to bypass the wireless communication verification process. The verification process can take up to 120 seconds. If the print server is being configured for use on a network that is not immediately available to either the printer or the configuring computer, or you simply do not want to verify wireless communication with the printer, select this check box, and go to step 1. 1 Select the wireless mode that the network uses (Infrastructure or Ad-Hoc mode). 2 Enter the Network Name (SSID) of the network for which the printer will be used. Note: The SSID must be entered exactly as it is used on the network. SSID's are case-sensitive, so if the SSID is entered incorrectly, the print server will not be able to communicate on the network, and the configuration process must be repeated. 3 Select the appropriate channel for the network. 4 Select the appropriate authentication type for the network. The authentication type options are dependent on the wireless mode that was selected in step 1, and will determine the types of encryption that will be available. For Infrastructure mode: • Open • Shared • WPA Personal • 802.1x-RADIUS For Ad-Hoc mode: • Open Using the Wireless Setup Utility 8
-
 1
1 -
2
-
3
-
4
-
5
-
6
-
 7
7 -
 8
8 -
 9
9 -
 10
10 -
 11
11 -
 12
12 -
 13
13 -
 14
14 -
 15
15 -
 16
16 -
 17
17 -
18
-
19
-
20
-
21
-
22
-
23
-
24
-
25
-
26
-
27
-
28
-
29
 |
 |