Lexmark X203n User's Guide
Lexmark X203n Manual
 |
View all Lexmark X203n manuals
Add to My Manuals
Save this manual to your list of manuals |
Lexmark X203n manual content summary:
- Lexmark X203n | User's Guide - Page 1
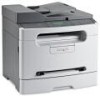
Lexmark X203n and X204n Series User's Guide February 2011 Machine type(s): 7011 Model(s): 200, 215, 300, 315 www.lexmark.com - Lexmark X203n | User's Guide - Page 2
printer setup 20 Attaching cables...20 Installing printer software...20 Verifying printer setup...21 Printing a menu settings page ...21 Printing a network setup page...21 Installing the printer on a wired network 22 Minimizing your printer's environmental impact 24 Saving paper and toner - Lexmark X203n | User's Guide - Page 3
supported by the printer 40 Paper sizes supported by the printer...41 Printing...42 Printing a document...42 Printing on both sides of the paper (duplexing the ADF ...48 Copying using the scanner glass ...49 Copying on both sides of the paper (duplexing 49 Copying photos...50 Copying on specialty - Lexmark X203n | User's Guide - Page 4
...58 Sending an e-mail using a shortcut number ...59 Sending an e-mail using the address book ...60 Canceling an e-mail...60 Faxing...61 Getting the printer ready to fax...61 Initial fax setup ...61 Choosing a fax connection...62 Connecting to an analog telephone line ...63 Connecting to a DSL - Lexmark X203n | User's Guide - Page 5
Scan Center software...84 Understanding the Scan Center features...84 Understanding printer menus 85 Menus list...85 Paper menu...85 Default Source menu ...85 Size/Type menu ...86 Paper Texture menu ...88 Paper Weight menu ...89 Custom Types menu ...89 Custom Scan Sizes menu ...90 Universal Setup - Lexmark X203n | User's Guide - Page 6
Ordering toner cartridges ...118 Ordering a photoconductor kit ...118 Replacing supplies...119 Replacing the toner cartridge ...119 Replacing the photoconductor kit ...121 Moving the printer to another location 124 Shipping the printer...125 Administrative support 126 Finding advanced networking - Lexmark X203n | User's Guide - Page 7
printed 131 54 Standard network software error ...131 54 Network software error ...131 56 Standard USB port disabled ...131 84 PC Kit life warning ...131 84 Replace PC Kit ...131 88.yy Cartridge is low...131 200-250 paper jam...132 290-294 paper jams ...132 840.01 Scanner Disabled ...134 840.02 - Lexmark X203n | User's Guide - Page 8
shading appears on the page 160 Toner rubs off ...161 Toner specks ...161 Transparency print quality is poor...162 Embedded Web Server does not open 162 Check the network connections ...162 Check the network settings ...162 Contacting Customer Support...162 Notices...163 Product information...163 - Lexmark X203n | User's Guide - Page 9
instructions and local regulations. CAUTION-POTENTIAL INJURY: Follow these guidelines to avoid personal injury or printer damage: • Turn the printer This product is designed, tested, and approved to meet strict global safety standards with the use of specific manufacturer's components. The safety - Lexmark X203n | User's Guide - Page 10
maintaining the printer • Troubleshooting and solving problems Help using the printer software Find it here Setup documentation-The setup documentation came with the printer and is also available on the Lexmark Web site at www.lexmark.com/publications/. User's Guide-The User's Guide is available - Lexmark X203n | User's Guide - Page 11
support: • Documentation • Driver downloads • Live chat support • E-mail support • Telephone support Warranty information Find it here Lexmark Support Web site-support.lexmark • Keep the printer: - Away from the direct airflow of air conditioners, heaters, or ventilators - Free from direct sunlight, - Lexmark X203n | User's Guide - Page 12
(12 in.) 3 Front 41 cm (16 in.) 4 Rear 15 cm (6 in.) 5 Top 31 cm (12 in.) 1@!. 4 GHI 2 ABC 5 JKL 3 DEF 7 PQRS 8 TUV 6 MNO * 9 WXYZ 0 # 3 2 4 Printer configurations Basic model The following illustration shows the printer front with its basic features or parts: Learning about the - Lexmark X203n | User's Guide - Page 13
7 6 1@!. 4 GHI 2 ABC 5 JKL 3 DEF 7 PQRS 8 TUV 6 MNO * 9 WXYZ 0 # 1 2 5 1 Printer control panel 2 Standard exit bin 3 Paper stop 4 Manual feeder 5 Paper tray (250 sheets) 6 Front door 7 Front door release button Configured model The following illustration shows the fully configured - Lexmark X203n | User's Guide - Page 14
button 4 5 6 Basic functions of the scanner The scanner provides copy, fax, and scan-to-network capability. Note: Fax is supported on selected models only. You can: • Make quick copies, or change the settings on the printer control panel to perform specific copy jobs. • Send a fax using the - Lexmark X203n | User's Guide - Page 15
or book pages. When using the scanner glass: • Place a document facedown on the scanner glass in the upper left corner. • Scan or copy documents from 114.3 x 139.7 mm (4.5 x 5.5 in.) to 215.9 x 297.2 mm (8.5 x 11.7 in.). • Copy books up to 25.4-mm (1.0 in.) thick. Learning about the printer 15 - Lexmark X203n | User's Guide - Page 16
as status and error messages. Access the administration menus; start, stop, or cancel a print job. 3 Keypad area Enter numbers, letters, or symbols on the display. Access the Address Book or change the default fax settings on printer models that support fax. 1 Copy 2 Scan/Email 3 Fax Options - Lexmark X203n | User's Guide - Page 17
printing options as well as status and error messages 3 Stop/Cancel • Stops printing • Exits a menu and returns to Ready 4 Start Starts a copy, scan, or fax job 5 Right arrow Scrolls right 6 Select Accepts menu selections and settings 7 Left arrow Scrolls left Learning about the printer 17 - Lexmark X203n | User's Guide - Page 18
up a telephone receiver) when faxing. Press a second time to hang up the line. Note: Fax mode is not available on selected printer models. 2 Keypad Enter numbers, letters, or symbols on the display. 1@!. 2 ABC 3 DEF 4 5 JKL 6 MNO 7PQRS 8 TUV 9WXYZ *0 # 3 Shortcuts Enters the shortcut - Lexmark X203n | User's Guide - Page 19
programmed shortcuts (1-99) for fax and e-mail. Note: Fax mode is not available on selected printer models. 5 Redial/Pause • Press the Redial/Pause button to cause a two- or three-second button causes an error beep. Note: Fax mode is not available on selected printer models. Learning about the - Lexmark X203n | User's Guide - Page 20
printer software A printer driver is software that lets the computer communicate with the printer. The printer software is typically installed during the initial printer setup. If you need to install the software after setup, follow these instructions: For Windows users 1 Close all open software - Lexmark X203n | User's Guide - Page 21
.lexmark.com. 2 From the Drivers & Downloads menu, click Driver Finder. 3 Select your printer, and then select your operating system. 4 Download the driver and install the printer software. Verifying printer setup If your printer is a network model and is attached to a network, print a network setup - Lexmark X203n | User's Guide - Page 22
network. These instructions apply to Ethernet connections. Before you install the printer on a wired network, make sure that: • You have completed the initial setup of the printer. • The printer is connected to your network with the appropriate type of cable. For Windows users 1 Insert the Software - Lexmark X203n | User's Guide - Page 23
Printer Setup Utility or Print Center. 4 From the Printer List, click Add. 5 Select the printer from the list. 6 Click Add. Note: If the printer does not show up in the list, you may need to add it using the IP address. Contact your system support person for assistance. Additional printer setup - Lexmark X203n | User's Guide - Page 24
Eco-Mode". Using recycled paper As an environmentally conscious company, Lexmark supports the use of recycled office paper produced specifically for use in laser printers. For more information on recycled papers that work well with your printer, see "Using recycled paper and other office papers" on - Lexmark X203n | User's Guide - Page 25
when a scan job is started. Paper Turn off print log features. Energy/Paper Use all the settings associated with Energy mode and Paper mode. Off Use factory default settings for all settings associated with Eco-Mode. This setting supports the performance specifications for your printer. To - Lexmark X203n | User's Guide - Page 26
and then select your country from the list. 3 Follow the instructions on the computer screen. Recycling Lexmark packaging Lexmark continually strives to minimize packaging. Less packaging helps to ensure that Lexmark printers are transported in the most efficient and environmentally sensitive manner - Lexmark X203n | User's Guide - Page 27
. You can also: 1 Visit our Web site at www.lexmark.com/recycle. 2 From the Toner Cartridges section, select your country from the list. 3 Follow the instructions on the computer screen. Reducing printer noise Use Quiet Mode to reduce the printer noise. Note: See the table for the multiple settings - Lexmark X203n | User's Guide - Page 28
4 Press the arrow buttons until Quiet Mode appears, and then press . 5 Select the setting you want, and then press . Submitting changes appears. Minimizing your printer's environmental impact 28 - Lexmark X203n | User's Guide - Page 29
settings The Universal Paper Size is a user-defined setting that lets you print on paper sizes that are not preset in the printer menus. Set the Paper Size for the Manual Feeder to Universal when the size you want is not available from the Paper Size menu. Then, specify all of the - Lexmark X203n | User's Guide - Page 30
by the Universal Setup menu. Specify the paper height and width Defining a specific height and width measurement for the Universal paper size (in the portrait orientation) allows the printer to support the size, including support for standard features such as duplex printing and printing multiple - Lexmark X203n | User's Guide - Page 31
. 1 Pull the paper tray completely out. 1@!. 4 GHI 2 ABC 5 JKL 3 DEF 7 PQRS 8 TUV 6 MNO * 9 WXYZ 0 # 2 Squeeze the width guide tabs on the right guide as shown, and slide the width guides to the sides of the tray. The width guides move in unison. 1 2 Loading paper and specialty media 31 - Lexmark X203n | User's Guide - Page 32
the paper size. Use the size indicators on the bottom of the tray to help position the guide. If you are loading a longer size of paper, then squeeze the length guide tab and slide the length guide backward to the correct position for the paper size. The tray extends backward as shown. Loading - Lexmark X203n | User's Guide - Page 33
toward the back of the tray as shown with the recommended print side facedown. Note: The maximum fill line on the side of the width guide indicates the maximum height for loading paper. Do not overload the tray. Load letterhead with the print side facedown and the top edge of the - Lexmark X203n | User's Guide - Page 34
one sheet of paper at a time. You can use the manual feeder to quickly print on paper types or sizes that are not currently loaded in the tray. 1 Insert the paper faceup into the center of the manual feeder. 2 Adjust the paper guides to the paper width. Loading paper and specialty media 34 - Lexmark X203n | User's Guide - Page 35
3 Push the paper further into the manual feeder until the printer pulls it in. Warning-Potential Damage: Do not force the paper into the feeder. Forcing the paper causes jams. 1@!. 4 GHI 2 ABC 5 JKL 3 DEF 7 PQRS 8 TUV 6 - Lexmark X203n | User's Guide - Page 36
Paper type Paper1 Labels2 Transparencies Paper tray 250 sheets 50 sheets 50 Manual feeder 1 sheet 1 sheet 1 Envelopes X 1 1 Based on 75 g/m2 (20 lb) paper 2 Single-sided paper labels designed for laser printers are supported for occasional use: no more than 20 pages of labels a month. Vinyl - Lexmark X203n | User's Guide - Page 37
g/m2 (24 lb bond) grain long paper. The manual feeder can automatically feed paper weights up to 163 g/m2 problems. Smoothness Paper smoothness directly affects print quality. If paper is too rough, toner both print quality and the ability of the printer to feed the paper correctly. Leave paper - Lexmark X203n | User's Guide - Page 38
problems printer fuser • Preprinted papers that require a registration (the precise print location on the page) greater than ±2.3 mm (±0.9 in.), such as optical character recognition (OCR) forms In some cases, registration can be adjusted with a software ensure trouble-free specifically in toner. - Lexmark X203n | User's Guide - Page 39
Lexmark supports the use of recycled office paper produced specifically for use in laser (electrophotographic) printers. In 1998, Lexmark that paper meeting these guidelines may still cause paper feeding problems in any laser printer (for example, if the paper curls excessively under normal printing - Lexmark X203n | User's Guide - Page 40
size. For information on card stock and labels, see the Card Stock & Label Guide. Paper types and weights supported by the printer The printer engine and manual feeder support 60-90 g/m2 (16-24 lb) paper weights. The ADF supports 60-105 g/m2 (16-28 lb paper). Short grain paper less than 64 g/m2 - Lexmark X203n | User's Guide - Page 41
supported by the printer Note: Paper that weighs at least 75 g/m2 (20 lb) is recommended for sizes less than or equal to 182 mm (7.17 in.) wide. Paper size1 A4 Dimensions Paper tray (250 sheets) Manual 2 Grain long only. 3 Supports only sizes for which the paper guide tabs can be adjusted to - Lexmark X203n | User's Guide - Page 42
printer control panel Paper menu, set the Paper Type and Paper Size to match the loaded paper. 2 Send the print job: For Windows users a With a document open, click File Print. b Click Properties, Preferences, Options, or Setup, and then adjust the settings as needed. Note: To print on a specific - Lexmark X203n | User's Guide - Page 43
large quantities. When printing on transparencies: • Feed transparencies from the standard 250-sheet tray or the manual feeder. • Use transparencies designed specifically for laser printers. Check with the manufacturer or vendor to ensure transparencies are able to withstand temperatures up to 190 - Lexmark X203n | User's Guide - Page 44
manual feeder. • Use envelopes designed specifically for laser printers in any way - Have windows, holes, perforations, cutouts, supported. For detailed information on label printing, characteristics, and design, see the Card Stock & Label Guide available on the Lexmark Web site at www.lexmark - Lexmark X203n | User's Guide - Page 45
manual feeder. Do not use labels in the ADF. • Use labels designed specifically for laser printers printer and the cartridge with adhesive, and could void the printer and cartridge driver edge, and use a non-oozing adhesive. • Portrait orientation works best, especially when printing bar codes problems - Lexmark X203n | User's Guide - Page 46
See "Printing a menu settings page" on page 21 and "Printing a network setup page" on page 21 for more information on printing these pages. Printing a font sample list To print samples of the fonts currently available for your printer: 1 Make sure the printer is on and Ready appears. 2 From the - Lexmark X203n | User's Guide - Page 47
icon. In Mac OS X version 10.4 and earlier: 1 From the Go menu, choose Applications. 2 Double-click Utilities, and then double-click Print Center or Printer Setup Utility. 3 Double-click the printer icon. 4 From the printer window, select the job to cancel. 5 From the icon bar at the top of the - Lexmark X203n | User's Guide - Page 48
, small items, transparencies, photo paper, or thin media (such as magazine clippings) into the ADF. Place these items on the scanner glass. 2 Adjust the paper guides. 3 From the printer control panel, press Copy, or use the keypad to enter the number of copies. 4 Change the copy settings as needed - Lexmark X203n | User's Guide - Page 49
. 6 Press to return to Ready. Copying on both sides of the paper (duplexing) 1 Load a document facedown on the scanner glass. A B C 1@!. 4 GHI 7 PQRS 2 ABC 5 JKL 3 DEF 8 TUV 6 MNO * 9 WXYZ 0 # 2 From the printer control panel, press the Copy button. 3 Press to copy the first side of - Lexmark X203n | User's Guide - Page 50
. 7 Use the printer control panel buttons to change other copy settings as needed. 8 Press repeatedly until Ready appears. 9 Press the Copy button. 10 Use the keypad to select the number of copies you want. 11 Press . 12 If you want to scan another photo, place it on the scanner glass, and then - Lexmark X203n | User's Guide - Page 51
paper, or thin media (such as magazine clippings) into the ADF. Place these items on the scanner glass. 2 If you are loading a document into the ADF, then adjust the paper guides. 3 From the printer control panel, press the Copy button. 4 From the Copy area, press the Options button. 5 Press the - Lexmark X203n | User's Guide - Page 52
, or thin media (such as magazine clippings) into the ADF. Place these items on the scanner glass. 2 If you are loading a document into the ADF, then adjust the paper guides. 3 From the printer control panel, press the Copy button. 4 Press the Options button. Original Size appears. 5 Press . 6 Press - Lexmark X203n | User's Guide - Page 53
paper, or thin media (such as magazine clippings) into the ADF. Place these items on the scanner glass. 2 If you are loading a document into the ADF, then adjust the paper guides. 3 From the printer control panel, press the Copy button. 4 Press the Options button. 5 Press the arrow buttons until - Lexmark X203n | User's Guide - Page 54
paper, or thin media (such as magazine clippings) into the ADF. Place these items on the scanner glass. 2 If you are loading a document into the ADF, then adjust the paper guides. 3 From the printer control panel, press the Copy button. 4 Press the Options button. 5 Press the arrow buttons until - Lexmark X203n | User's Guide - Page 55
paper, or thin media (such as magazine clippings) into the ADF. Place these items on the scanner glass. 2 If you are loading a document into the ADF, then adjust the paper guides. 3 From the printer control panel, press the Copy button. 4 Press the Options button. 5 Press the arrow buttons until - Lexmark X203n | User's Guide - Page 56
scanner glass, or while the document is printing. 1 From the printer control panel, press . Stopping appears, followed by Cancel Job. 2 Press to cancel the job. Canceling appears. The printer clears all pages in the ADF or printer articles, business graphics, and brochures. When should I use - Lexmark X203n | User's Guide - Page 57
IP address or gateway address. To set up the e-mail function: 1 Type the printer IP address into the address field of your Web browser. Note: If you do not know the IP address of the printer, then print a network setup page and locate the address in the TCP/IP section. 2 Click Settings. 3 Click - Lexmark X203n | User's Guide - Page 58
such as magazine clippings) into the ADF. Place these items on the scanner glass. 2 If you are loading a document into the ADF, then adjust the paper guides. 3 From the printer control panel, press the Scan/Email button. Scan to E-mail appears. 4 Press . Search appears. Note: If there are no entries - Lexmark X203n | User's Guide - Page 59
Start To Begin appears. d Press . Manually entering an e-mail address After selecting Manual on the printer control panel, To appears on the scanner glass. 2 If you are loading a document into the ADF, then adjust the paper guides. 3 From the printer control panel, press the Scan/Email button. Scan - Lexmark X203n | User's Guide - Page 60
such as magazine clippings) into the ADF. Place these items on the scanner glass. 2 If you are loading a document into the ADF, then adjust the paper guides. 3 From the printer control panel, press the Scan/Email button. Scan to E-mail appears. 4 Press . Search appears. Note: If there are no entries - Lexmark X203n | User's Guide - Page 61
scanner glass for single pages, small items (such as postcards or photos), transparencies, photo paper, or thin media (such as magazine clippings). Getting the printer other entity, or individual). To enter your fax setup information, use the printer control panel, or use your browser to access the - Lexmark X203n | User's Guide - Page 62
of your Web browser. Note: If you do not know the IP address of the printer, then print a network setup page and locate the address in the TCP/IP section. 2 Click Settings. 3 Click Fax Settings. 4 Click Analog Fax Setup. 5 Click inside the Station Name box, and then enter the name to be printed on - Lexmark X203n | User's Guide - Page 63
service Connect to a Private Branch eXchange (PBX) or Integrated Services Digital Network (ISDN) system Use a Distinctive Ring service " on page 64. See "Connecting to a distinctive ring service" on page 64. See "Connecting the printer and a telephone or answering machine to the same telephone line - Lexmark X203n | User's Guide - Page 64
faxes, you must disable the other ring patterns. If you subscribe to a distinctive ring service, follow these steps to connect the equipment: 1 Connect one end of the telephone cable that came with the printer to the printer LINE port . 2 Connect the other end of the telephone cable to an active - Lexmark X203n | User's Guide - Page 65
the arrow buttons until Off appears, and then press . Note: If you disable all the distinctive ring patterns, then the printer will not receive faxes. Connecting the printer and a telephone or answering machine to the same telephone line 1 Connect one end of the telephone cable that came with the - Lexmark X203n | User's Guide - Page 66
Use one of the following methods: Answering machine Answering machine and telephone Telephone or a telephone with an integrated answering machine Faxing 66 - Lexmark X203n | User's Guide - Page 67
an answering machine, telephone, or other telecommunications equipment to the printer. 1 Connect one end of the telephone cable that came with the printer to the printer LINE port . Note: There is a special RJ-11 plug installed in the printer EXT port . Do not remove this plug. It is necessary - Lexmark X203n | User's Guide - Page 68
Use one of the following methods: Answering machine Telephone Faxing 68 - Lexmark X203n | User's Guide - Page 69
necessary for the proper operation of the fax function and connected telephones. 1 Connect one end of the telephone cable that came with the printer to the printer LINE port . 2 Connect the other end of the telephone cable to the adapter. Note: Your telephone adapter may look different than the one - Lexmark X203n | User's Guide - Page 70
3 Connect the adapter into the N slot of an active analog telephone wall jack. 4 If you would like to use the same line for both fax and telephone communication, then connect a second telephone line (not provided) between the telephone and the F slot of an active analog telephone wall jack. 5 If you - Lexmark X203n | User's Guide - Page 71
to a computer with a modem to send faxes from the software program. Note: Setup steps may vary depending on your country or region. 1 Connect one end of the telephone cable that came with the printer to the printer LINE port . 2 Connect the other end of the telephone cable to an active analog - Lexmark X203n | User's Guide - Page 72
can reset the date and time. Then the correct date and time will be printed on every fax job. To set the date and time: 1 Type the printer IP address into the address field of your Web browser. Note: If you do not know the IP address of the printer, then print a network setup page - Lexmark X203n | User's Guide - Page 73
Place these items on the scanner glass. 2 If you are loading a document into the ADF, then adjust the paper guides. 3 From the printer control panel, press the Fax from software programs. For Windows users 1 With a file open, click File Print. 2 Click Properties, Preferences, Options, or Setup. 3 - Lexmark X203n | User's Guide - Page 74
specific instructions using other Macintosh OS versions, see your Mac OS Help. 1 With a document open, choose File > Print. 2 From the Printer pop-up menu, choose your printer on the scanner glass. 2 If you are loading a document into the ADF, then adjust the paper guides. 3 From the printer control - Lexmark X203n | User's Guide - Page 75
not know the IP address of the printer, then print a network setup page and locate the IP address in the TCP/IP section. 2 Click Settings. 3 Click Manage Shortcuts. Note: A password may be required. If you do not have an ID and password, get one from your system support person. 4 Click Fax Shortcut - Lexmark X203n | User's Guide - Page 76
, photo paper, or thin media (such as magazine clippings) into the ADF. Place these items on the scanner glass. 2 If you are loading a document into the ADF, then adjust the paper guides. 3 From the printer control panel, press the Fax button. To: appears on the first line, and the time and date - Lexmark X203n | User's Guide - Page 77
items on the scanner glass. 2 If you are loading a document into the ADF, then adjust the paper guides. 3 From the printer control panel, press the printer IP address into the address field of your Web browser. Note: If you do not know the IP address of the printer, then print a network setup page - Lexmark X203n | User's Guide - Page 78
phone numbers or fax station names of specific fax callers you want to block. 7 Click Submit. Viewing a fax log 1 Type the printer IP address into the address field of your Web browser. Note: If you do not know the IP address of the printer, then print a network setup page and locate the IP address - Lexmark X203n | User's Guide - Page 79
option lets you print and forward received faxes to a fax number. 1 Type the printer IP address into the address field of your Web browser. Note: If you do not know the IP address of the printer, then print a network setup page and locate the address in the TCP/IP section. 2 Click Settings. 3 Click - Lexmark X203n | User's Guide - Page 80
7 Click inside the Forward to Shortcut box, and then enter the shortcut number where you want the fax forwarded. Note: The shortcut number must be a valid shortcut number for the setting that was selected in the "Forward to" box. 8 Click Submit. Faxing 80 - Lexmark X203n | User's Guide - Page 81
). The scanner lets you scan documents directly to a computer. The computer does not have to be directly connected to the printer for you to receive Scan to PC images. You can scan the document back to the computer over the network by creating a scan profile on the computer and then downloading the - Lexmark X203n | User's Guide - Page 82
editing) • Presentation/Article • Drawing/Sketch • Last Used Scan Options Default Content Tell the printer the original document type. Choose from Text, Mixed, or and brochures. Photo-Tells the scanner to pay extra attention to graphics and pictures. This setting increases the time it takes to scan, - Lexmark X203n | User's Guide - Page 83
document is simplex (printed on one side) or duplex (printed on both sides). This lets the scanner know what needs to be scanned for inclusion in the document. Note: Duplex may not be available on all printer models. Orientation Tell the printer whether the original document is in portrait or - Lexmark X203n | User's Guide - Page 84
, business graphics, and brochures. When should I use Photo mode? Use Photograph mode when the original document is a high-quality print or photograph. Using the Scan Center software Understanding the Scan Center features The Scan Center software lets you modify scan settings and select where - Lexmark X203n | User's Guide - Page 85
on the printer setup, this menu item appears as Standard Network or Network . Paper menu Default Source menu Menu item Default Source Tray 1 Manual Paper Manual Env Description Sets a default paper source for all print jobs Notes: • Tray 1 (standard tray) is the factory default setting - Lexmark X203n | User's Guide - Page 86
: Letter is the US factory default setting. A4 is the international factory default setting. Lets you specify the size of the envelope being manually loaded Note: 10 Envelope is the US factory default setting. DL Envelope is the international factory default setting. Understanding printer menus 86 - Lexmark X203n | User's Guide - Page 87
-defined name will appear instead of Custom Type . Lets you specify the type of paper being manually loaded Note: Plain Paper is the factory default setting. Lets you specify the type of envelope being manually loaded Note: Envelope is the factory default setting. Understanding printer menus 87 - Lexmark X203n | User's Guide - Page 88
for a specific type of factory default setting for most items. • Rough is the factory default setting for Bond. • When Rough Texture is the setting selected for Select Type, Rough is the only Select Texture setting available. • Settings appear only if the paper is supported. Understanding printer - Lexmark X203n | User's Guide - Page 89
select the weight for a specific type of paper. Menu item type of media. Notes: • Normal is the factory default setting for most items. • When Light only if the paper is supported. Custom Types menu Menu item the factory default setting for the Custom Type. • The custom media type must be supported - Lexmark X203n | User's Guide - Page 90
• 14 inches is the US factory default setting for Height for Size 2. 356 millimeters is the international factory default setting for Height for Size 2. • Landscape is the factory default setting for Orientation. • On is the factory default setting for 2 scans/side. Understanding printer menus 90 - Lexmark X203n | User's Guide - Page 91
setting for Height for Size 2. 356 millimeters is the international factory default setting for Height for Size 2. • Landscape is the factory default setting for Orientation. • Off is the factory default setting for 2 scans/side. Universal Setup menu These menu items are used to specify the height - Lexmark X203n | User's Guide - Page 92
if the longest edge is shorter than the maximum length supported in the tray. Reports menu Reports menu Note: When you select a menu item from the Reports menu, the indicated report prints. Menu item Menu Settings Page Device Statistics Network Setup Page Shortcut List Fax Job Log Fax Call Log - Lexmark X203n | User's Guide - Page 93
that can be scanned into an asset database. Description Sets the language of the text appearing on the display Note: All languages may not be available for all printers. Minimizes the use of energy, paper, or specialty media Notes: • Off is the factory default setting. Off resets the printer to its - Lexmark X203n | User's Guide - Page 94
Cartridge Alarm Timeouts Power Saver Disabled 1-240 Timeouts Screen Timeout 15-300 Description Reduces the amount of noise produced by the printer Notes: • Off is the factory default setting. • On configures the printer to produce as little noise as possible. Instructs the printer to run the setup - Lexmark X203n | User's Guide - Page 95
default setting. Do Not Restore keeps the user-defined settings. • Restore returns all printer settings to the factory default settings except Network/Ports menu settings. All downloads stored in RAM are deleted. Description Specifies the type of content contained in the copy job Notes: • Text - Lexmark X203n | User's Guide - Page 96
ID Card Custom Scan Size 4 x 6 in. 3 x 5 in. Business Card A4 A5 Oficio (Mexico) JIS B5 Paper Source Tray Manual Feeder Darkness -4 the original document Notes: • Letter is the US factory default setting. A4 is the international factory default setting. • A setting with an * indicates - Lexmark X203n | User's Guide - Page 97
the sharpness of a copy Note: 3 is the factory default setting. Description Specifies the fax station name of the printer Specifies a fax number associated with the printer Specifies how the printer is identified Sets the printer to fax manually only, which requires a line splitter and a telephone - Lexmark X203n | User's Guide - Page 98
. Enables switchboard blind dialing without a dial tone Note: No is the factory default setting. Enables Error Correction Mode for fax jobs Note: Yes is the factory default setting. Lets you send faxes by scanning at the printer Note: On is the factory default setting. Understanding printer menus 98 - Lexmark X203n | User's Guide - Page 99
Shadow Detail -4 to +4 Scan edge to edge On Off Sharpness 1-5 Fax Receive Settings Menu item Enable Fax Receive On Off Rings to Answer 1-25 Auto Answer Yes No Manual Answer Code 1-9 Description Allows driver to fax jobs to be sent by the printer Note: Yes is the factory default setting. Specifies - Lexmark X203n | User's Guide - Page 100
setting. Description Enables printing of a transmission log after each fax job Note: Print log is the factory default setting. Enables printing of a receive error log following a receive error Note: Print Never is the factory default setting. Enables automatic printing of fax logs Note: On is the - Lexmark X203n | User's Guide - Page 101
Setup menu Menu item Printer Language PS Emulation PCL Emulation Description Notes: • Always Off turns the speaker off. • "On until Connected" is the factory The factory default printer language is PCL Emulation. • Setting a printer language as the default does not prevent a software program - Lexmark X203n | User's Guide - Page 102
Vertical Vertical Description Sets the logical and physical printable area Notes: • Normal is the factory default setting. When attempting to print data in the non-printable area defined by the Normal setting, the printer clips the image at the boundary. • The Whole Page setting allows the image to - Lexmark X203n | User's Guide - Page 103
conserve toner. Enables a print mode preferable for files such as architectural drawings, maps, electrical circuit diagrams, and flow charts Notes: • Off is the factory default setting. • To set Enhance Fine Lines using the Embedded Web Server, type the network printer IP address in a browser window - Lexmark X203n | User's Guide - Page 104
edge of the page. Specifies the number of lines that print on each page Notes: • 60 is the US factory default setting. 64 is the international factory default setting. • The printer sets the amount of space between each line based on the Lines per Page, Paper Size, and Orientation settings. Select - Lexmark X203n | User's Guide - Page 105
) control command Note: Off is the factory default setting. Specifies whether the printer automatically performs a line feed (LF) after a carriage return (CR) control command Note: Off is the factory default setting. Network/Ports menu Standard Network or Network menus Note: Only active ports - Lexmark X203n | User's Guide - Page 106
Auto Std Network Setup Reports Network Card TCP/IP IPv6 Net Setup Reports Network Card TCP/IP IPv6 Description Sets the printer to perform the special processing required for bidirectional communication following the conventions defined by the NPA protocol Notes: • Auto is the factory default - Lexmark X203n | User's Guide - Page 107
only for network models or printers attached to print servers. This menu is available from the Network/Ports menu: Network/Ports Standard Network or Network Std Network Setup or Net Setup TCP/IP Menu item Activate On Off Description Activates TCP/IP Note: On is the factory default - Lexmark X203n | User's Guide - Page 108
that support BOOTP Network/Ports menu: Network/Ports Standard Network or Network Std Network Setup or Net Setup IPv6 Menu item Enable IPv6 On Off Auto Configuration On Off View Hostname View Address View Router Address Description Enables IPv6 in the printer Note: On is the factory - Lexmark X203n | User's Guide - Page 109
Notes: • On is the factory default setting. • When the Off setting is used, the printer does not examine incoming data. • When the Off setting is used, the printer uses PCL emulation if the PCL SmartSwitch setting is On. It uses the default printer language specified in the Setup menu if the PCL - Lexmark X203n | User's Guide - Page 110
network address, netmask, or gateway information for an external print server that is attached to the printer using a USB cable Note: This menu item is available only if the printer Instructs the printer to run the setup wizard Notes: • Yes is the factory default setting. • After completing the setup - Lexmark X203n | User's Guide - Page 111
. Specifies the time zone for the fax Note: * indicates that this value does not have pre-programmed Daylight Savings Time Start and End times. Understanding printer menus 111 - Lexmark X203n | User's Guide - Page 112
Australia EST Queensland (EST) * Tasmania (EST) Wellington (NZST) Not Listed Observe DST On Off Accommodates Daylight Savings Time changes Note: On is the factory default setting. Enable NTP On Off Lets the printer clock synchronize with the Network Time Protocol (NTP) server Note: On is the - Lexmark X203n | User's Guide - Page 113
, unplug the power cord from the wall outlet and disconnect all cables to the printer before proceeding. 2 Remove all paper from the printer. 3 Dampen a clean, lint-free cloth with water. Warning-Potential Damage: Do not use household cleaners or detergents, as they may damage the finish of the - Lexmark X203n | User's Guide - Page 114
glass If you encounter print quality problems, such as streaks on copied or scanned images, clean the areas shown. 1 Slightly dampen a soft, lint-free cloth or paper towel with water. 2 Open the scanner cover. 1 3 1@!. 4 GHI 7 PQRS 2 ABC 5 JKL 3 DEF 8 TUV 6 MNO * 9 WXYZ 0 # 2 1 White - Lexmark X203n | User's Guide - Page 115
Cleaning the ADF separator rollers After you have copied over 5,000 pages using the ADF, or if streaks are appearing, clean the ADF separator rollers. 1 Open the ADF cover. 2 Unlock the separator roll. 3 Remove the separator roll. Maintaining the printer 115 - Lexmark X203n | User's Guide - Page 116
4 Use a clean, lint-free cloth dampened with water to wipe the separator roller. 5 Reinstall the separator roll. 6 Lock the separator roll. Maintaining the printer 116 - Lexmark X203n | User's Guide - Page 117
free cloth dampened with water to wipe the other separator roller while gently rotating it. 8 Close the ADF cover. Storing supplies Choose a cool, clean storage area for the printer a network computer Note: The computer must be connected to the same network as the printer. Maintaining the printer 117 - Lexmark X203n | User's Guide - Page 118
cartridge Toner cartridge X340A21G Lexmark Return Program Cartridge X203A11G Ordering a photoconductor kit When 84 PC Kit Life Warning appears on the display, the photoconductor kit is near its end of life. Order a photoconductor kit so that one is available when 84 Replace PC Kit appears - Lexmark X203n | User's Guide - Page 119
the status of the photoconductor kit by printing a network setup page. Part name Photoconductor kit Part number X203H22G Replacing supplies Replacing the toner cartridge When 88 Cartridge is low appears, or when you experience faded print, remove the toner cartridge. Firmly shake it side-to - Lexmark X203n | User's Guide - Page 120
on the base of the photoconductor kit, and then pull the toner cartridge out using the handle. 1 1@!. 4 GHI 2 ABC 5 JKL 3 DEF 7 PQRS 8 TUV 6 MNO * 9 WXYZ 0 # 2 3 Unpack the new toner cartridge. 4 Shake the cartridge in all directions to distribute the toner. Maintaining the printer 120 - Lexmark X203n | User's Guide - Page 121
The cartridge clicks into place when correctly installed. 1@!. 4 GHI 2 ABC 5 JKL 3 DEF 7 PQRS 8 TUV 6 MNO * 9 WXYZ 0 # 6 Close the front door. Replacing the photoconductor kit The printer automatically notifies you before the photoconductor kit reaches a page maximum by showing 84 PC Kit - Lexmark X203n | User's Guide - Page 122
2 ABC 5 JKL 3 DEF 7 PQRS 8 TUV 6 MNO * 9 WXYZ 0 # 2 Pull the photoconductor kit and toner cartridge out of the printer as a unit by pulling on the toner cartridge handle. Note: The photoconductor kit and toner cartridge form a unit. 1@!. 4 GHI 2 ABC 5 JKL 3 DEF 7 PQRS 8 TUV 6 MNO - Lexmark X203n | User's Guide - Page 123
on the base of the photoconductor kit. Pull the toner cartridge up and out using the handle. 1 2 4 Unpack the new photoconductor kit. Be careful not to touch the photoconductor drum. Warning-Potential Damage: When replacing the photoconductor kit, do not leave the kit exposed to direct light for an - Lexmark X203n | User's Guide - Page 124
5 Insert the toner cartridge into the photoconductor kit by aligning the rollers on the toner cartridge with the tracks. Push the toner cartridge until it clicks into place. 6 Install the unit into the printer by aligning the arrows on the guides of the unit with the arrows in the printer. Push the - Lexmark X203n | User's Guide - Page 125
a large enough surface to support the full footprint of the printer. • Keep the printer in an upright position. • Avoid severe jarring movements. Shipping the printer When shipping the printer, use the original packaging or call the place of purchase for a relocation kit. Maintaining the printer 125 - Lexmark X203n | User's Guide - Page 126
IP address of the printer, then print a network setup page and locate the IP address in the TCP/IP section. • For more information, see the Networking Guide on the Software and Documentation CD and the Embedded Web Server Administrator's Guide on the LexmarkTM Web site at www.lexmark.com. Viewing - Lexmark X203n | User's Guide - Page 127
of life remaining in the maintenance kit, and capacity measurements of certain printer parts. To view the device status: 1 Type the printer IP address in the address field of your Web browser. Note: If you do not know the IP address of the printer, then print a network setup page and locate the IP - Lexmark X203n | User's Guide - Page 128
, specify the correct size setting: • For Windows users, specify the size from Print Properties. • For Macintosh users, specify the size from the Page Setup dialog. REINSTALL THE TONER CARTRIDGE Remove and reinstall the toner cartridge, making sure that it is aligned correctly. Troubleshooting 128 - Lexmark X203n | User's Guide - Page 129
Do not turn the printer power off while Programming System Code appears on the display. Cartridge is low Try one or more of the following: • Replace the toner cartridge, and then press to clear the message and continue printing. • Press to clear the message and continue printing. Troubleshooting 129 - Lexmark X203n | User's Guide - Page 130
toner cartridge The printer has detected an invalid, refilled toner cartridge. Remove the toner cartridge, and then install a new one. 32 Replace unsupported cartridge Remove the toner cartridge, and then install a supported one. 34 Short paper The printer to clear the message. Troubleshooting 130 - Lexmark X203n | User's Guide - Page 131
Try one or more of the following: • Replace the photoconductor kit. • Press to clear the message and continue printing. 84 Replace PC Kit The photoconductor kit is exhausted. Install a new photoconductor kit. 88.yy Cartridge is low Replace the toner cartridge, and then press to clear the message - Lexmark X203n | User's Guide - Page 132
resume printing. 290-294 paper jams 1 Remove all original documents from the ADF. 2 Open the ADF cover. 3 Unlock the separator roll. 4 Remove the separator roll. Troubleshooting 132 - Lexmark X203n | User's Guide - Page 133
5 Remove the jammed paper. 6 Reinstall the separator roll. 7 Lock the separator roll. 8 Close the ADF cover. Troubleshooting 133 - Lexmark X203n | User's Guide - Page 134
6 MNO * 9 WXYZ 0 # 10 Press . 840.01 Scanner Disabled This message indicates that the scanner has been disabled by the system support person. 840.02 Scanner Auto Disabled This message indicates that the printer identified a problem with the scanner and automatically disabled it. 1 Remove all - Lexmark X203n | User's Guide - Page 135
the paper tray while the printer is printing. Load it prior to printing, or wait for a prompt to load it. • Do not load too much paper. Make sure the stack height does not exceed the indicated maximum height. • Make sure the guides in the paper tray or the manual feeder are properly positioned - Lexmark X203n | User's Guide - Page 136
jam 1 Remove the tray from the printer. 1@!. 4 GHI 2 ABC 5 JKL 3 DEF 7 PQRS 8 TUV 6 MNO * 9 WXYZ 0 # 2 Remove the jam if you see it here. 1@!. 4 GHI 2 ABC 5 JKL 3 DEF 7 PQRS 8 TUV 6 MNO * 9 WXYZ 0 # 3 If you do not see it, see "201 paper jam" on page 137. Troubleshooting 136 - Lexmark X203n | User's Guide - Page 137
door, and then remove the photoconductor kit and toner cartridge. 1@!. 4 GHI 2 ABC 5 JKL 3 DEF 7 PQRS 8 TUV 6 MNO * 9 WXYZ 0 # 2 Lift the flap at the front of the printer, and remove any jammed sheets. 3 Align and insert the photoconductor kit and toner cartridge. 4 Close the front door - Lexmark X203n | User's Guide - Page 138
jam CAUTION-HOT SURFACE: The inside of the printer might be hot. To reduce the risk of injury from a hot component, allow the surface to cool before touching. 1 Open the front door, and then remove the photoconductor kit and toner cartridge. 1@!. 4 GHI 2 ABC 5 JKL 3 DEF 7 PQRS 8 TUV 6 MNO - Lexmark X203n | User's Guide - Page 139
3 Open the rear door. 4 Remove the jam. 5 Close the rear door. 6 Align and insert the photoconductor kit and toner cartridge. 7 Close the front door. 8 Press . Troubleshooting 139 - Lexmark X203n | User's Guide - Page 140
241 paper jam 1 Remove the tray from the printer. 1@!. 4 GHI 2 ABC 5 JKL 3 DEF 7 PQRS 8 TUV 6 MNO * 9 WXYZ 0 # 2 Remove the jam. 3 Insert the tray. 4 Press . Troubleshooting 140 - Lexmark X203n | User's Guide - Page 141
of it may be still visible. If it is visible, then gently pull the jammed sheet from the front of the manual feeder. If the sheet is not visible, then complete the following steps: 1 Remove the photoconductor kit and toner cartridge. 1@!. 4 GHI 2 ABC 5 JKL 3 DEF 7 PQRS 8 TUV 6 MNO * 9 WXYZ - Lexmark X203n | User's Guide - Page 142
. Make sure the model number of the software matches the model number of your printer. To verify that the printer software is the most current, check the Lexmark Web site at www.lexmark.com. MAKE SURE THE PRINTER IS CONNECTED TO THE NETWORK Print a network setup page and check that the status shows - Lexmark X203n | User's Guide - Page 143
For more information, visit the Lexmark Web site at www.lexmark.com. MAKE SURE PRINTER CABLES ARE SECURELY CONNECTED Check the cable connections to the printer to make sure they are secure. For more information, see the setup documentation that came with the printer. Multiple-language PDFs do not - Lexmark X203n | User's Guide - Page 144
FOR ERROR MESSAGES Clear any error messages. CHECK THE POWER Make sure the printer is plugged in, the power is on, and Ready appears. Scanner unit does not close Make sure there are no obstructions: 1 Lift the scanner unit. 2 Remove any obstruction keeping the scanner unit open. Troubleshooting 144 - Lexmark X203n | User's Guide - Page 145
print quality problems" on page 152. CHECK THE DISPLAY FOR ERROR MESSAGES Clear any error messages. THE TONER MAY BE LOW When 88 Cartridge is low appears or when the print becomes faded, replace the toner cartridge. THE SCANNER GLASS MAY BE DIRTY Clean the scanner glass with a clean, lint-free cloth - Lexmark X203n | User's Guide - Page 146
printer off and then back on. This often fixes the problem with the scanner. Scan was not successful These are possible solutions. Try one or more of the following: CHECK THE CABLE CONNECTIONS Make sure the network or USB cable is securely connected to the computer and the printer. Troubleshooting - Lexmark X203n | User's Guide - Page 147
THE DOCUMENT PLACEMENT Make sure the document or photo is loaded facedown on the scanner glass in the upper left corner. Cannot scan from a computer These are possible solutions. Try one or more of the following: CHECK THE DISPLAY FOR ERROR MESSAGES Clear any error messages. Troubleshooting 147 - Lexmark X203n | User's Guide - Page 148
Windows XP, then the Windows XP personal firewall must be disabled before you can use Scan to PC profiles. Solving fax problems Caller ID is not shown Contact your telecommunications company to verify that your telephone line is subscribed to the caller ID service. If your region supports multiple - Lexmark X203n | User's Guide - Page 149
hear a dial tone, then connect the printer to that wall jack. REVIEW THIS DIGITAL PHONE SERVICE CHECKLIST The fax modem is an analog device. Certain router that will support analog use. For more information, contact your DSL provider. • If you are using a PBX telephone service, then make Troubleshooting 149 - Lexmark X203n | User's Guide - Page 150
print a network setup page and locate the IP address in the TCP/IP section. 2 Click Settings. 3 Click Fax Settings. 4 Click Analog Fax Setup. 5 In the Rings to Answer box, enter the number of times you want the phone to ring before answering. 6 Click Submit. THE TONER MAY BE LOW 88 Cartridge low - Lexmark X203n | User's Guide - Page 151
print, replace the cartridge. MAKE SURE THE FAX TRANSMISSION SPEED IS NOT SET TOO HIGH Decrease the incoming fax transmission speed: 1 Type the printer IP address into the address field of your Web browser. Note: If you do not know the IP address of the printer, then print a network setup page and - Lexmark X203n | User's Guide - Page 152
PAPER IN THE PAPER TRAY OR MANUAL FEEDER In the paper tray, make problem, then contact Customer Support. You may have a printer part that requires adjustment or replacement. Isolating print quality problems To help isolate print quality problems, print the print quality test pages: 1 Turn the printer - Lexmark X203n | User's Guide - Page 153
toner cartridge and photoconductor kit. THE TONER MAY BE LOW When 88 Cartridge low appears, order a new toner cartridge. If the problem continues, the printer may need to be serviced. For more information, contact Customer Support. Characters have jagged or uneven edges If you are using downloaded - Lexmark X203n | User's Guide - Page 154
users, specify the size from the Page Setup dialog. Gray background ABCDE ABCDE ABCDE CHECK THE TONER DARKNESS SETTING Select a lighter Toner Darkness setting: • From the printer control panel, change the setting from the Quality menu. • For Windows users, change the setting from Print Properties - Lexmark X203n | User's Guide - Page 155
From the printer control panel, check the Paper Size setting from the Paper menu. 2 Before sending the job to print, specify the correct size setting: • For Windows users, specify the size from Print Properties. • For Macintosh users, specify the size from the Page Setup dialog. Troubleshooting 155 - Lexmark X203n | User's Guide - Page 156
following: CHECK THE DARKNESS SETTINGS The Toner Darkness setting is too dark. • From the printer control panel, change this setting from the Quality menu. • For Windows users, change this setting from Print you use it. CHECK THE PAPER Avoid textured paper with rough finishes. Troubleshooting 156 - Lexmark X203n | User's Guide - Page 157
CARTRIDGE MAY BE DEFECTIVE Replace the toner cartridge. Print is too light These are possible solutions. Try one or more of the following: CHECK THE DARKNESS SETTINGS The Toner Darkness setting is too light. • From the printer control panel, change this setting from the Quality menu. • For Windows - Lexmark X203n | User's Guide - Page 158
Replace the toner cartridge. Skewed print These are possible solutions. Try one or more of the following: CHECK THE PAPER GUIDES Move the guides in the tray to the correct positions for the paper size loaded. CHECK THE PAPER Make sure you are using paper that meets the printer specifications - Lexmark X203n | User's Guide - Page 159
FED FROM A SPECIFIC SOURCE From Print Properties, the Print dialog, or the printer control panel, select another paper source for the job. THE TONER CARTRIDGE MAY BE DEFECTIVE Replace the toner cartridge. MAKE SURE THE PAPER PATH IS CLEAR Paper could be caught between the photoconductor kit and the - Lexmark X203n | User's Guide - Page 160
IS FED FROM A SPECIFIC SOURCE From Print Properties, the Print dialog, or the printer control panel, select another paper source for the job. THE TONER CARTRIDGE IS DEFECTIVE Replace the toner cartridge. MAKE SURE THE PAPER PATH IS CLEAR Paper could be caught between the photoconductor kit and the - Lexmark X203n | User's Guide - Page 161
, make sure the Paper Texture setting matches the paper loaded in the tray. Toner specks These are possible solutions. Try one or more of the following: THE TONER CARTRIDGE MAY BE DEFECTIVE Replace the toner cartridge. THERE IS TONER IN THE PAPER PATH Contact Customer Support. Troubleshooting 161 - Lexmark X203n | User's Guide - Page 162
, see your system administrator. Contacting Customer Support When you call Customer Support, describe the problem you are experiencing, the message on the display, and the troubleshooting steps you have already taken to find a solution. You need to know your printer model type and serial number. For - Lexmark X203n | User's Guide - Page 163
typographical errors. to products, programs, or services do not imply that the Lexmark technical support, visit support.lexmark.com. For information on supplies and downloads, visit www.lexmark.com. If you don't have access to the Internet, you can contact Lexmark by mail: Lexmark International - Lexmark X203n | User's Guide - Page 164
printer commands (language) and functions included in its printer products. This printer is intended to be compatible with the PCL language. This means the printer This product has been tested and found to comply with the instructions, may cause of Lexmark Technology & Services Lexmark International, - Lexmark X203n | User's Guide - Page 165
Scanning Copying 52 dBA, 49dBA 52 dBA Ready 26 dBA Values are subject to change. See www.lexmark .com for current values. Waste from Electrical and Electronic Equipment (WEEE) directive The WEEE logo signifies specific options, visit the Lexmark Web site at www.lexmark.com for your local - Lexmark X203n | User's Guide - Page 166
60825-1. Class I laser products are not considered to be hazardous. The printer contains internally a Class IIIb (3b) laser that is nominally a 7 milliwatt gallium maintenance, or prescribed service condition. Laser advisory label A laser notice label may be affixed to this printer as shown: Power - Lexmark X203n | User's Guide - Page 167
hard-copy original documents. 460 W Scanning The product is scanning hard-copy documents. 460 W of time, called the Power Saver Timeout. Factory default Power Saver Timeout for this product (in Statement of Limited Warranty Lexmark X203n, Lexmark X204n Lexmark International, Inc., Lexington, - Lexmark X203n | User's Guide - Page 168
covered by a Lexmark warranty, technical support may not be available or only be available for a fee. Extent of limited warranty Lexmark does not warrant uninterrupted or error-free operation of any product or the durability or longevity of prints produced by any product. Warranty service does not - Lexmark X203n | User's Guide - Page 169
-Accidents, misuse, abuse or use inconsistent with Lexmark user's guides, manuals, instructions or guidance -Unsuitable physical or operating environment -Maintenance by anyone other than Lexmark or a Lexmark authorized servicer -Operation of a product beyond the limit of its duty cycle -Use of - Lexmark X203n | User's Guide - Page 170
them when replacement is required. Replacement toner cartridge(s) sold without these terms are available through www.lexmark.com, may be refilled by you, or a third party, as the only cartridge alternative to be used with the licensed printer. LEXMARK SOFTWARE LICENSE AGREEMENT This Software License - Lexmark X203n | User's Guide - Page 171
proprietary notices. You may not copy the Software Program to any public or distributed network. c Reservation of Rights. The Software Program, including all fonts, is copyrighted and owned by Lexmark International, Inc. and/or its suppliers. Lexmark reserves all rights not expressly granted to you - Lexmark X203n | User's Guide - Page 172
on Contracts for the International Sale of Goods shall not apply. 14 UNITED STATES GOVERNMENT RESTRICTED RIGHTS. The Software Program has been developed you provide in relation to support services performed with respect to the Software Program and requested by you. Lexmark agrees not to use this - Lexmark X203n | User's Guide - Page 173
compatibility and safety of electrical equipment designed for use within certain voltage limits. The manufacturer of this product is: Lexmark International Universal Service Order Code (USOC) jack. A plug and jack used to connect this equipment to the premises' wiring and telephone network must - Lexmark X203n | User's Guide - Page 174
service. If you experience trouble with this equipment, for repair or warranty information, contact Lexmark International, Inc. at www.lexmark.com or your Lexmark representative. If the equipment is causing harm to the telephone network nationwide problem. Testing Laboratory be a 900 number or - Lexmark X203n | User's Guide - Page 175
NRTL (Nationally Recognized Testing Laboratory) ou un network The following are special conditions for the Facsimile User Instructions. product is compatible with all of Telecom's network services. This equipment shall not tone filter (Lexmark part number 14B5109 or 80D1877) to - Lexmark X203n | User's Guide - Page 176
compatibility, safety of electrical equipment designed for use within certain voltage limits and on radio equipment and telecommunications terminal equipment. Compliance is indicated by the CE marking. The manufacturer of this product is: Lexmark International your printer has a wireless network card - Lexmark X203n | User's Guide - Page 177
service, this device is intended to be operated indoors and away from windows only signifies that the Industry Canada technical specifications were met. Industry Canada (Canada) l'ensemble de la population par Santé Canada. Reportez-vous au Code de sécurité 6 que vous pouvez consulter sur le site Web - Lexmark X203n | User's Guide - Page 178
relating to electromagnetic compatibility, safety of electrical equipment designed for use within certain voltage limits and on radio equipment and telecommunications terminal equipment. Compliance is indicated by the CE marking. The manufacturer of this product is: Lexmark International, Inc., 740 - Lexmark X203n | User's Guide - Page 179
. dat het toestel dit product in overeenstemming is met de essentiële eisen en de andere relevante bepalingen van richtlijn 1999/5/EG. Norsk Lexmark International, Inc. erklærer herved at dette produktet er i samsvar med de grunnleggende krav og øvrige relevante krav i direktiv 1999/5/EF. Polski - Lexmark X203n | User's Guide - Page 180
not have printed 131 54 Network software error 131 54 Standard network software error 131 56 Standard USB port disabled 131 84 PC Kit life warning 131 84 Replace PC Kit 131 840.01 Scanner Disabled 134 840.02 Scanner Auto Disabled 134 88.yy Cartridge is low 131 Symbols "scan to computer" screen - Lexmark X203n | User's Guide - Page 181
, 176 features Scan Center 84 finding information 10 publications 10 Web site 10 Finishing menu 102 font sample list printing 46 forwarding faxes 79 G green settings Eco-Mode 25 Power Saver 26 Quiet Mode 27 I information, finding 10 installing printer software 20 Invalid Engine Code 129 IPv6 menu - Lexmark X203n | User's Guide - Page 182
54 N Network 129 Network 129 Network menu 105 Network Card menu 107 Network Reports menu 106 network setup page 21 Networking Guide 126 noise emission levels 165 notices 164, 165, 166, 167, 173, 174, 175, 176, 177, 178 O options fax 78, 79 scan to computer 78 ordering toner cartridges 118 - Lexmark X203n | User's Guide - Page 183
software error 131 56 Standard USB port disabled 131 84 PC Kit life warning 131 84 Replace PC Kit 131 840.01 Scanner Disabled 134 840.02 Scanner Auto Disabled 134 88.yy Cartridge is low 131 Cartridge Low 129 Close front door 129 Invalid Engine Code 129 Load with 129 Network 129 Network - Lexmark X203n | User's Guide - Page 184
a computer 147 scan was not successful 146 scanner unit does not close 144 scanning takes too long or freezes the computer 147 U Universal Paper Size 91 setting 29 Universal Setup menu 91 USB port 20 V viewing reports 126 W Waiting 130 Web site finding 10 wired network setup using Windows 22 wired
-
 1
1 -
 2
2 -
 3
3 -
 4
4 -
 5
5 -
 6
6 -
 7
7 -
8
-
9
-
10
-
11
-
12
-
13
-
14
-
15
-
16
-
17
-
18
-
19
-
20
-
21
-
22
-
23
-
24
-
25
-
26
-
27
-
28
-
29
-
30
-
31
-
32
-
33
-
34
-
35
-
36
-
37
-
38
-
39
-
40
-
41
-
42
-
43
-
44
-
45
-
46
-
47
-
48
-
49
-
50
-
51
-
52
-
53
-
54
-
55
-
56
-
57
-
58
-
59
-
60
-
61
-
62
-
63
-
64
-
65
-
66
-
67
-
68
-
69
-
70
-
71
-
72
-
73
-
74
-
75
-
76
-
77
-
78
-
79
-
80
-
81
-
82
-
83
-
84
-
85
-
86
-
87
-
88
-
89
-
90
-
91
-
92
-
93
-
94
-
95
-
96
-
97
-
98
-
99
-
100
-
101
-
102
-
103
-
104
-
105
-
106
-
107
-
108
-
109
-
110
-
111
-
112
-
113
-
114
-
115
-
116
-
117
-
118
-
119
-
120
-
121
-
122
-
123
-
124
-
125
-
126
-
127
-
128
-
129
-
130
-
131
-
132
-
133
-
134
-
135
-
136
-
137
-
138
-
139
-
140
-
141
-
142
-
143
-
144
-
145
-
146
-
147
-
148
-
149
-
150
-
151
-
152
-
153
-
154
-
155
-
156
-
157
-
158
-
159
-
160
-
161
-
162
-
163
-
164
-
165
-
166
-
167
-
168
-
169
-
170
-
171
-
172
-
173
-
174
-
175
-
176
-
177
-
178
-
179
-
180
-
181
-
182
-
183
-
184
 |
 |

Lexmark X203n and X204n Series
User's Guide
February 2011
www.lexmark.com
Machine type(s):
7011
Model(s):
200, 215, 300, 315