Lexmark X203n User's Guide - Page 55
Pausing the current print job to make copies, Notes, Options, on 1 Portrait
 |
View all Lexmark X203n manuals
Add to My Manuals
Save this manual to your list of manuals |
Page 55 highlights
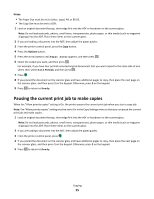
Notes: • The Paper Size must be set to Letter, Legal, A4, or B5 JIS. • The Copy Size must be set to 100%. 1 Load an original document faceup, short edge first into the ADF or facedown on the scanner glass. Note: Do not load postcards, photos, small items, transparencies, photo paper, or thin media (such as magazine clippings) into the ADF. Place these items on the scanner glass. 2 If you are loading a document into the ADF, then adjust the paper guides. 3 From the printer control panel, press the Copy button. 4 Press the Options button. 5 Press the arrow buttons until Paper Saver appears, and then press . 6 Select the output you want, and then press . For example, if you have four portrait-oriented original documents that you want copied to the same side of one sheet, then select 4 on 1 Portrait, and then press . 7 Press . 8 If you placed the document on the scanner glass and have additional pages to copy, then place the next page on the scanner glass, and then press 1 on the keypad. Otherwise, press 2 on the keypad. 9 Press to return to Ready. Pausing the current print job to make copies When the "Allow priority copies" setting is On, the printer pauses the current print job when you start a copy job. Note: The "Allow priority copies" setting must be set to On in the Copy Settings menu so that you can pause the current print job and make copies. 1 Load an original document faceup, short edge first into the ADF or facedown on the scanner glass. Note: Do not load postcards, photos, small items, transparencies, photo paper, or thin media (such as magazine clippings) into the ADF. Place these items on the scanner glass. 2 If you are loading a document into the ADF, then adjust the paper guides. 3 From the printer control panel, press . 4 If you placed the document on the scanner glass and have additional pages to copy, then place the next page on the scanner glass, and then press 1 on the keypad. Otherwise, press 2 on the keypad. 5 Press to return to Ready. Copying 55
-
 1
1 -
2
-
3
-
4
-
5
-
6
-
7
-
8
-
9
-
10
-
11
-
12
-
13
-
14
-
15
-
16
-
17
-
18
-
19
-
20
-
21
-
22
-
23
-
24
-
25
-
26
-
27
-
28
-
29
-
30
-
31
-
32
-
33
-
34
-
35
-
36
-
37
-
38
-
39
-
40
-
41
-
42
-
43
-
44
-
45
-
46
-
47
-
48
-
49
-
 50
50 -
 51
51 -
 52
52 -
 53
53 -
 54
54 -
 55
55 -
 56
56 -
 57
57 -
 58
58 -
 59
59 -
 60
60 -
61
-
62
-
63
-
64
-
65
-
66
-
67
-
68
-
69
-
70
-
71
-
72
-
73
-
74
-
75
-
76
-
77
-
78
-
79
-
80
-
81
-
82
-
83
-
84
-
85
-
86
-
87
-
88
-
89
-
90
-
91
-
92
-
93
-
94
-
95
-
96
-
97
-
98
-
99
-
100
-
101
-
102
-
103
-
104
-
105
-
106
-
107
-
108
-
109
-
110
-
111
-
112
-
113
-
114
-
115
-
116
-
117
-
118
-
119
-
120
-
121
-
122
-
123
-
124
-
125
-
126
-
127
-
128
-
129
-
130
-
131
-
132
-
133
-
134
-
135
-
136
-
137
-
138
-
139
-
140
-
141
-
142
-
143
-
144
-
145
-
146
-
147
-
148
-
149
-
150
-
151
-
152
-
153
-
154
-
155
-
156
-
157
-
158
-
159
-
160
-
161
-
162
-
163
-
164
-
165
-
166
-
167
-
168
-
169
-
170
-
171
-
172
-
173
-
174
-
175
-
176
-
177
-
178
-
179
-
180
-
181
-
182
-
183
-
184
 |
 |
