Lexmark X3330 Service Manual - Page 31
Service checks, Carrier transport service check
 |
View all Lexmark X3330 manuals
Add to My Manuals
Save this manual to your list of manuals |
Page 31 highlights
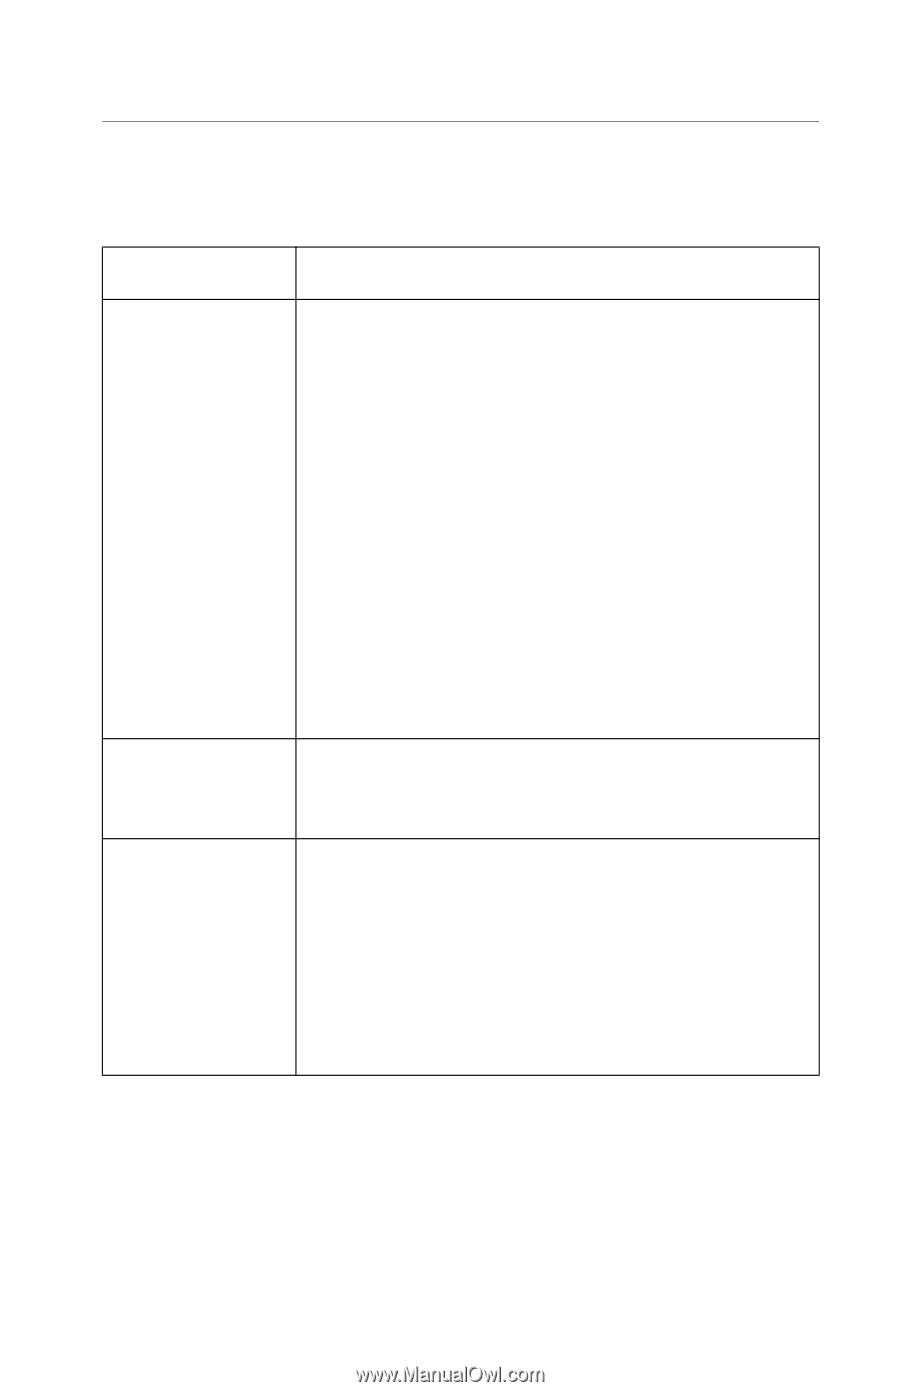
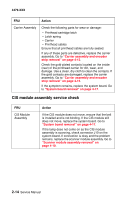
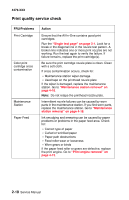
4479-XXX Service checks Carrier transport service check FRU Action • System Board • Carrier Transport Motor Check the carrier transport motor connector J1 on the system board. If it is connected, check for approximately 29 V dc on pins 1 and 2 or at the wire connections located on the rear of the carrier transport motor. If voltage is incorrect, replace the system board. Go to "System board removal" on page 4-17. If voltage is correct, check the motor for binds, or a loose motor pulley. A noisy or chattering motor or a motor that fails to turn can be caused by: • A broken circuit or short-circuit in the motor • A bind in the carrier transport mechanism Disconnect the carrier transport motor cable J1 from the system board and check for 0 to 10 ohms between the two wires on the carrier transport motor. If the reading is incorrect, replace the print engine. Go to "Print engine removal" on page 4-13. Carrier Guide Rod Clean and lubricate the carrier rod. Lubricate the carrier rod and the carrier rod bearing surfaces with grease P/N 99A0394. Encoder Strip Verify that the encoder strip is installed correctly and is free of grease or dirt. If the encoder strip is not installed correctly, it can cause the carrier to slam against the side frame. If the encoder strip is damaged, replace it. Go to "Carrier assembly and encoder strip removal" on page 4-15. If the encoder strip and all connections are okay, but the carrier slams the side frame, replace the system board. Go to "System board removal" on page 4-17. Diagnostic information 2-13
-
 1
1 -
2
-
3
-
4
-
5
-
6
-
7
-
8
-
9
-
10
-
11
-
12
-
13
-
14
-
15
-
16
-
17
-
18
-
19
-
20
-
21
-
22
-
23
-
24
-
25
-
 26
26 -
 27
27 -
 28
28 -
 29
29 -
 30
30 -
 31
31 -
 32
32 -
 33
33 -
 34
34 -
 35
35 -
 36
36 -
37
-
38
-
39
-
40
-
41
-
42
-
43
-
44
-
45
-
46
-
47
-
48
-
49
-
50
-
51
-
52
-
53
-
54
-
55
-
56
-
57
-
58
-
59
-
60
-
61
-
62
-
63
-
64
-
65
-
66
-
67
-
68
-
69
-
70
-
71
-
72
-
73
-
74
-
75
-
76
 |
 |