Lexmark X3330 Service Manual - Page 37
Lexmark Solution Center, Align to fix blurry, edges, Print, Arrow, FRU/Problems, Action
 |
View all Lexmark X3330 manuals
Add to My Manuals
Save this manual to your list of manuals |
Page 37 highlights
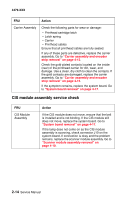
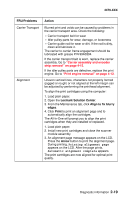
4479-XXX FRU/Problems Carrier Transport Alignment Action Blurred print and voids can be caused by problems in the carrier transport area. Check the following: • Carrier transport belt for wear • Idler pulley parts for wear, damage, or looseness • Carrier guide rod for wear or dirt. If the rod is dirty, clean and lubricate it. The carrier to carrier frame engagement should be lubricated with grease P/N 99A0394. If the carrier transport belt is worn, replace the carrier assembly. Go to "Carrier assembly and encoder strip removal" on page 4-15. If the idler pulley parts are defective, replace the print engine. Go to "Print engine removal" on page 4-13. Uneven vertical lines, characters not properly formed (jagged or rough) or not aligned at the left margin can be adjusted by performing the printhead alignment. To align the print cartridges using the computer: 1. Load plain paper. 2. Open the Lexmark Solution Center. 3. From the Maintenance tab, click Align to fix blurry edges. 4. Click Print to print an alignment page and to automatically align the cartridges. The All-In-One will prompt you to align the print cartridges when they are installed or replaced. 1. Load plain paper. 2. Install new print cartridges and close the scanner module assembly. 3. An alignment page message appears on the LCD. Press the Arrow button to print the alignment page. During printing, Printing alignment page appears on the LCD. After the page prints, Automatic alignment complete appears. The print cartridges are now aligned for optimal print quality. Diagnostic information 2-19
-
 1
1 -
2
-
3
-
4
-
5
-
6
-
7
-
8
-
9
-
10
-
11
-
12
-
13
-
14
-
15
-
16
-
17
-
18
-
19
-
20
-
21
-
22
-
23
-
24
-
25
-
26
-
27
-
28
-
29
-
30
-
31
-
 32
32 -
 33
33 -
 34
34 -
 35
35 -
 36
36 -
 37
37 -
 38
38 -
 39
39 -
 40
40 -
 41
41 -
 42
42 -
43
-
44
-
45
-
46
-
47
-
48
-
49
-
50
-
51
-
52
-
53
-
54
-
55
-
56
-
57
-
58
-
59
-
60
-
61
-
62
-
63
-
64
-
65
-
66
-
67
-
68
-
69
-
70
-
71
-
72
-
73
-
74
-
75
-
76
 |
 |