Lexmark X3330 Service Manual - Page 41
Cancel, Arrow, Power, Minus, Lexmark 3300, Series
 |
View all Lexmark X3330 manuals
Add to My Manuals
Save this manual to your list of manuals |
Page 41 highlights
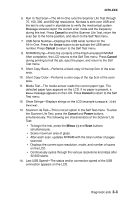
4479-XXX 6. Run In Test Scan-The All-In-One runs the Scanner Life Test through 75, 150, 300, and 600 dpi resolutions. No data is sent over USB and the test is only used in standalone to verify the mechanical system. Message screens report the current scan mode and the frequency during this test. Press Cancel to end the Scanner Life Test, return the scan bar to the home position, and return to the Self Test menu. 7. USB Serial Number-Displays the USB serial number for the All-In-One. Press the Arrow button to de-activate the USB serial number. Press Cancel to return to the Self Test menu. 8. NVRAM Dump-Prints the contents of the Flash-emulated NVRAM. After completion, the LCD returns to the Self Test menu. Press Cancel during printing to halt the job, eject the paper, and return to the Self Test menu. 9. Short Copy Black-Performs a black copy of the top 5cm of the scan area. 10. Short Copy Color-Performs a color copy of the top 5cm of the scan area. 11. Media Test-The media sensor reads the current paper type. The detected paper type appears on the LCD. If no paper is present, a None message appears on the LCD. Press Cancel to return to the Self Test menu. 12. Show Strings-Displays strings on the LCD (example Lexmark 3300 Series). 13. Scanner Life Test-This is not an option in the Self Test menu. To enter the Scanner Life Test, press the Cancel and Power buttons simultaneously. The following are characteristics of the Scanner Life Test: • To begin the test, press the Minus (-) and Scan buttons simultaneously. • Scans maximum area of glass. • After each scan, updates NVRAM with the total number of pages scanned. • Displays the current scan resolution, mode, and number of scans on the LCD. • Continuously cycles through the various resolutions and stops after 32,000 scans. 14. Last USB Speed-The status and/or connection speed of the USB connection appears on the LCD. Diagnostic aids 3-3
-
 1
1 -
2
-
3
-
4
-
5
-
6
-
7
-
8
-
9
-
10
-
11
-
12
-
13
-
14
-
15
-
16
-
17
-
18
-
19
-
20
-
21
-
22
-
23
-
24
-
25
-
26
-
27
-
28
-
29
-
30
-
31
-
32
-
33
-
34
-
35
-
 36
36 -
 37
37 -
 38
38 -
 39
39 -
 40
40 -
 41
41 -
 42
42 -
 43
43 -
 44
44 -
 45
45 -
 46
46 -
47
-
48
-
49
-
50
-
51
-
52
-
53
-
54
-
55
-
56
-
57
-
58
-
59
-
60
-
61
-
62
-
63
-
64
-
65
-
66
-
67
-
68
-
69
-
70
-
71
-
72
-
73
-
74
-
75
-
76
 |
 |
