Lexmark X342N Service Manual - Page 50
Paperpath sensor service check, Printhead service check, Unplug the MFP.
 |
UPC - 734646256292
View all Lexmark X342N manuals
Add to My Manuals
Save this manual to your list of manuals |
Page 50 highlights
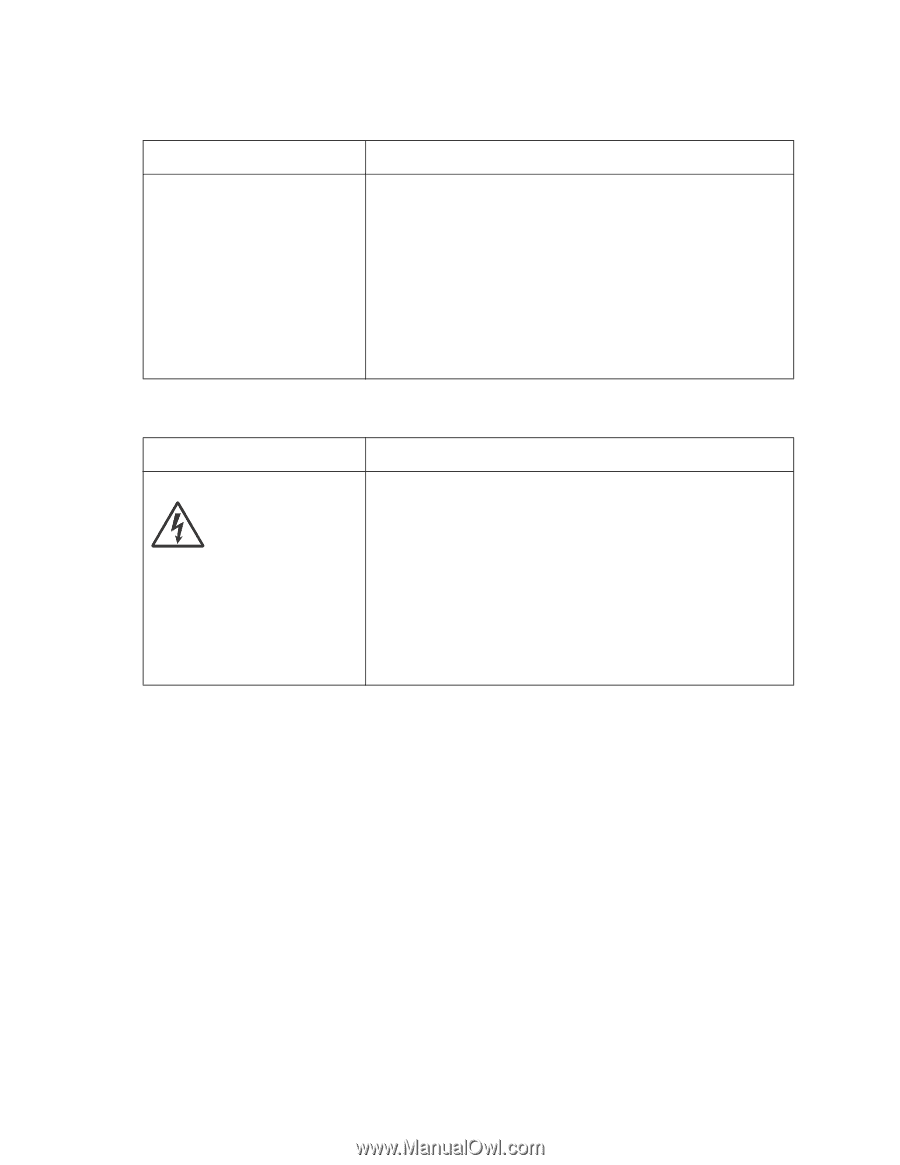
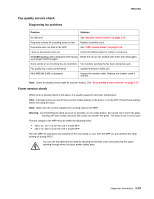
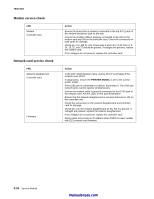
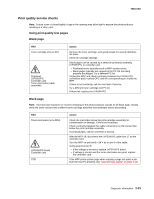
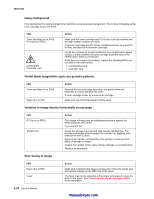
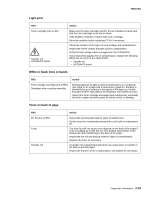
7003-XXX Paperpath sensor service check FRU All sensors MPF sensor Exit sensor Paper in sensor Controller card Action Check all the sensor flags for breakage or if they are jammed. Check all the sensors for dirt. Check pin 1 on connector J18 for +5V and pin 2 on J18 for +3.3 V.Pin 3 should be ground. Check pin 1 on connector J10 for +5V and pin2 on J10 for +3.3V. Pin 3 should be ground. Check pin 1 on connector J20 for +5V and pin2 on J20 for +3.3V. Pin 3 should be ground. If any of the readings are incorrect, replace the controller card. If they are correct, replace the malfunctioning sensor. Printhead service check FRU Printhead Action Unplug the MFP. Disconnect the printhead cables from J11 and J12 on the controller card. Turn the MFP on. On the controller card, verify +24 V dc on pin 5 at J11 and +5 V dc on pin 7 at J12. Verify grounds on pin 4 at J11 and on pins 2, 6, and 8 at J12. • If voltages or grounds are incorrect, check the controller card. See "Controller card service check" on page 2-21 for more information. • If voltages are correct, replace the printhead (cables are included). 2-28 Service Manual manuals4you.com
-
 1
1 -
2
-
3
-
4
-
5
-
6
-
7
-
8
-
9
-
10
-
11
-
12
-
13
-
14
-
15
-
16
-
17
-
18
-
19
-
20
-
21
-
22
-
23
-
24
-
25
-
26
-
27
-
28
-
29
-
30
-
31
-
32
-
33
-
34
-
35
-
36
-
37
-
38
-
39
-
40
-
41
-
42
-
43
-
44
-
 45
45 -
 46
46 -
 47
47 -
 48
48 -
 49
49 -
 50
50 -
 51
51 -
 52
52 -
 53
53 -
 54
54 -
 55
55 -
56
-
57
-
58
-
59
-
60
-
61
-
62
-
63
-
64
-
65
-
66
-
67
-
68
-
69
-
70
-
71
-
72
-
73
-
74
-
75
-
76
-
77
-
78
-
79
-
80
-
81
-
82
-
83
-
84
-
85
-
86
-
87
-
88
-
89
-
90
-
91
-
92
-
93
-
94
-
95
-
96
-
97
-
98
-
99
-
100
-
101
-
102
-
103
-
104
-
105
-
106
-
107
-
108
-
109
-
110
-
111
-
112
-
113
-
114
-
115
-
116
-
117
-
118
-
119
-
120
-
121
-
122
-
123
-
124
-
125
-
126
-
127
-
128
-
129
-
130
-
131
-
132
-
133
-
134
-
135
-
136
-
137
-
138
-
139
-
140
-
141
-
142
-
143
-
144
-
145
-
146
-
147
-
148
-
149
-
150
-
151
-
152
-
153
-
154
-
155
-
156
-
157
-
158
-
159
-
160
-
161
-
162
-
163
 |
 |