Lexmark X342N Service Manual - Page 66
NVRAM Reset, Registration, Printer Registration
 |
UPC - 734646256292
View all Lexmark X342N manuals
Add to My Manuals
Save this manual to your list of manuals |
Page 66 highlights
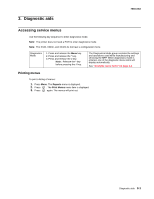
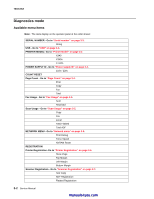
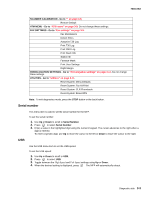
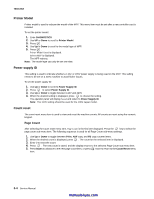
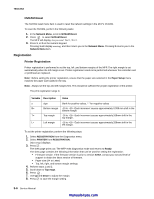
7003-XXX NVRAM Reset The NVRAM reset menu item is used to reset the network settings in the MFP's NVRAM. To reset the NVRAM, perform the following tasks: 1. In the Network Menu, scroll to NVRAM Reset. 2. Press to select NVRAM Reset. The MFP will display Are you sure? Yes=1, No=2. 3. Press 1, or 2 on the numeric keypad. Pressing 1 will display resetting, and then return you to the Network Menu. Pressing 2 returns you to the Network Menu item. Registration Printer Registration Printer registration is performed to set the top, left ,and bottom margins of the MFP. The right margin is set automatically when the left margin is set. Printer registration needs to be performed whenever the controller card or printhead are replaced. Note: Before setting the printer registration, ensure that the paper size selected in the Paper Setup menu matches the paper size loaded in the tray. Note: Always set the top and left margins first. This should be sufficient for proper registration of the printer. The print registration range is: Variable Description Value s sign blank for positive values, "-" for negative values B= Bottom margin -10 to +10-Each increment causes approximately 0.559 mm shift in the bottom margin. T= Top margin -16 to +16-Each increment causes approximately.169mm shift in the top margin. L= Left margin -16 to +16-Each increment causes approximately.339mm shift in the left margin. To set the printer registration, perform the following steps: 1. Select REGISTRATION from the Diagnostics menu. 2. Select PRINTER from REGISTRATION. [Skew Page] displays. 3. Press . The skew page prints out. The MFP exits diagnostics mode and returns to Ready. The skew page contains the following information that can be used for setting the registration: • Firmware version. If the firmware version is prior to version XXXX, contact your second level of support to obtain the latest version of firmware. • Paper size (A4 or Letter) • Top, left, right, and bottom margin settings. 4. Perform steps 1 and 2. 5. Scroll down to Top mrgn. 6. Press . 7. Use Up and Down to adjust the margin. 8. Press to save the margin setting. 3-6 Service Manual manuals4you.com
-
 1
1 -
2
-
3
-
4
-
5
-
6
-
7
-
8
-
9
-
10
-
11
-
12
-
13
-
14
-
15
-
16
-
17
-
18
-
19
-
20
-
21
-
22
-
23
-
24
-
25
-
26
-
27
-
28
-
29
-
30
-
31
-
32
-
33
-
34
-
35
-
36
-
37
-
38
-
39
-
40
-
41
-
42
-
43
-
44
-
45
-
46
-
47
-
48
-
49
-
50
-
51
-
52
-
53
-
54
-
55
-
56
-
57
-
58
-
59
-
60
-
 61
61 -
 62
62 -
 63
63 -
 64
64 -
 65
65 -
 66
66 -
 67
67 -
 68
68 -
 69
69 -
 70
70 -
 71
71 -
72
-
73
-
74
-
75
-
76
-
77
-
78
-
79
-
80
-
81
-
82
-
83
-
84
-
85
-
86
-
87
-
88
-
89
-
90
-
91
-
92
-
93
-
94
-
95
-
96
-
97
-
98
-
99
-
100
-
101
-
102
-
103
-
104
-
105
-
106
-
107
-
108
-
109
-
110
-
111
-
112
-
113
-
114
-
115
-
116
-
117
-
118
-
119
-
120
-
121
-
122
-
123
-
124
-
125
-
126
-
127
-
128
-
129
-
130
-
131
-
132
-
133
-
134
-
135
-
136
-
137
-
138
-
139
-
140
-
141
-
142
-
143
-
144
-
145
-
146
-
147
-
148
-
149
-
150
-
151
-
152
-
153
-
154
-
155
-
156
-
157
-
158
-
159
-
160
-
161
-
162
-
163
 |
 |