Lexmark X644E IPDS Printer and Host Setup Guide - Page 45
Step 2, Define the Printer to PSF/AIX, Con the Printer's Print Server TCP/IP Settings
 |
UPC - 734646093156
View all Lexmark X644E manuals
Add to My Manuals
Save this manual to your list of manuals |
Page 45 highlights
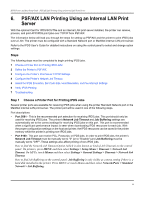
IPDS Printer and Host Setup Guide PSF/AIX LAN Printing Using an Internal LAN Print Server • Port 9600 - This port should only be used for receiving IPDS jobs. The printer's Network Job Timeout setting is automatically set to the correct setting for receiving IPDS jobs on this port. This port is only provided for compatibility with some older printers. Port 5001 is the recommended port for printing IPDS jobs. Step 2 Define the Printer to PSF/AIX To create a new IPDS printer definition in PSF/AIX perform the following actions: a) Execute the command smit psf_add_prt_tcpip to get the PSF/AIX SMIT Printer Definition for TCP/IP attached printers. b) Configure the following: Connect TIMEOUT: Enter a name for the IPDS printer. This name will also be used for the print queue associated with the printer. Internet ADDRESS: Enter the host name (preferred) or IP address you have assigned to the MarkNet adapter (e.g. 157.184.67.102). If you use the host name, PSF/AIX will resolve it into an IP address either through the Host file or through a Domain Naming Service (DNS) Server. PORT Number: 5001 (Port number selected in Step 1.) Number of QUEUE DEVICES: Leave this at the default value (4 devices) initially. You can tune this option later, according to the throughput of the printer. Connect TIMEOUT: Initially leave this at the default value (30 seconds). Refer to the PSF/AIX on-line help for information about when to increase this value. DESCRIPTION: Enter an optional description for the printer. c) Press Enter to create the new IPDS printer definition. Note: You can check the connection by using the enq command to place jobs in the queue. Example: enq -P'psfqueue' -odatatype=AFPDS /etc/motd You can also use the command smit psf_data_type_sel to queue the job. See also the Installing a TCP/IP-attached IPDS printer in the IBM AIX Print Service Facility/6000: Print Administration Version 1.2 manual for further information about this task. Step 3 Configure the Printer's Print Server TCP/IP Settings To enable IPDS printing with a Standard Network port or a MarkNet internal LAN print server, several settings must be verified. You can verify these settings from the printer control panel as shown below. 1 From a Ready state press the MENU button (printers) or touch 2 Use the navigation buttons or icons to scroll to Network/Ports. (Menus on MFPs). 45
-
 1
1 -
2
-
3
-
4
-
5
-
6
-
7
-
8
-
9
-
10
-
11
-
12
-
13
-
14
-
15
-
16
-
17
-
18
-
19
-
20
-
21
-
22
-
23
-
24
-
25
-
26
-
27
-
28
-
29
-
30
-
31
-
32
-
33
-
34
-
35
-
36
-
37
-
38
-
39
-
 40
40 -
 41
41 -
 42
42 -
 43
43 -
 44
44 -
 45
45 -
 46
46 -
 47
47 -
 48
48 -
 49
49 -
 50
50 -
51
-
52
-
53
-
54
-
55
-
56
-
57
-
58
-
59
-
60
-
61
-
62
 |
 |
