Lexmark X644E IPDS Printer and Host Setup Guide - Page 47
Step 4, Con the Printer's Network Job Timeout, Step 5, Select the IPDS Emulation, Bar Code
 |
UPC - 734646093156
View all Lexmark X644E manuals
Add to My Manuals
Save this manual to your list of manuals |
Page 47 highlights
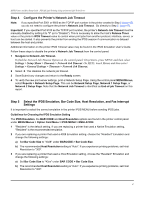
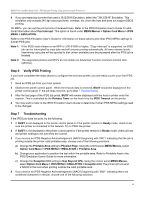
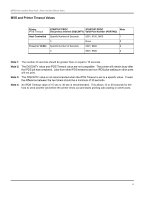
IPDS Printer and Host Setup Guide PSF/AIX LAN Printing Using an Internal LAN Print Server Step 4 Configure the Printer's Network Job Timeout Note: If you specified Port 5001 or 9600 as the TCP/IP port number in the printer created in Step 2 [page 45], you do not need to configure the printer's Network Job Timeout. Go directly to Step 5 [page 47]. Important! If you specified Port 9100 as the TCP/IP port number, the printer's Network Job Timeout must be manually disabled by setting it to "0" (or to "Disable"). This is necessary to allow the host's Release Timer value or the printer's IPDS Timeout value to control when print jobs from another protocol, interface, server, or host can be started. It also prevents the printer from ending the IPDS session if communication is delayed between the host and printer. Additional information on the printer IPDS Timeout value may be found in the IPDS Emulation User's Guide. Follow these steps to disable the printer's Network Job Timeout from the control panel: 1 Navigate to Network Job Timeout. To find the Network Job Timeout Option on the control panel: On printers, press MENU and then select Settings > Setup Menu > Timeouts > Network Job Timeout. On MFPs, touch Menus and then select Settings > General Settings > Timeouts > Network Job Timeout. 2 Select 0. This disables the network job timeout. 3 Save/Submit any changes and return to the Ready screen. 4 To verify the new print server settings, print a Network Setup Page. Using the control panel MENU/Menus, select Reports > Network Setup Page. This can be Network Setup Page, Network 1 Setup Page, or Network 2 Setup Page. Note that the Network Job Timeout is identified as End-of-job Timeout on this report. Step 5 Select the IPDS Emulation, Bar Code Size, Host Resolution, and Fax Interrupt Settings It is important to select the correct emulation in the printer IPDS MENU before sending IPDS jobs. Guidelines for Choosing the IPDS Emulation Setting The IPDS Emulation, the BAR CODE and Host Resolution options are found in the printer control panel under MENU/Menus > Option Card Menu > IPDS MENU > EMULATION. 1 "Resident" is the default setting. If you are replacing a printer that used a Native Emulation setting, "Resident" is the recommended emulation. 2 If you are replacing a printer that used a 4028 Emulation setting, choose the "Resident" Emulation and change the following settings: a) Set Bar Code Size to "4028" under BARCODE > Bar Code Size. b) The recommended Host Resolution setting is "Auto". If you experience printing problems, set Host Resolution to "300". 3 If you are replacing a printer that used a 43xx Emulation setting, choose the "Resident" Emulation and change the following settings: a) Set Bar Code Size to "43xx" under BAR CODE > Bar Code Size. b) The recommended Host Resolution setting is "Auto". If you experience printing problems, set Host Resolution to "300". 47
-
 1
1 -
2
-
3
-
4
-
5
-
6
-
7
-
8
-
9
-
10
-
11
-
12
-
13
-
14
-
15
-
16
-
17
-
18
-
19
-
20
-
21
-
22
-
23
-
24
-
25
-
26
-
27
-
28
-
29
-
30
-
31
-
32
-
33
-
34
-
35
-
36
-
37
-
38
-
39
-
40
-
41
-
 42
42 -
 43
43 -
 44
44 -
 45
45 -
 46
46 -
 47
47 -
 48
48 -
 49
49 -
 50
50 -
 51
51 -
 52
52 -
53
-
54
-
55
-
56
-
57
-
58
-
59
-
60
-
61
-
62
 |
 |
