Linksys PHB1100 User Guide - Page 28
Managing Your Personal Voice Mailbox, Changing Voice Mail Notification Settings
 |
UPC - 745883567645
View all Linksys PHB1100 manuals
Add to My Manuals
Save this manual to your list of manuals |
Page 28 highlights
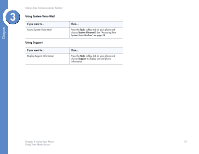
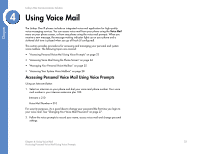
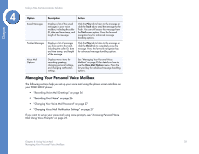
Chapter 4 Linksys One Communications Solution Option Description Action Saved Messages Displays a list of the saved messages in your voice mailbox, including the caller ID, date and time stamp, and length of the message. Click the Play tab to listen to the message or click the Trash tab to send the message to the Trash. You can still access this message from the Trash menu option. Press the forward navigation key for advanced message handling options. Trashed Messages Displays a list of messages you have sent to the trash, including the caller ID, date and time stamp, and length of the message. Click the Play tab to listen to the message or click the Shred tab to completely erase the message. Press the forward navigation key for advanced message handling options. Voice Mail Options Displays menu items for recording greetings, changing personal settings, and changing notification settings. See "Managing Your Personal Voice Mailbox" on page 25 for details on how to use the Voice Mail Options menu. Press the forward key for advanced message handling options. Managing Your Personal Voice Mailbox The following sections help you set up your voice mail using the phone screen interface on your PHM1200 IP phone: • "Recording Voice Mail Greetings" on page 26 • "Recording Your Name" on page 26 • "Changing Your Voice Mail Password" on page 27 • "Changing Voice Mail Notification Settings" on page 27 If you want to set up your voice mail using voice prompts, see "Accessing Personal Voice Mail Using Voice Prompts" on page 23. Chapter 4: Using Voice Mail 25 Managing Your Personal Voice Mailbox
-
 1
1 -
2
-
3
-
4
-
5
-
6
-
7
-
8
-
9
-
10
-
11
-
12
-
13
-
14
-
15
-
16
-
17
-
18
-
19
-
20
-
21
-
22
-
 23
23 -
 24
24 -
 25
25 -
 26
26 -
 27
27 -
 28
28 -
 29
29 -
 30
30 -
 31
31 -
 32
32 -
 33
33 -
34
-
35
-
36
-
37
-
38
-
39
-
40
-
41
-
42
-
43
-
44
-
45
 |
 |