MSI E7320 User Manual - Page 68
Installing the Driver
 |
View all MSI E7320 manuals
Add to My Manuals
Save this manual to your list of manuals |
Page 68 highlights
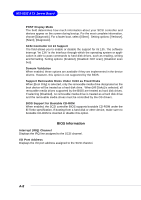
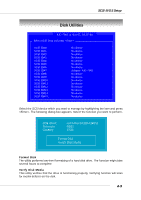
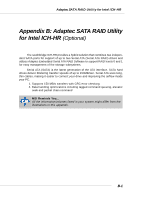
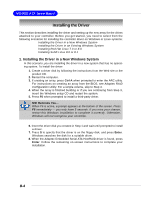
MS-9152 ATX Server Board Installing the Driver This section describes installing the driver and setting up the new array for the drives attached to your controller. Before you get started, you need to select from the following scenarios for installing the controller driver on Windows or Linux systems: Installing the Driver in a New Windows System Installing the Driver in an Existing Windows System Installing Red Hat Linux 7.3 or 8.0 Installing SuSE Linux 8.0 or 8.1 1. Installing the Driver in a New Windows System In this scenario, you are installing the driver in a new system that has no operating system. To install the driver: 1. Create a driver disk by following the instructions from the Web site or the product CD. 2. Restart the computer. 3. If creating an array, press Ctrl-A when prompted to enter the ARC utility. For instructions on creating an array from the BIOS, see Adaptec RAID Configuration Utility. For a simple volume, skip to Step 4. 4. When the array is finished building or if you are continuing from Step 3, insert the Windows setup CD and restart the system. 5. Press F6 when prompted to install a third-party driver. MSI Reminds You... When F6 is active, a prompt appears at the bottom of the screen. Press F6 immediately - you only have 5 seconds. If you miss your chance, restart this Windows installation to complete it correctly. Otherwise, Windows will not recognize your controller. 6. Insert the driver disk you created in Step 1 and wait until prompted to install a driver. 7. Press S to specify that the driver is on the floppy disk, and press Enter. Windows searches the disk for a suitable driver. 8. When the Adaptec Embedded Serial ATA HostRAID driver is found, press Enter. Follow the remaining on-screen instructions to complete your installation. B-4
-
 1
1 -
2
-
3
-
4
-
5
-
6
-
7
-
8
-
9
-
10
-
11
-
12
-
13
-
14
-
15
-
16
-
17
-
18
-
19
-
20
-
21
-
22
-
23
-
24
-
25
-
26
-
27
-
28
-
29
-
30
-
31
-
32
-
33
-
34
-
35
-
36
-
37
-
38
-
39
-
40
-
41
-
42
-
43
-
44
-
45
-
46
-
47
-
48
-
49
-
50
-
51
-
52
-
53
-
54
-
55
-
56
-
57
-
58
-
59
-
60
-
61
-
62
-
 63
63 -
 64
64 -
 65
65 -
 66
66 -
 67
67 -
 68
68 -
 69
69 -
 70
70 -
 71
71 -
 72
72 -
 73
73 -
74
-
75
-
76
-
77
-
78
-
79
-
80
-
81
-
82
-
83
-
84
-
85
-
86
-
87
-
88
-
89
-
90
-
91
-
92
 |
 |
