Maytag MFI2266AES Service Manual - Page 46
Door and Drawer Removal
 |
View all Maytag MFI2266AES manuals
Add to My Manuals
Save this manual to your list of manuals |
Page 46 highlights
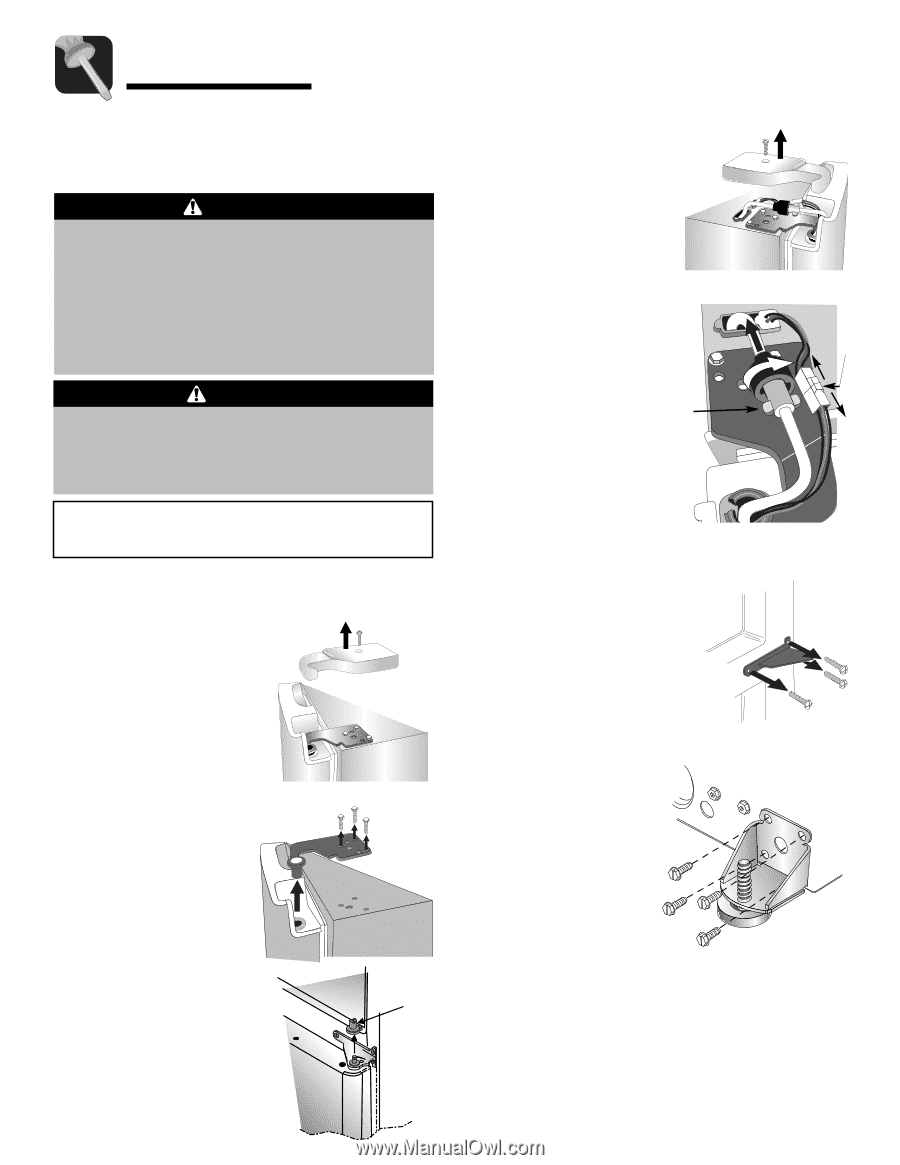
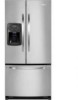
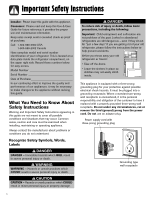
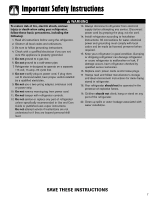
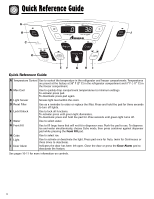
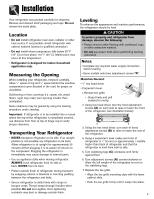
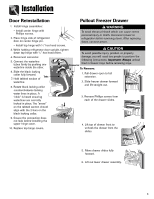
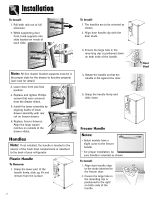
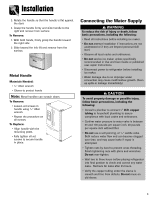
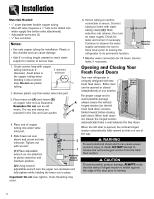
Installation Door and Drawer Removal Some installations require door/drawer removal to transport the refrigerator to its final location. WARNING To avoid electrical shock which can cause severe personal injury or death, observe the following: • Disconnect power to refrigerator before removing doors or drawer. Connect refrigerator door wire harness and power only after replacing doors or drawer. CAUTION To avoid damage to walls and flooring, protect vinyl or other flooring with cardboard, rugs or other protective material. Monitor water connection for 24 hours. Correct leaks if necessary. Note: For refrigerators in operation, shut off water before removing water line from the door. 1. Unplug power cord from power source. 2. Remove toe grille (see page 4). 3. Remove top hinge cover from right side refrigerator door by removing Phillips screws. Retain screw and cover for later use. 4. Unscrew 5⁄16" hex head screws from top hinge to remove hinge and retain all screws for later use. 5. Lift right side refrigerator door from center hinge pin. Remove door closure from center hinge pin on the right side and retain for later use. right side door closure 6. Remove top hinge cover from left side refrigerator door by removing Phillips screws. Retain screws and cover for later use. 7. Disconnect wire harness on top left side of refrigerator door top hinge. Release connector by pressing junction point with a flat blade screwdriver or fingernail. 8. Disconnect water line. Hold "tabbed" section Tabs of waterline while rotating the black locking collar clockwise and slide back. 9. Unscrew 5⁄16" hex head screws from top hinge to remove hinge; retain for later use. 10. Lift left side refrigerator door, along with top hinge, from center hinge pin. 11. Remove center hinge pin with a 5⁄16" hex head driver and retain hinge pin for later use. 12. Remove Phillips screws to remove right and left hinges; retain all screws for later use. 13. Remove both stabilizing brackets with 3⁄8" hex head driver; retain screws for later use. 5 Connector
-
 1
1 -
2
-
3
-
4
-
5
-
6
-
7
-
8
-
9
-
10
-
11
-
12
-
13
-
14
-
15
-
16
-
17
-
18
-
19
-
20
-
21
-
22
-
23
-
24
-
25
-
26
-
27
-
28
-
29
-
30
-
31
-
32
-
33
-
34
-
35
-
36
-
37
-
38
-
39
-
40
-
 41
41 -
 42
42 -
 43
43 -
 44
44 -
 45
45 -
 46
46 -
 47
47 -
 48
48 -
 49
49 -
 50
50 -
 51
51 -
52
-
53
-
54
-
55
-
56
-
57
-
58
-
59
-
60
-
61
-
62
-
63
-
64
-
65
-
66
-
67
-
68
-
69
-
70
-
71
 |
 |