Miele Triflex HX2 Operating instructions/Installation instructions - Page 175
Be careful not to damage any electri
 |
View all Miele Triflex HX2 manuals
Add to My Manuals
Save this manual to your list of manuals |
Page 175 highlights
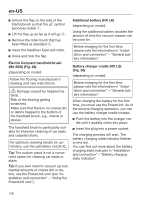
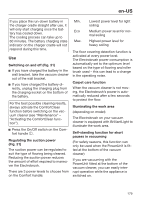
en-US You can read more about this in "Battery charging state indicator (while charging)". Charging the battery (with wall mounting) (Fig. 12) There are 2 ways to store and charge the vacuum cleaner in the supplied wall bracket. Before charging the battery for the first time, you must read the information in "Installation and connection" - "General battery information". You will need a suitable location near a free power socket for mounting the appliance on the wall. Wall mounting (Figs. 13 + 14) The supplied wall bracket has a mounting plate with a bag of screws attached to the back. Attach the mounting plate to the point on the wall where you want the wall mounting to be. Remove the bag of screws. Press the release catch at the bottom of the wall bracket (Fig. 13). Remove the mounting plate from the wall bracket by sliding it downward (Fig. 14). Attaching the mounting plate (Figs. 15 + 16) 2 plugs and 2 T20 TORX screws are supplied for attaching the mounting plate to the wall. You will also need a battery-operated screwdriver or a drill (with a drilling diameter of 6 mm). Depending on how you decide to configure your vacuum cleaner, select a distance of 17 11/16" or 38 9/16" (45 cm or 98 cm) between the bottom edge of the mounting plate and the floor (Fig. 15). Be careful not to damage any electrical in the wall. Attach the mounting plate to the wall (Fig. 16). Attaching the charging cable to the wall bracket (Figs. 17, 18, + 19) A cable compartment is located on the underside of the wall bracket. Press both release catches on the underside of the wall bracket and remove the cable compartment cover (Fig. 17). Plug the supplied charging cable into the opening from above (Fig. 18). Lay the charging cable in its guide (Fig. 18). Refit the cover and close the cable compartment (Fig. 19). Connecting the accessories holder (if required) (Fig. 20) An accessories holder is supplied for storing the three-piece accessory set on the wall bracket (see "Using the accessories supplied"). Push the accessories holder on to the wall bracket as far as it will go. 175
-
 1
1 -
2
-
3
-
4
-
5
-
6
-
7
-
8
-
9
-
10
-
11
-
12
-
13
-
14
-
15
-
16
-
17
-
18
-
19
-
20
-
21
-
22
-
23
-
24
-
25
-
26
-
27
-
28
-
29
-
30
-
31
-
32
-
33
-
34
-
35
-
36
-
37
-
38
-
39
-
40
-
41
-
42
-
43
-
44
-
45
-
46
-
47
-
48
-
49
-
50
-
51
-
52
-
53
-
54
-
55
-
56
-
57
-
58
-
59
-
60
-
61
-
62
-
63
-
64
-
65
-
66
-
67
-
68
-
69
-
70
-
71
-
72
-
73
-
74
-
75
-
76
-
77
-
78
-
79
-
80
-
81
-
82
-
83
-
84
-
85
-
86
-
87
-
88
-
89
-
90
-
91
-
92
-
93
-
94
-
95
-
96
-
97
-
98
-
99
-
100
-
101
-
102
-
103
-
104
-
105
-
106
-
107
-
108
-
109
-
110
-
111
-
112
-
113
-
114
-
115
-
116
-
117
-
118
-
119
-
120
-
121
-
122
-
123
-
124
-
125
-
126
-
127
-
128
-
129
-
130
-
131
-
132
-
133
-
134
-
135
-
136
-
137
-
138
-
139
-
140
-
141
-
142
-
143
-
144
-
145
-
146
-
147
-
148
-
149
-
150
-
151
-
152
-
153
-
154
-
155
-
156
-
157
-
158
-
159
-
160
-
161
-
162
-
163
-
164
-
165
-
166
-
167
-
168
-
169
-
 170
170 -
 171
171 -
 172
172 -
 173
173 -
 174
174 -
 175
175 -
 176
176 -
 177
177 -
 178
178 -
 179
179 -
 180
180 -
181
-
182
-
183
-
184
-
185
-
186
-
187
-
188
-
189
-
190
-
191
-
192
-
193
-
194
-
195
-
196
-
197
-
198
-
199
-
200
 |
 |
