Miele Triflex HX2 Operating instructions/Installation instructions - Page 180
Optional accessories, Filter system Fig. 32, Activating the ComfortClean function, Fig. 33
 |
View all Miele Triflex HX2 manuals
Add to My Manuals
Save this manual to your list of manuals |
Page 180 highlights
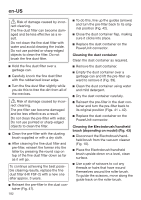
en-US Swing the vacuum cleaner forwards until the Electrobrush connector audibly clicks into place. The vacuum cleaner stays securely upright, the Electrobrush switches itself off and the battery is conserved. If you then unlock the connector on the Electrobrush, the Electrobrush will switch on again. Maintenance With 3D4U, Miele also offers free accessories to download from your 3D printer (www.miele.com, Service, 3D4U). Risk of injury caused by rotating roller brush. You can injure yourself on the rotating roller brush. Switch the vacuum cleaner off before doing any maintenance work. Use the On/Off switch on the Comfort handle to do this. It is recommended to use only genuine Miele accessories bearing the "ORIGINAL Miele" logo on the packaging. Only these will guarantee the optimum performance of your vacuum cleaner and the best possible cleaning results. Filter system (Fig. 32) Fine dust filter (HX FSF-2) Pre-filter Dust container d Dust container flap Please note that faults and damage caused by use of accessories which do not bear the "ORIGINAL Miele" logo on the packaging are not covered by the vacuum cleaner warranty. Optional accessories Original Miele accessories are available from the Miele Webshop, Miele Customer Service, and your Miele dealer. Original Miele accessories are identified by the "ORIGINAL Miele" logo on the packaging. 180 Activating the ComfortClean function (Fig. 33) Always run the interim cleaning function for the fine dust filter before emptying the dust container. You should also run it whenever the suction power begins to drop. This enables the vacuum cleaner to achieve the very best cleaning performance again right away. The fine dust filter is located in the lid of the dust container. Twist it counterclockwise by 3 180° turns. Use the recesses to help you.
-
 1
1 -
2
-
3
-
4
-
5
-
6
-
7
-
8
-
9
-
10
-
11
-
12
-
13
-
14
-
15
-
16
-
17
-
18
-
19
-
20
-
21
-
22
-
23
-
24
-
25
-
26
-
27
-
28
-
29
-
30
-
31
-
32
-
33
-
34
-
35
-
36
-
37
-
38
-
39
-
40
-
41
-
42
-
43
-
44
-
45
-
46
-
47
-
48
-
49
-
50
-
51
-
52
-
53
-
54
-
55
-
56
-
57
-
58
-
59
-
60
-
61
-
62
-
63
-
64
-
65
-
66
-
67
-
68
-
69
-
70
-
71
-
72
-
73
-
74
-
75
-
76
-
77
-
78
-
79
-
80
-
81
-
82
-
83
-
84
-
85
-
86
-
87
-
88
-
89
-
90
-
91
-
92
-
93
-
94
-
95
-
96
-
97
-
98
-
99
-
100
-
101
-
102
-
103
-
104
-
105
-
106
-
107
-
108
-
109
-
110
-
111
-
112
-
113
-
114
-
115
-
116
-
117
-
118
-
119
-
120
-
121
-
122
-
123
-
124
-
125
-
126
-
127
-
128
-
129
-
130
-
131
-
132
-
133
-
134
-
135
-
136
-
137
-
138
-
139
-
140
-
141
-
142
-
143
-
144
-
145
-
146
-
147
-
148
-
149
-
150
-
151
-
152
-
153
-
154
-
155
-
156
-
157
-
158
-
159
-
160
-
161
-
162
-
163
-
164
-
165
-
166
-
167
-
168
-
169
-
170
-
171
-
172
-
173
-
174
-
 175
175 -
 176
176 -
 177
177 -
 178
178 -
 179
179 -
 180
180 -
 181
181 -
 182
182 -
 183
183 -
 184
184 -
 185
185 -
186
-
187
-
188
-
189
-
190
-
191
-
192
-
193
-
194
-
195
-
196
-
197
-
198
-
199
-
200
 |
 |