Miele Triflex HX2 Operating instructions/Installation instructions - Page 178
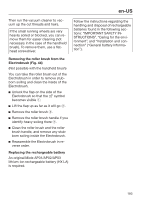
Electro Compact handheld brush, HX SEB Fig. 29, Additional battery HX LA, Battery charger cradle HX
 |
View all Miele Triflex HX2 manuals
Add to My Manuals
Save this manual to your list of manuals |
Page 178 highlights
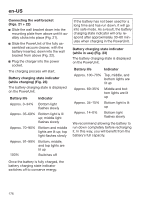
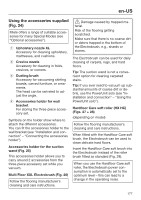
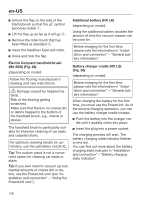
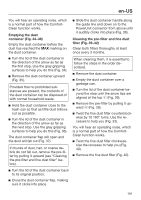
en-US Unlock the flap on the side of the Electrobrush so that the symbol becomes visible a. Lift the flap up as far as it will go b. Remove the roller brush that has been fitted as standard c. Insert the Hardfloor Care soft roller. Close and lock the flap. Electro Compact handheld brush (HX SEB) (Fig. 29) (depending on model) Follow the flooring manufacturer's cleaning and care instructions. Damage caused by trapped ma- terial. Risk of the flooring getting scratched. Make sure that there is no coarse dirt or debris trapped in the bottom of the handheld brush, e.g., shards or stones. The handheld brush is particularly suitable for intensive cleaning of car seats and carpeted stairs. For optimum cleaning results on upholstery, use the upholstery nozzle XL. Tip: The suction wand is not a convenient option for cleaning car seats or stairs. Tip: If you ever need to vacuum up substantial amounts of coarse dirt or debris, use the PowerUnit solo (see "Installation and connection" - "Using the PowerUnit solo"). Additional battery (HX LA) (depending on model) Using the additional battery doubles the amount of time the vacuum cleaner can be used for. Before charging for the first time, please note the information in "Installation and connection" - "General battery information". Battery charger cradle (HX LS) (Fig. 30) (depending on model) Before charging for the first time, please note the information in "Installation and connection" - "General battery information". When charging the battery for the first time, you must use the PowerUnit. As of the second charging operation, you can use the battery charger cradle instead. Push the battery into the charger cradle until it audibly clicks into place. Insert the plug into a power socket. The charging process will start. The battery charging state indicator flashes on the left. You can find out more about the battery charging state indicator in "Installation and connection" - "Battery charging state indicator". 178
-
 1
1 -
2
-
3
-
4
-
5
-
6
-
7
-
8
-
9
-
10
-
11
-
12
-
13
-
14
-
15
-
16
-
17
-
18
-
19
-
20
-
21
-
22
-
23
-
24
-
25
-
26
-
27
-
28
-
29
-
30
-
31
-
32
-
33
-
34
-
35
-
36
-
37
-
38
-
39
-
40
-
41
-
42
-
43
-
44
-
45
-
46
-
47
-
48
-
49
-
50
-
51
-
52
-
53
-
54
-
55
-
56
-
57
-
58
-
59
-
60
-
61
-
62
-
63
-
64
-
65
-
66
-
67
-
68
-
69
-
70
-
71
-
72
-
73
-
74
-
75
-
76
-
77
-
78
-
79
-
80
-
81
-
82
-
83
-
84
-
85
-
86
-
87
-
88
-
89
-
90
-
91
-
92
-
93
-
94
-
95
-
96
-
97
-
98
-
99
-
100
-
101
-
102
-
103
-
104
-
105
-
106
-
107
-
108
-
109
-
110
-
111
-
112
-
113
-
114
-
115
-
116
-
117
-
118
-
119
-
120
-
121
-
122
-
123
-
124
-
125
-
126
-
127
-
128
-
129
-
130
-
131
-
132
-
133
-
134
-
135
-
136
-
137
-
138
-
139
-
140
-
141
-
142
-
143
-
144
-
145
-
146
-
147
-
148
-
149
-
150
-
151
-
152
-
153
-
154
-
155
-
156
-
157
-
158
-
159
-
160
-
161
-
162
-
163
-
164
-
165
-
166
-
167
-
168
-
169
-
170
-
171
-
172
-
 173
173 -
 174
174 -
 175
175 -
 176
176 -
 177
177 -
 178
178 -
 179
179 -
 180
180 -
 181
181 -
 182
182 -
 183
183 -
184
-
185
-
186
-
187
-
188
-
189
-
190
-
191
-
192
-
193
-
194
-
195
-
196
-
197
-
198
-
199
-
200
 |
 |
