Miele Triflex HX2 Operating instructions/Installation instructions - Page 183
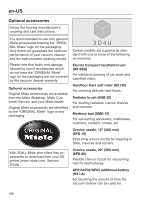
An original Miele AP01/AP02/AP03
 |
View all Miele Triflex HX2 manuals
Add to My Manuals
Save this manual to your list of manuals |
Page 183 highlights
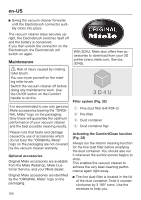
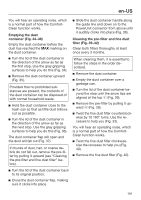
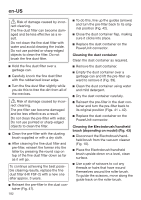
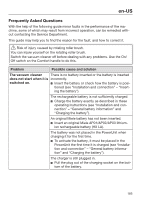
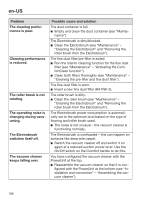
en-US Then run the vacuum cleaner to vacuum up the cut threads and hairs. If the small running wheels are very heavily soiled or blocked, you can remove them for easier cleaning (not necessary in the case of the handheld brush). To remove them, use a flathead screwdriver. Follow the instructions regarding the handling and disposal of rechargeable batteries found in the following sections: "IMPORTANT SAFETY INSTRUCTIONS", "Caring for the environment", and "Installation and connection" ("General battery information"). Removing the roller brush from the Electrobrush (Fig. 44) (Not possible with the handheld brush) You can take the roller brush out of the Electrobrush in order to remove stubborn soiling and clean the inside of the Electrobrush. Unlock the flap on the side of the Electrobrush so that the symbol becomes visible a. Lift the flap up as far as it will go b. Remove the roller brush c. Remove the roller brush handle if you identify heavy soiling there d. Clean the roller brush and the roller brush handle, and remove any stubborn soiling inside the Electrobrush. Reassemble the Electrobrush in reverse order. Replacing the rechargeable battery An original Miele AP01/AP02/AP03 lithium-ion rechargeable battery (HX LA) is required. 183
-
 1
1 -
2
-
3
-
4
-
5
-
6
-
7
-
8
-
9
-
10
-
11
-
12
-
13
-
14
-
15
-
16
-
17
-
18
-
19
-
20
-
21
-
22
-
23
-
24
-
25
-
26
-
27
-
28
-
29
-
30
-
31
-
32
-
33
-
34
-
35
-
36
-
37
-
38
-
39
-
40
-
41
-
42
-
43
-
44
-
45
-
46
-
47
-
48
-
49
-
50
-
51
-
52
-
53
-
54
-
55
-
56
-
57
-
58
-
59
-
60
-
61
-
62
-
63
-
64
-
65
-
66
-
67
-
68
-
69
-
70
-
71
-
72
-
73
-
74
-
75
-
76
-
77
-
78
-
79
-
80
-
81
-
82
-
83
-
84
-
85
-
86
-
87
-
88
-
89
-
90
-
91
-
92
-
93
-
94
-
95
-
96
-
97
-
98
-
99
-
100
-
101
-
102
-
103
-
104
-
105
-
106
-
107
-
108
-
109
-
110
-
111
-
112
-
113
-
114
-
115
-
116
-
117
-
118
-
119
-
120
-
121
-
122
-
123
-
124
-
125
-
126
-
127
-
128
-
129
-
130
-
131
-
132
-
133
-
134
-
135
-
136
-
137
-
138
-
139
-
140
-
141
-
142
-
143
-
144
-
145
-
146
-
147
-
148
-
149
-
150
-
151
-
152
-
153
-
154
-
155
-
156
-
157
-
158
-
159
-
160
-
161
-
162
-
163
-
164
-
165
-
166
-
167
-
168
-
169
-
170
-
171
-
172
-
173
-
174
-
175
-
176
-
177
-
 178
178 -
 179
179 -
 180
180 -
 181
181 -
 182
182 -
 183
183 -
 184
184 -
 185
185 -
 186
186 -
 187
187 -
 188
188 -
189
-
190
-
191
-
192
-
193
-
194
-
195
-
196
-
197
-
198
-
199
-
200
 |
 |
