NEC MT860 User Manual - Page 10
Part Names of the Projector - lamps
 |
UPC - 050927239212
View all NEC MT860 manuals
Add to My Manuals
Save this manual to your list of manuals |
Page 10 highlights
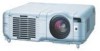
Part Names of the Projector Controls (See page E-7) Remote Sensor (See page E-11) Built-in Security Slot ( )* Remote Sensor (See page E-11) Image Sensor For Auto Focus and Auto Wall Color Correction. (See page E-47) NOTE: The Auto Focus and the Auto Wall Color Correction are not available on MT860. Ventilation (inlet) Carrying Handle Lens Adjustable Tilt Foot Lever (See page E-19) Adjustable Tilt Foot (See page E-19) Adjustable Tilt Foot Lever (See page E-19) Ventilation (outlet) Lens Cap Heated air is exhausted from here Adjustable Tilt Foot (See page E-19) * This security slot supports the MicroSaver® Security System. MicroSaver® is a registered trademark of Kensington Microware Inc. The logo is trademarked and owned by Kensington Microware Inc. Lamp Cover (See page E-53) PC Card Slot 1 PC Card Slot 2 Filter Cover (inlet) Remote Sensor (See page E-11) Stereo Speaker (5W) DVI IN G/Y AUDIO AUDIO B/Cb RGB2 IN RGB1 IN AUDIO R L/MONO S-VIDEO IN AUDIO USB(MOUSE/HUB) V H REMOTE AUDIO R L/MONO AUDIO OUT RGB OUT AUDIO R L/MONO VIDEO IN AUDIO 1 2 PC CONTROL AC IN Main Power Switch When you plug the supplied power cable into an active wall outlet and turn on the Main Power switch, the POWER indicator turns orange and the projector is in standby mode. (See page E-18) Remote Sensor (See page E-11) PC Card Eject Button AC Input Connect the supplied power cable's threepin plug here, and plug the other end into an active wall outlet. (See page E-17) Attaching the lens cap To attach the lens cap to the bottom with the supplied string and rivet: 1. Thread the string through the hole on the lens cap and then tie a knot in the string. Carrying the Projector Always carry your projector by the handle. Ensure that the power cable and any other cables connecting to video sources are disconnected before moving the projector. When moving the projector or when it is not in use, cover the lens with the lens cap. 2. Use the rivet to attach the string to the bottom of the projector. E-6
-
 1
1 -
2
-
3
-
4
-
 5
5 -
 6
6 -
 7
7 -
 8
8 -
 9
9 -
 10
10 -
 11
11 -
 12
12 -
 13
13 -
 14
14 -
 15
15 -
16
-
17
-
18
-
19
-
20
-
21
-
22
-
23
-
24
-
25
-
26
-
27
-
28
-
29
-
30
-
31
-
32
-
33
-
34
-
35
-
36
-
37
-
38
-
39
-
40
-
41
-
42
-
43
-
44
-
45
-
46
-
47
-
48
-
49
-
50
-
51
-
52
-
53
-
54
-
55
-
56
-
57
-
58
-
59
-
60
-
61
-
62
-
63
-
64
-
65
-
66
-
67
-
68
-
69
-
70
 |
 |
