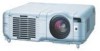
NEC MT860 User Manual - Page 26
Optimizing RGB Picture Automatically, Turning Up or Down Volume, Using the Laser Pointer - data projector
 |
UPC - 050927239212
View all NEC MT860 manuals
Add to My Manuals
Save this manual to your list of manuals |
Page 26 highlights
NOTE: During 3D Reform adjustment, "Aspect Ratio" and "Screen" may not be available. Should this happen, first reset the 3D Reform data and then do each setting. Second repeat the 3D Reform adjustment. Changing Aspect Ratio and/ or Screen setting can limit 3D Reform in its adjustable range. The adjustable ranges for 3D Reform are as follows: Horizontal Max ±35° approx. Vertical Max +50°/-25° approx. Turning Up or Down Volume Sound level from the speaker and the AUDIO OUT jack (RCA) on the projector can be adjusted. VOLUME * The following are conditions at the above maximum angle when all of the following are met • Image is projected in Wide (Zoom) • Resolution is XGA (SVGA on MT860) Higher resolution than XGA limits 3D Reform in its adjustable range. • Menu items should be set as follows: Aspect Ratio 4:3 Screen Type 4:3 • Horizontal and Vertical are adjusted separately. A combination of both adjustments limits 3D Reform in its adjustable range. • When "4:3 Fill" is selected in Aspect Ratio, "Cornerstone" and "Horizontal Keystone" are not available. Volume bar increase volume decrease volume Optimizing RGB Picture Automatically Adjusting the Image Using Auto Adjust Optimizing RGB image automatically Press the Auto Adjust button to optimize an RGB image automatically. [Poor picture] Using the Laser Pointer You can use the laser to draw your audience's attention to a red dot that you can place on any object. Press and hold the LASER button to activate the laser pointer. AUTO ADJ. [Normal picture] AUTO ADJ. VIDEO SELECT OFF PPOOWWEERR RGB ON LASER VIEWER PJ VOLUME HMEALGPNAIFSYPPOEICNTTERFRPEICEZ-MEU3TDEREFORM ZOOM SLIDE FOCUS FOLDER SLIDE LIST LASER Press the Auto Adjust button to fine-tune the computer image or to remove any vertical banding that might appear and to reduce video noise, dot interference or cross talk (this is evident when part of your image appears to be shimmering). This function adjusts the clock frequencies that eliminate the horizontal banding in the image. This function also adjusts the clock phase to reduce video noise, dot interference or cross talk. (This is evident when part of your image appears to be shimmering.) This adjustment may be necessary when you connect your computer for the first time. NOTE: • Some signals may not be displayed correctly or take time. • The Auto Adjust function does not work for component and video signal. • If the Auto Adjust operation cannot optimize the RGB signal, try to adjust Clock and Phase manually. See page E-39. • Pressing and holding the AUTO ADJUST button on the cabinet or AUTO ADJ button on the remote control for a minimum of 2 seconds will enable the Auto Focus* and the Auto Wall Color Correction* feature instead of the Auto Adjust feature. (The Auto Focus and the Auto Wall Color Correction features are not available on MT860.) E-22 CAUTION: • Do not look into the laser pointer while it is on. • Do not point the laser beam at a person.
-
 1
1 -
2
-
3
-
4
-
5
-
6
-
7
-
8
-
9
-
10
-
11
-
12
-
13
-
14
-
15
-
16
-
17
-
18
-
19
-
20
-
 21
21 -
 22
22 -
 23
23 -
 24
24 -
 25
25 -
 26
26 -
 27
27 -
 28
28 -
 29
29 -
 30
30 -
 31
31 -
32
-
33
-
34
-
35
-
36
-
37
-
38
-
39
-
40
-
41
-
42
-
43
-
44
-
45
-
46
-
47
-
48
-
49
-
50
-
51
-
52
-
53
-
54
-
55
-
56
-
57
-
58
-
59
-
60
-
61
-
62
-
63
-
64
-
65
-
66
-
67
-
68
-
69
-
70
 |
 |
