NEC MT860 User Manual - Page 42
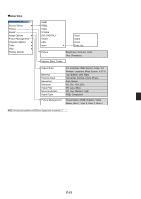
Picture not available for Viewer and LAN, Sound, Image Options
 |
UPC - 050927239212
View all NEC MT860 manuals
Add to My Manuals
Save this manual to your list of manuals |
Page 42 highlights
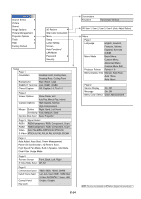
Entry Edit Command Picture (not available for Viewer and LAN) Adjusting Brightness, Contrast, Color, Hue, and Sharpness You can edit signals on the Entry List. Load Enables you to select a signal from the list. Store Enables you to store the currently projected signal. Cut Enables you to remove a selected signal from the list and place it on the "clipboard" in the projector. Copy Enables you to copy a selected signal from the list and place it on the "clipboard" in the projector. Paste Enables you to paste the signal placed on the "clipboard" to any other line of the list. To do this, select "Paste" and then select the line number you want to paste to. Last press ENTER. Edit Enables you to change source names or add source names to "More" in the Sorce Select. Source Name .. Enter a signal name. Up to 18 alphanumeric characters can be used. Input Terminal .. Change the input terminal. RGB1 and RGB2 are available for RGB signal; Video and S-Video are available for composite signal. Source List ...... Set signal selection method. Lock Set so that the selected signal cannot be deleted when "All Delete" is executed. Skip Set so that the selected signal will be skipped during auto search. When complete, select OK and press ENTER. To exit without storing setting, select Cancel. Select "Source Name" and press ENTER to display the Source Name Edit window. You can change source name on this window. Press [̄] to display the software keyboard, which you can enter alphanumeric characters. See page E-60 for the key function of the software keyboard. All Delete ....... This feature enables you to delete all the registered signals in the Entry List. The following buttons are not available for the currently projecting signals: 1) The Cut and Paste buttons on the Entry Edit Command screen 2) The Input Terminal button on the Entry Edit screen Brightness ...... Adjusts the brightness level or the back raster intensity. Contrast ......... Adjusts the intensity of the image according to the incoming signal. Color Increases or decreases the color saturation level (not valid for RGB). Hue Varies the color level from +/- green to +/-blue. The red level is used as reference. This adjustment is only valid for Video and Component inputs (not valid for RGB). Sharpness ..... Controls the detail of the image for Video (Not valid for RGB). Sound Controlling Volume, Bass and Treble. Adjusts the sound, bass and treble level of the projector speaker and AUDIO OUT (RCA). Image Options Selecting Aspect Ratio (not available for Viewer and LAN) Aspect Ratio allows you to select the best Aspect mode to display your source image. When screen size 4:3 is selected for the source, the following selections will display: 4:3 Standard 4:3 aspect Letter Box ...... Reduced to display the true aspect with black bor- ders on top and bottom Wide Screen .. Left & Right stretched with black borders on top and bottom Crop Left & Right stretched. Left & Right sides cut. Available for 4:3 only. When screen size 16:9 is selected for the source, the following selections will display: 4:3 Window .... Reduced to display the true aspect with black borders on right and left Letter Box ...... Standard 16:9 aspect Wide Screen .. Left and right stretched to display the true aspect 4:3 Fill Stretched to display in 16:9 aspect ratio NOTE: You can adjust image positions vertically for source with black borders. See page E-47 for setting image positions. Copyright Please note that using this projector for the purpose of commercial gain or the attraction of public attention in a venue such as a coffee shop or hotel and employing compression or expansion of the screen image with a "Aspect Ratio" or "Screen" setting may raise concern about the infringement of copyrights which are protected by copyright law. NOTE: During 3D Reform adjustment, "Aspect Ratio" may not be available. Should this happen, first reset the 3D Reform data and then do setting again. Second repeat the 3D Reform adjustment. Changing the aspect ratio can limit 3D Reform in its adjustable range. Input Signal Screen Type 4:3 Letterbox Squeeze 4:3 Screen 4:3 16:9 Screen 4:3 Window 4:3 Fill E-38 Letterbox Letterbox Wide Screen Crop Wide Screen
-
 1
1 -
2
-
3
-
4
-
5
-
6
-
7
-
8
-
9
-
10
-
11
-
12
-
13
-
14
-
15
-
16
-
17
-
18
-
19
-
20
-
21
-
22
-
23
-
24
-
25
-
26
-
27
-
28
-
29
-
30
-
31
-
32
-
33
-
34
-
35
-
36
-
 37
37 -
 38
38 -
 39
39 -
 40
40 -
 41
41 -
 42
42 -
 43
43 -
 44
44 -
 45
45 -
 46
46 -
 47
47 -
48
-
49
-
50
-
51
-
52
-
53
-
54
-
55
-
56
-
57
-
58
-
59
-
60
-
61
-
62
-
63
-
64
-
65
-
66
-
67
-
68
-
69
-
70
 |
 |
