Netgear AC2000 User Manual - Page 107
Choose a Wireless Network, Name SSID, Apply, Device Name, Get IP Address Dynamically, Get DNS
 |
View all Netgear AC2000 manuals
Add to My Manuals
Save this manual to your list of manuals |
Page 107 highlights
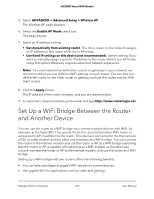
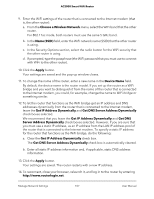
AC2000 Smart WiFi Router 9. Enter the WiFi settings of the router that is connected to the Internet modem (that is, the other router): a. From the Choose a Wireless Network menu, select the WiFi band that the other router. For 802.11ac mode, both routers must use the same 5 GHz band. b. In the Name (SSID) field, enter the WiFi network name (SSID) that the other router is using. c. In the Security Options section, select the radio button for the WiFi security that the other router is using. d. If prompted, type the passphrase (the WiFi password that you must use to connect with WiFi to the other router). 10. Click the Apply button. Your settings are saved and the pop-up window closes. 11. To change the name of the router, enter a new name in the Device Name field. By default, the device name is the router model. If you set up the router as a WiFi bridge and you want to distinguish it from the name of the router that is connected to the Internet modem, you could, for example, change the name to WiFi bridge or something similar. 12. To let the router that functions as the WiFi bridge get an IP address and DNS addresses dynamically from the router that is connected to the Internet modem, leave the Get IP Address Dynamically and Get DNS Server Address Dynamically check boxes selected. We recommend that you leave the Get IP Address Dynamically and Get DNS Server Address Dynamically check boxes selected. However, if you are sure that you must use a static IP address, us an IP address from the LAN IP address pool of the router that is connected to the Internet modem. To specify a static IP address for the router that functions as the WiFi bridge, do the following: a. Clear the Get IP Address Dynamically check box. The Get DNS Server Address Dynamically check box is automatically cleared. b. Enter all static IP address information and, if applicable, static DNS address information. 13. Click the Apply button. Your settings are saved. The router restarts with a new IP address. 14. To reconnect, close your browser, relaunch it, and log in to the router by entering http://www.routerlogin.net. Manage Network Settings 107 User Manual
-
 1
1 -
2
-
3
-
4
-
5
-
6
-
7
-
8
-
9
-
10
-
11
-
12
-
13
-
14
-
15
-
16
-
17
-
18
-
19
-
20
-
21
-
22
-
23
-
24
-
25
-
26
-
27
-
28
-
29
-
30
-
31
-
32
-
33
-
34
-
35
-
36
-
37
-
38
-
39
-
40
-
41
-
42
-
43
-
44
-
45
-
46
-
47
-
48
-
49
-
50
-
51
-
52
-
53
-
54
-
55
-
56
-
57
-
58
-
59
-
60
-
61
-
62
-
63
-
64
-
65
-
66
-
67
-
68
-
69
-
70
-
71
-
72
-
73
-
74
-
75
-
76
-
77
-
78
-
79
-
80
-
81
-
82
-
83
-
84
-
85
-
86
-
87
-
88
-
89
-
90
-
91
-
92
-
93
-
94
-
95
-
96
-
97
-
98
-
99
-
100
-
101
-
 102
102 -
 103
103 -
 104
104 -
 105
105 -
 106
106 -
 107
107 -
 108
108 -
 109
109 -
 110
110 -
 111
111 -
 112
112 -
113
-
114
-
115
-
116
-
117
-
118
-
119
-
120
-
121
-
122
-
123
-
124
-
125
-
126
-
127
-
128
-
129
-
130
-
131
-
132
-
133
-
134
-
135
-
136
-
137
-
138
-
139
-
140
-
141
-
142
-
143
-
144
-
145
-
146
-
147
-
148
-
149
-
150
-
151
-
152
-
153
-
154
-
155
-
156
-
157
-
158
-
159
-
160
-
161
-
162
-
163
-
164
-
165
-
166
-
167
-
168
-
169
-
170
-
171
-
172
-
173
 |
 |