Netgear DGN1000 DGN1000 Setup Manual - Page 22
Setup Wizard, Basic Settings, Apply, User's Manual - problem
 |
UPC - 606449066128
View all Netgear DGN1000 manuals
Add to My Manuals
Save this manual to your list of manuals |
Page 22 highlights
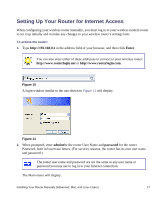
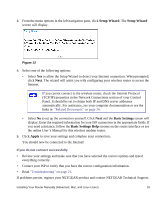
3. From the menu options in the left navigation pane, click Setup Wizard. The Setup Wizard screen will display. Figure 12 4. Select one of the following options: • Select Yes to allow the Setup Wizard to detect your Internet connection. When prompted, click Next. The wizard will assist you with configuring your wireless router to access the Internet. If you cannot connect to the wireless router, check the Internet Protocol (TCP/IP) properties in the Network Connections section of your Control Panel. It should be set to obtain both IP and DNS server addresses automatically. For assistance, see your computer documentation or see the links in "Related Documents" on page 34. • Select No to set up the connection yourself. Click Next and the Basic Settings screen will display. Enter the required information for your ISP connection in the appropriate fields. If you need assistance, follow the Basic Settings Help screens on the router interface or see the online User's Manual for this wireless modem router. 5. Click Apply to save your settings and complete your connection. You should now be connected to the Internet! If you do not connect successfully: • Review your settings and make sure that you have selected the correct options and typed everything correctly. • Contact your ISP to verify that you have the correct configuration information. • Read "Troubleshooting" on page 23. If problems persist, register your NETGEAR product and contact NETGEAR Technical Support. Installing Your Router Manually (Advanced, Mac, and Linux Users) 18
-
 1
1 -
2
-
3
-
4
-
5
-
6
-
7
-
8
-
9
-
10
-
11
-
12
-
13
-
14
-
15
-
16
-
 17
17 -
 18
18 -
 19
19 -
 20
20 -
 21
21 -
 22
22 -
 23
23 -
 24
24 -
 25
25 -
 26
26 -
 27
27 -
28
-
29
-
30
-
31
-
32
-
33
-
34
-
35
-
36
-
37
-
38
-
39
 |
 |
