Netgear DGN1000 DGN1000 Setup Manual - Page 25
Using Push 'N' Connect (WPS) to Add Wireless Devices, For a Windows PC - review
 |
UPC - 606449066128
View all Netgear DGN1000 manuals
Add to My Manuals
Save this manual to your list of manuals |
Page 25 highlights
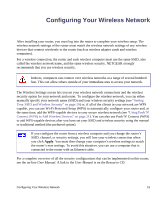
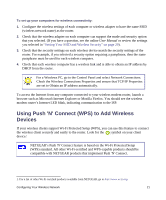
To set up your computers for wireless connectivity: 1. Configure the wireless settings of each computer or wireless adapter to have the same SSID (wireless network name) as the router. 2. Check that the wireless adapter on each computer can support the mode and security option that you selected. (If you have a question, see the online User Manual or review the settings you selected in "Setting Your SSID and Wireless Security" on page 20). 3. Check that the security settings on each wireless device match the security settings of the router. For example, if you selected a security option requiring a passphrase, then the same passphrase must be used for each wireless computer. 4. Check that each wireless computer has a wireless link and is able to obtain an IP address by DHCP from the router. For a Windows PC, go to the Control Panel and select Network Connections. Check the Wireless Connections Properties and ensure that TCP/IP Properties are set to Obtain an IP address automatically. To access the Internet from any computer connected to your wireless modem router, launch a browser such as Microsoft Internet Explorer or Mozilla Firefox. You should see the wireless modem router's Internet LED blink, indicating communication to the ISP. Using Push 'N' Connect (WPS) to Add Wireless Devices If your wireless clients support Wi-Fi Protected Setup (WPS), you can use this feature to connect the wireless client securely and easily to the router. Look for the symbol on your client device.1 NETGEAR's Push 'N' Connect feature is based on the Wi-Fi Protected Setup (WPS) standard. All other Wi-Fi-certified and WPS-capable products should be compatible with NETGEAR products that implement Push 'N' Connect. 1. For a list of other Wi-Fi-certified products available from NETGEAR, go to http://www.wi-fi.org. Configuring Your Wireless Network 21
-
 1
1 -
2
-
3
-
4
-
5
-
6
-
7
-
8
-
9
-
10
-
11
-
12
-
13
-
14
-
15
-
16
-
17
-
18
-
19
-
 20
20 -
 21
21 -
 22
22 -
 23
23 -
 24
24 -
 25
25 -
 26
26 -
 27
27 -
 28
28 -
 29
29 -
 30
30 -
31
-
32
-
33
-
34
-
35
-
36
-
37
-
38
-
39
 |
 |