Netgear DGN2000 DGN2000 Reference Manual - Page 46
Connecting Additional Wireless Client Devices After WPS Setup, Keep Existing Wireless Settings
 |
UPC - 606449058727
View all Netgear DGN2000 manuals
Add to My Manuals
Save this manual to your list of manuals |
Page 46 highlights
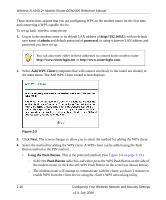
Wireless-N ADSL2+ Modem Router DGN2000 Reference Manual • If a connection is established, the modem router WPS screen displays a message confirming that the wireless client was successfully added to the wireless network. (The modem router has generated an SSID, implemented WPA/WPA2 wireless security [including a PSK security password] on the modem router, and has sent this configuration to the wireless client.) 5. Note the new SSID and WPA/WPA2 password for the wireless network. To access the Internet from any computer connected to your modem router, launch a browser such as Microsoft Internet Explorer. You should see the modem router's Internet LED blink, indicating communication to the ISP. Note: If no WPS-capable client devices are located during the 2-minute timeframe, security will not be implemented on the modem router. For more information about WPS, see "Displaying and Configuring Advanced WPS Settings" in Chapter 5. Connecting Additional Wireless Client Devices After WPS Setup You can add more WPS clients to your wireless network, or you can add a combination of WPS-enabled clients and clients without WPS. Note: Your wireless settings remain the same when you add another WPS-enabled client, as long as the Keep Existing Wireless Settings checkbox is selected in the Advanced WPS Settings screen (listed under the Advanced heading in the modem router main menu). If you clear this checkbox, when you add the client, a new SSID and passphrase will be generated, and all existing connected wireless clients will be disassociated and disconnected from the modem router. To add a wireless client device that is WPS-enabled: 1. Follow the procedures in "Using Push 'N' Connect (WPS) to Configure Your Wireless Network and Security" on page 2-17. 2. To view a list of all devices connected to your modem router (including wireless and Ethernetconnected), see "Viewing Attached Devices" in Chapter 4. For non-WPS clients, you cannot use the WPS setup procedures to add them to the wireless network. You must record, and then manually enter your security settings (see "Manually Configuring Your Wireless Security" on page 2-10). 2-20 Configuring Your Wireless Network and Security Settings v1.0, July 2008
-
 1
1 -
2
-
3
-
4
-
5
-
6
-
7
-
8
-
9
-
10
-
11
-
12
-
13
-
14
-
15
-
16
-
17
-
18
-
19
-
20
-
21
-
22
-
23
-
24
-
25
-
26
-
27
-
28
-
29
-
30
-
31
-
32
-
33
-
34
-
35
-
36
-
37
-
38
-
39
-
40
-
 41
41 -
 42
42 -
 43
43 -
 44
44 -
 45
45 -
 46
46 -
 47
47 -
 48
48 -
 49
49 -
 50
50 -
 51
51 -
52
-
53
-
54
-
55
-
56
-
57
-
58
-
59
-
60
-
61
-
62
-
63
-
64
-
65
-
66
-
67
-
68
-
69
-
70
-
71
-
72
-
73
-
74
-
75
-
76
-
77
-
78
-
79
-
80
-
81
-
82
-
83
-
84
-
85
-
86
-
87
-
88
-
89
-
90
-
91
-
92
-
93
-
94
-
95
-
96
-
97
-
98
-
99
-
100
-
101
-
102
-
103
-
104
-
105
-
106
-
107
-
108
-
109
-
110
-
111
-
112
-
113
-
114
-
115
-
116
-
117
-
118
-
119
-
120
-
121
-
122
-
123
-
124
-
125
-
126
 |
 |
