Netgear WBC502 Hardware Installation Guide - Page 40
Step 5: Mount the AirBridge, Mount the AirBridge to a wall
 |
View all Netgear WBC502 manuals
Add to My Manuals
Save this manual to your list of manuals |
Page 40 highlights
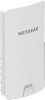
Insight Instant AirBridge WBC502 Hardware Installation Guide 5. If the signal strength is weak or moderately good, make sure that you place the AirBridge according to the following guidelines: • Place the AirBridge at a higher location. • Place the AirBridge in a direct, or near line of sight with the AirBridge at the main site. • Align the front panel of the AirBridge with the AirBridge at the main site. The AirBridges at both sites must face each other. 6. Test the network connectivity by doing one of the following: • Connect a WiFi client to the satellite. • Connect a computer to the LAN2 port on the satellite. At the detached site, if you can access the network at the main site and the Internet, the WiFi connection functions. Step 5: Mount the AirBridge Before you mount the AirBridge at a permanent location outside, configure your setup at your main test site and test your setup by establishing a WiFi connection at the permanent location (see Step 4: Set up the WiFi connection between a master and a satellite on page 36). You can mount the AirBridge on a flat wall or on a pole with a diameter of up to 4 inches (10 cm). It is helpful if the location enables easy access to the AirBridge. Select the optimal location for the equipment using the following guidelines: • The higher you place the AirBridge, the better the WiFi link quality. • For AirBridges, that are installed at different sites, do the following: - Provide a direct, or near line of sight between the AirBridges. - Align the front panels of the AirBridges so that they face each other. Mount the AirBridge to a wall The back panel of the AirBridge provides two holes for wall mounting. The AirBridge package includes two screws, two washers, and a paper screw placement guide. Make sure that the wall that you select allows the front panel of the AirBridge to face the front panel of the AirBridge at the main site. Installation 40 Hardware Installation Guide
-
 1
1 -
2
-
3
-
4
-
5
-
6
-
7
-
8
-
9
-
10
-
11
-
12
-
13
-
14
-
15
-
16
-
17
-
18
-
19
-
20
-
21
-
22
-
23
-
24
-
25
-
26
-
27
-
28
-
29
-
30
-
31
-
32
-
33
-
34
-
 35
35 -
 36
36 -
 37
37 -
 38
38 -
 39
39 -
 40
40 -
 41
41 -
 42
42 -
 43
43 -
 44
44 -
 45
45
 |
 |
