Netgear WGX102 WGX102v2 Reference Manual - Page 30
Logging On to Con the WGX102 - reset
 |
View all Netgear WGX102 manuals
Add to My Manuals
Save this manual to your list of manuals |
Page 30 highlights
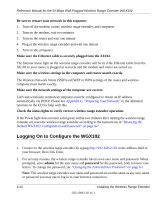
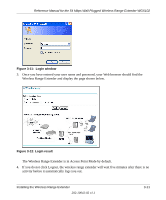
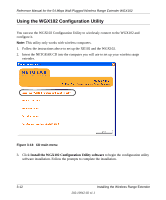
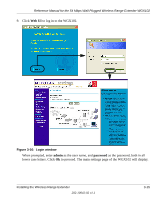
Reference Manual for the 54 Mbps Wall-Plugged Wireless Range Extender WGX102 Be sure to restart your network in this sequence: 1. Turn off the modem, router, wireless range extender, and computers 2. Turn on the modem, wait two minutes 3. Turn on the router and wait one minute 4. Plug in the wireless range extender and wait one minute 5. Turn on the computers. Make sure the Ethernet cable is securely plugged into the XE102. The Internet status light on the wireless range extender will be lit if the Ethernet cable from the XE102 to your router is plugged in securely and the modem and router are turned on. Make sure the wireless settings in the computer and router match exactly. The Wireless Network Name (SSID) and WEP or WPA settings of the router and wireless computer must match exactly. Make sure the network settings of the computer are correct. LAN and wirelessly connected computers must be configured to obtain an IP address automatically via DHCP. Please see Appendix C, "Preparing Your Network" or the animated tutorials on the CD for help with this. Check the status lights to verify correct wireless range extender operation. If the Power light does not turn solid green within two minutes after turning the wireless range extender on, reset the wireless range extender according to the instructions in "Restoring the Default WGX102 Configuration and Password" on page 8-7. Logging On to Configure the WGX102 1. Connect to the wireless range extender by typing http://192.168.0.101 in the address field of your browser, then click Enter. 2. For security reasons, the wireless range extender has its own user name and password. When prompted, enter admin for the user name and password for the password, both in lower case letters. To change the password, see "Changing the Administrator Password" on page 6-1. Note: The wireless range extender user name and password are not the same as any user name or password you may use to log in to your Internet connection. 3-10 Installing the Wireless Range Extender 202-10042-02 v1.1
-
 1
1 -
2
-
3
-
4
-
5
-
6
-
7
-
8
-
9
-
10
-
11
-
12
-
13
-
14
-
15
-
16
-
17
-
18
-
19
-
20
-
21
-
22
-
23
-
24
-
 25
25 -
 26
26 -
 27
27 -
 28
28 -
 29
29 -
 30
30 -
 31
31 -
 32
32 -
 33
33 -
 34
34 -
 35
35 -
36
-
37
-
38
-
39
-
40
-
41
-
42
-
43
-
44
-
45
-
46
-
47
-
48
-
49
-
50
-
51
-
52
-
53
-
54
-
55
-
56
-
57
-
58
-
59
-
60
-
61
-
62
-
63
-
64
-
65
-
66
-
67
-
68
-
69
-
70
-
71
-
72
-
73
-
74
-
75
-
76
-
77
-
78
-
79
-
80
-
81
-
82
-
83
-
84
-
85
-
86
-
87
-
88
-
89
-
90
-
91
-
92
-
93
-
94
-
95
-
96
-
97
-
98
-
99
-
100
-
101
-
102
-
103
-
104
-
105
-
106
-
107
-
108
-
109
-
110
-
111
-
112
-
113
-
114
-
115
-
116
-
117
-
118
-
119
-
120
-
121
-
122
-
123
-
124
-
125
-
126
-
127
-
128
-
129
-
130
-
131
-
132
-
133
-
134
-
135
-
136
-
137
-
138
-
139
-
140
-
141
-
142
-
143
-
144
-
145
-
146
-
147
-
148
-
149
-
150
-
151
-
152
-
153
-
154
-
155
-
156
-
157
-
158
-
159
-
160
-
161
-
162
-
163
-
164
-
165
-
166
-
167
-
168
-
169
 |
 |
