Nikon 25040 User Manual
Nikon 25040 - Coolpix 300 Digital Camera Manual
 |
UPC - 018208250400
View all Nikon 25040 manuals
Add to My Manuals
Save this manual to your list of manuals |
Nikon 25040 manual content summary:
- Nikon 25040 | User Manual - Page 1
- Nikon 25040 | User Manual - Page 2
- Nikon 25040 | User Manual - Page 3
DIGITAL CAMERA COOLPIX 300 User's Manual i - Nikon 25040 | User Manual - Page 4
observed to ensure safe operation of this product. Be sure to read all sections marked with this symbol before use. Caution The symbols in this manual indicate areas in which caution is needed to avoid damaging the product. Sections marked with this symbol should be read before use to ensure that - Nikon 25040 | User Manual - Page 5
and used in accordance with the instructions, may cause harmful interference to this device that are not expressly approved by Nikon Corporation may void the user's authority to supplied with your COOLPIX 300 (see page 4 of this manual) or the optional SS-E300 SCSI cable. Other interface cables - Nikon 25040 | User Manual - Page 6
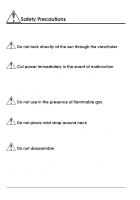
cause permanent visual impairment. Cut power immediately in the event of malfunction Should you notice smoke or an unusual smell coming from the camera or the optional AC adaptor, unplug the AC adaptor and remove the batteries immediately, taking care to avoid burns. Continued operation could result - Nikon 25040 | User Manual - Page 7
or to excessive heat or moisture. • Batteries are prone to leakage when fully discharged. To avoid damage to the camera, be sure to remove the batteries when no charge remains. • When the camera is used continuously for a long time on battery power, the batteries may become hot. When removing the - Nikon 25040 | User Manual - Page 8
's batteries or other small parts into their mouths. Do not walk while looking through viewfinder Walking while looking through the camera's viewfinder or while using the touch-panel display could result in a fall or other injury. Observe caution when operating the flash Using the flash close - Nikon 25040 | User Manual - Page 9
panel display. Using the viewfinder with the touch-panel display's cover closed saves battery power and allows you to support the camera with both hands, which prevents the camera from shaking and so blurring your photographs. When framing pictures through the viewfinder, close the touch-panel cover - Nikon 25040 | User Manual - Page 10
change the language of the display, follow the steps described in the second and third chapters of this manual ("Before You Begin" and "First Steps") to ready the camera and stylus and to turn the camera on. Using the stylus, touch OK in the lower right corner of the first menu that appears - Nikon 25040 | User Manual - Page 11
xxxxxxxx E G F J Select "E" xxxxxxxx [5] Note: In this illustration, "xxxxx..." is used in place of the characters that will actually be seen in the display. Turn the camera off. When you next turn the camera on, the information in the touch-panel display will be displayed in English. ix - Nikon 25040 | User Manual - Page 12
prohibition of copying or reproduction Note that simply being in possession of material which has been copied or reproduced by means of a digital camera may be punishable by law. Items prohibited by law from being copied or reproduced Do not copy or reproduce paper money, coins, securities - Nikon 25040 | User Manual - Page 13
of the COOLPIX 300 5 Attaching the Wrist Strap 6 A Guide to the Touch-Panel Display 7 Using the Stylus 9 Through the Viewfinder 11 Cautions 12 First Steps 15 Putting Batteries in Your Camera 15 Attaching the Optional AC Adaptor 17 Turning the Camera On 19 Checking the Battery Level 21 - Nikon 25040 | User Manual - Page 14
72 Display Options 73 Speaker Options 74 Macro Close-Up 75 Connections 77 Making a Serial Port Connection 77 Making a SCSI Connection 81 Caring for Your Camera 86 Cleaning 86 Storage 86 Troubleshooting 87 General problems 87 Error codes 95 Specifications 96 Index 98 xii - Nikon 25040 | User Manual - Page 15
Thank you for your purchase of a Nikon COOLPIX 300. The COOLPIX 300 combines a digital camera, memo tablet, and digital audio recording driven operation, and allows on-the-spot viewing of stored data using the camera's sophisticated play-back and slide-show features • Digital image sensing using a - Nikon 25040 | User Manual - Page 16
, "Caring for Your Camera" and "Troubleshooting," describe how to look after your COOLPIX 300 and what steps you can take should you encounter difficulties. Please read all instructions carefully to ensure that you get the most from your camera. Note: The illustrations in this manual are composites - Nikon 25040 | User Manual - Page 17
the package contains all the items listed below. Should you notice that anything is missing, contact your retailer immediately. Nikon COOLPIX 300 digital camera (1) Carrying case (1) Stylus (1) Wrist strap (1) Four AA alkaline batteries (4) Cloth (1) Before You Begin : What's in This Package - Nikon 25040 | User Manual - Page 18
SC-E300M serial (RS-232/ RS-422) cable for Macintosh SC-E300 serial (RS-232C) cable for PC (1) EG300 video cable (1) User's manual (this manual) Open Me First Envelope (1) Nikon View software and manual (1) 4 Before You Begin : What's in This Package - Nikon 25040 | User Manual - Page 19
Parts of the COOLPIX 300 Before You Begin : Parts of the COOLPIX 300 5 - Nikon 25040 | User Manual - Page 20
Wrist Strap Attach the wrist strap to the strap pin as shown below. Be sure to keep the strap on your wrist when carrying the camera. 6 Before You Begin : Attaching the Wrist Strap - Nikon 25040 | User Manual - Page 21
to most of the camera's functions and settings through a series of menus and icons. To view the touch-panel display, slide open the panel's protective cover. Note: When using your COOLPIX 300 with the touch-panel display open, hold the camera as shown below. Before You Begin : A Guide to the Touch - Nikon 25040 | User Manual - Page 22
keep the display free of fingerprints, avoid touching it with your hands. When the camera is on, you can save power by closing the touch-panel display. You will window [ 7] Status bar [ 8] MENU key [ 9] Next [10] Page down [11] ENTER key 8 Before You Begin : A Guide to the Touch Panel Display - Nikon 25040 | User Manual - Page 23
Using the Stylus The COOLPIX 300's touch-panel display is operated with a special telescoping stylus which fits into a compartment in the camera's body. To use the stylus, first remove it from its compartment and extend it as shown below. Caution: The compartment for the stylus is located - Nikon 25040 | User Manual - Page 24
's cover and return the stylus to its compartment, pushing it in until the black plastic cap at the top of the stylus latches with the camera's body. Note: The touch panel should be operated only with the stylus provided, as other objects might damage the display. Should the stylus be lost - Nikon 25040 | User Manual - Page 25
cm (5.5˝ - 9˝). The READY lamp, which indicates whether or not the camera is ready to take photographs, is located below the viewfinder eyepiece. [1] (normal mode) [3] READY lamp Note: The illustrations in this manual are composites. Photographs taken with the COOLPIX 300 may differ from those - Nikon 25040 | User Manual - Page 26
not touch the lens with your fingers The proper procedure for cleaning the camera's lens is described in "Caring for Your Camera." Do not cut power when the camera is on Do not unplug the camera or remove the batteries while the camera is on, or while data are being recorded or items deleted from - Nikon 25040 | User Manual - Page 27
produced by equipment such as radio transmitters or household television sets could interfere with the touch-panel display or otherwise adversely affect your camera's internal memory and functioning. Keep dry The COOLPIX 300 is not waterproof, and may malfunction if immersed in water or exposed to - Nikon 25040 | User Manual - Page 28
Batteries When you turn the camera on, check the battery level displayed in the start-up window to determine whether the days, the capacity of batteries tends to decrease. When taking pictures outside in cold weather, keep a spare set of warm batteries on hand. 14 Before You Begin : Cautions - Nikon 25040 | User Manual - Page 29
First Steps This section guides you through the steps you will take when using your COOLPIX 300 for the first time, from inserting the batteries or plugging in the optional AC adaptor to making your first photographs, memos, and recordings. Putting Batteries in Your Camera When putting new batteries - Nikon 25040 | User Manual - Page 30
Being careful not to catch your fingers in the latches, slide the battery cover back on until you hear the "click" made by the latches closing. 16 First Steps : Putting Batteries in Your Camera - Nikon 25040 | User Manual - Page 31
connector. Plug the AC adaptor into a power outlet. You are now ready to turn the camera on. Caution: Use only an adaptor authorized by Nikon for use with the COOLPIX 300 (three kinds of adaptor are available from Nikon: the EH-10, rated for circuits of 90-120V; the EH-10E, for use - Nikon 25040 | User Manual - Page 32
the AC adaptor depends on the country of use. Caution: Do not unplug the AC adaptor when the camera is on, or when data are being recorded or deleted from memory. Forcibly cutting power to the camera when in these circumstances could result in loss of data or in damage to the - Nikon 25040 | User Manual - Page 33
300 is turned on, the word "HELLO" will appear in the touch-panel display and the POWER, READY, and recording lamps will flash while the camera performs a brief initial check of its internal systems and power supply. Once this check is complete, the POWER lamp will glow steadily and the - Nikon 25040 | User Manual - Page 34
or by touching the display window with the stylus. The touch-panel display also reactivates automatically whenever the record button is pressed. To turn the camera off, slide and release the ON/OFF switch as shown above. The touch-panel display will briefly show the word "GOOD-BYE" on a blue - Nikon 25040 | User Manual - Page 35
battery level. Should the battery level fall to ten percent or less, you will need to replace the batteries as soon as possible. When the camera is in recording mode, battery level is shown iconically in the status bar of the touch panel display. [ 66] Battery level indicator Batteries fully - Nikon 25040 | User Manual - Page 36
) and the following warning will appear in the touch-panel display. BATTERIES ARE LOW CAMERA WILL POWER DOWN WITHIN 30 SECONDS Turn the camera off as quickly as possible (if no action is taken the camera will turn itself off automatically in thirty seconds) and replace the batteries before turning - Nikon 25040 | User Manual - Page 37
Setting the Time and Date When you turn on your camera for the first time, you will need to set the time and date. Open the touch-panel display and press the MENU key with the - Nikon 25040 | User Manual - Page 38
supply. Should you notice that the clock is running extremely late, this is probably a sign that the clock's battery needs to be replaced. Take the camera to your local Nikon representative for servicing. 24 First Steps : Setting the Time and Date - Nikon 25040 | User Manual - Page 39
recordings. This section gives a brief description of how to make a photograph after turning the camera on; more detailed information on changing the camera's settings may be found in the "Settings" chapter. For instructions on how to make memos or record sounds, refer "Creating Your First Memo" and - Nikon 25040 | User Manual - Page 40
will display a message warning you that memory is full (see "Troubleshooting"). Step 3 - Put the camera in recording mode You can only take photographs when the camera is in recording mode. The camera enters recording mode automatically ten seconds after having been turned on, or when you use the - Nikon 25040 | User Manual - Page 41
Step 4 - Check the camera's settings When the camera is in recording mode, a hand icon ( ) appears in the status bar at the bottom of the touch-panel's main window. Touching this icon with the - Nikon 25040 | User Manual - Page 42
panel display. Using the viewfinder with the touch-panel display's cover closed saves battery power and allows you to support the camera with both hands, which prevents the camera from shaking and so blurring your photographs. When framing pictures through the viewfinder, close the touch-panel cover - Nikon 25040 | User Manual - Page 43
Note: Be careful not to place your finger over the lens or flash window when taking photographs. Step 6 - Compose a photograph Frame your subject in the viewfinder (illustrated below) or in the touchpanel display. Note that as the touch-panel display shows the view directly through the lens, there - Nikon 25040 | User Manual - Page 44
-press the shutter release button Pressing the shutter release button down halfway causes a beep to sound once. The READY lamp will flash while the camera adjusts its auto exposure settings and charges the flash. half-press Note: You can skip this step when framing photographs in the viewfinder, as - Nikon 25040 | User Manual - Page 45
Step 8 - Take a photograph When the camera is ready to record an image, the READY lamp will glow steadily. You can now take a picture by pressing the shutter release button down the - Nikon 25040 | User Manual - Page 46
bar of the touch-panel display will go down by one. [ 65] Number of exposures remaining Note: After shutter has been released and the camera has finished transferring the photograph to memory, a flashing letter "M" will appear for a few seconds at the top left corner of the main window. While - Nikon 25040 | User Manual - Page 47
photographs and recordings, see "Annotating Photographs and Recordings" in the "Playback" section and "Taking Your First Photograph" immediately above. Step 1 - Put the camera in recording mode To create a memo, first turn your COOLPIX 300 on and enter recording mode as described in steps 1-3 of the - Nikon 25040 | User Manual - Page 48
Step 3 - Touch the main window with the stylus With the camera in recording mode, touch the main window of the touchpanel display once with the stylus. The main window will show a threecolor palette on a blue background. - Nikon 25040 | User Manual - Page 49
1017 SEC PICTURES 49 SET +SOUNDS OK Note: The above window will be displayed for about ten seconds after the camera has finished its initial check, after which time the camera will enter recording mode. To restore the status window, press the MENU button with the stylus and select STATUS from - Nikon 25040 | User Manual - Page 50
on sound settings). If there is no memory available when the camera is turned on, or if the camera runs out of memory while making a recording, the camera will display a message warning you that memory is full (see "Troubleshooting"). When this happens, you will need to transfer the data in - Nikon 25040 | User Manual - Page 51
the audio recorder. The COOLPIX 300 allows you to choose any one of three recording modes. Choosing Mode 1 links the camera's microphone to the shutter release button, causing the camera to make a recording of a fixed duration whenever you take a photograph (for details on setting the length of the - Nikon 25040 | User Manual - Page 52
when you are taking photographs. If you make a photograph with the sound recorder on, wait until the READY lamp glows steadily before moving the camera to a better position for recording. When you have finished making your recording, release the record button. Note: If you press and release the - Nikon 25040 | User Manual - Page 53
to view stored images and sounds, how to annotate stored items with memos or recordings, how to delete stored data, and how to connect the camera to a television set for on-screen viewing and playback. The Main Menu The COOLPIX 300's play-back functions are mostly accessible from the - Nikon 25040 | User Manual - Page 54
below). SET UP Brings up the setup menu (see "Settings"). STATUS Brings up the status window, which gives information on the state of the camera's battery and memory (for more information on the status window, see "First Steps"). The Playback Window Selecting PLAY BACK from the main menu brings - Nikon 25040 | User Manual - Page 55
a note mark ( ; the number to the right of the note mark shows the length of the recording rounded down to the nearest second). If the camera has been set to make an audio recording of a fixed length beginning when the shutter button is pressed, or if a sound recording has been added - Nikon 25040 | User Manual - Page 56
touching the thumbnail or indicator that marks the desired members of the combination. Suppose, for example, that you had made a photograph with the camera set to create an audio clip when the shutter was released, and then subsequently annotated this combination with a memo. Were you to touch the - Nikon 25040 | User Manual - Page 57
on a blue background and the selection will be played back from the camera's speaker. Pressing the ENTER key after the recording has finished will cause the on the image and the audio recording will be played back from the camera's speaker. While an item is played back, you can use the scroll - Nikon 25040 | User Manual - Page 58
the item to which you wish to add audio data. You can then make a recording as described in Step 5 of "Making Your First Recording" (the camera automatically selects Mode 2 as the recording mode when in playback mode). If the selected item is a photograph or memo, the recording you make will be - Nikon 25040 | User Manual - Page 59
Annotating Photographs and Recordings When playing back a single image or recording, you can annotate it by adding a memo or, if the item already contains a memo, you can make additions to an existing annotation. To add a memo to a photograph or recording, first play it back in the main window as - Nikon 25040 | User Manual - Page 60
Viewing Multiple Images Multiple photographs, memos, and recordings can be chosen for playback by selecting several items in succession. In the playback list, simply use the stylus to touch each of the items you wish to play back. If the items are not on the same page, select those items that are - Nikon 25040 | User Manual - Page 61
When more than four items are selected for simultaneous playback, only the first four items selected will be displayed. The remaining items can be viewed by using the scroll keys ( ) to move through the selected items. Touch the Next ( ) and Previous ( ) arrows to scroll through the selected - Nikon 25040 | User Manual - Page 62
bar contains the items listed below. LCD SPEAKER DISP ALL Choosing this command with the stylus allows you to select the language used in the camera's menus and dialogs, and to control the brightness of the TFT display. For more information on these topics, see "Display Options" in the "Settings - Nikon 25040 | User Manual - Page 63
Playback Options Selecting DISP from the status bar at the bottom of the playback window brings up the following menu. MENU PLAY DISP ON OFF DISPLAY 1 DISPLAY 2 DISPLAY 3 Using this menu, you can control what information appears when images and recordings are played back. When the display - Nikon 25040 | User Manual - Page 64
When you have finished changing the display setting, touch the ENTER key to put the changes into effect and return to the playback list, or the CANCEL key to return to the playback list without changing the display setting. 50 Playback : Playback Options - Nikon 25040 | User Manual - Page 65
items. The number in the top right corner of the display will diminish as the items are deleted, and when the process is complete the camera will return to the playback list. Selecting CANCEL cancels the operation and returns you to the playback list directly; the selected items are not deleted - Nikon 25040 | User Manual - Page 66
the items you have selected, you will need to back up those images or recordings you would like to keep before erasing them from the camera's memory. See "Connections" for information on transferring data to a computer for long-term storage. 52 Playback : Deleting Images and Recordings - Nikon 25040 | User Manual - Page 67
Slide Shows The COOLPIX 300 allows you to create a slide show from the images and recordings stored in the camera's memory. To use the slide-show function, select SLIDE SHOW from the main menu. A preview window similar to that shown below will appear in the - Nikon 25040 | User Manual - Page 68
When SLIDE SHOW is first selected from the main menu, the preview window will show the camera set to cycle once through all the items in memory in the order they were recorded, displaying each item for two seconds or, if the - Nikon 25040 | User Manual - Page 69
In this example you would press twice to change the number from "1" to "3." The first page of previews would then be as shown below. 1 [ 3] [ 10] 2 [ 2] [ 12] 3 [ 3] 4 [ 4] s [ 10] [ 2] REPEAT [ 1] CYCLE DEF In the example above, the slides will appear in the order 3-2-3-4.... Notice that - Nikon 25040 | User Manual - Page 70
item's associated number by touching it with the stylus and then press the DELETE key (note that this does not remove the item from the camera's memory; the item is merely removed from its current position in the preview list). To add an item to the preview list, press the Page - Nikon 25040 | User Manual - Page 71
of the audio clip. To change the number of times the camera repeats the slide show before returning to the preview window, select the minimum of one. When the number of cycles shows "1," pressing will set the camera to repeat the show continuously until the CANCEL key is pressed (the number of - Nikon 25040 | User Manual - Page 72
preview window. You can then touch the MENU key to return to the main menu. The current slide show settings will be saved in the camera's memory, to be recalled when you next choose SLIDE SHOW from the main menu. To preview all recordings in memory, including any that you may - Nikon 25040 | User Manual - Page 73
video channel. When you turn on the COOLPIX 300, the television should show the same picture that you see in the main window of the camera's touch panel display. Note: Unusual characters or graphics may be briefly displayed on the television screen when the COOLPIX 300 is turned on. This is - Nikon 25040 | User Manual - Page 74
COOLPIX 300's touch panel display will now be shown simultaneously on the television screen, and sound recordings played back when you use the camera's slide-show or playback functions will be broadcast over the television's speakers. Note: The version of the COOLPIX 300 shipped to countries which - Nikon 25040 | User Manual - Page 75
can be accessed from the setup menu. To view the setup menu, select SET UP from the camera's main menu (the main menu can be accessed by pressing the MENU key when the camera is in recording mode). MENU RECORDING PLAY BACK SLIDE SHOW SET UP STATUS Settings : The Setup Menu 61 - Nikon 25040 | User Manual - Page 76
shutter settings: single frame or continuous (see "Shooting Mode," below). This function can also be accessed by touching the shooting-mode icon when the camera is in recording mode (see "Taking Your First Photograph" in "First Steps"). SPEED LIGHT This item can be chosen to change the settings - Nikon 25040 | User Manual - Page 77
the time and date. See "Setting the Time and Date" in "First Steps." Selecting this function allows you to set the language used in the camera's windows and menus, and to control the brightness of the TFT display (see "Display Options," below). This function can also be accessed from the status - Nikon 25040 | User Manual - Page 78
of the main window of the touch-panel display. Single-frame When the camera is in single-frame mode, one photograph is taken each time the shutter display, each time the ENTER key is pressed). Continuous When the camera is in continuous mode, photographs are taken continuously one after another as - Nikon 25040 | User Manual - Page 79
settings list at the top right corner of the main window of the touch-panel display. Auto When the flash is set to "Auto," the camera's internal auto exposure circuitry will automatically activate the flash when lighting is poor. This setting is the best choice in most circumstances. Off When set - Nikon 25040 | User Manual - Page 80
be activated whenever the flash is used. Full-pressing the shutter release button will first activate the red-eye lamp. Approximately one second later, the camera will fire the main flash and record the image. Note: The COOLPIX 300's built-in flash has a range of 1.2 - 2.25 meters (3´11˝ - 7´5˝). To - Nikon 25040 | User Manual - Page 81
this loss of quality will be. The COOLPIX 300 offers the following two settings for image quality, each represented by a different icon when the camera is in recording mode. Choose image quality for each photograph according to the type of subject and your memory needs. Fine Setting the image - Nikon 25040 | User Manual - Page 82
When the camera is in recording mode, the current image quality setting can be determined by viewing the image quality icon displayed in the settings list. To change - Nikon 25040 | User Manual - Page 83
when the record or shutter-release buttons are pressed. On When the microphone is set to "On," sound can be recorded and stored in the camera's memory. The recording method used can be chosen from the sound mode menu (see below). To change the microphone's settings or to choose a new recording - Nikon 25040 | User Manual - Page 84
MODE 1 Choose MODE 1 to create photographs which incorporate an audio clip. When the camera is in Mode 1, pressing the shutter-release button to make a photograph simultaneously causes the camera to turn on the microphone and record an audio clip of fixed duration; the recording and photograph will - Nikon 25040 | User Manual - Page 85
recording when the record button is pressed once and continue until the record button is pressed a second time. This method allows you to set the camera on a desk or table to make recordings, freeing your hands for other work. Note, however, that seventeen minutes of sound data are enough to fill - Nikon 25040 | User Manual - Page 86
timer, touch the timer icon ( ) which appears in the settings list when the camera is in recording mode, or select SELF TIMER from the setup menu. The following MENU SETUP TIMER ON OFF When the timer is set to ON and the camera is in recording mode, the timer icon in the settings list will flash. - Nikon 25040 | User Manual - Page 87
the stylus. Note: When you choose a new language for the display, the change will not be put into effect until you have first turned the camera off. To adjust the brightness of the touch-panel display, use the arrow keys ( ) to select a value between one (darkest) and eight (brightest). Once - Nikon 25040 | User Manual - Page 88
selecting a menu item or pressing the shutter release button is performed. To turn this function on and off, or to set the volume of the camera's built-in speaker, choose SPEAKER from the setup menu or from the status bar in the playback list. The following menu will appear. MENU SETUP - Nikon 25040 | User Manual - Page 89
Macro Close-Up Macro close-up field-of-view The COOLPIX 300 provides a macro close-up function which allows you to take photographs at ranges of 14 - 23 cm (5.5˝ - 9˝). Use this function when you want to capture fine detail at close range. Use the macro close-up switch to select between macro - Nikon 25040 | User Manual - Page 90
-up, a flashing macro close-up icon ( ) will appear at the top left corner of the main window in recording mode. Be sure to return the camera to normal mode when taking photographs at ranges greater than 65 cm (two feet). Note: The flash is automatically set to "Off" when the - Nikon 25040 | User Manual - Page 91
View software package provided with this product. For information on using Nikon View software to view the contents of your camera's memory or to transfer recordings to disk for long-term storage, refer to the Nikon View User's Manual. Note: Although the COOLPIX 300 comes equipped with both serial - Nikon 25040 | User Manual - Page 92
connecting the COOLPIX 300 to your computer, you will need to adjust the camera's data rate to match that of the computer's serial port (for information your COOLPIX 300. Using the stylus, select a speed supported by your computer's serial port. 78 Connections : Making a Serial Port Connection - Nikon 25040 | User Manual - Page 93
camera to the computer's serial port, turn on the camera and other peripheral devices and then turn on the computer. If you have installed the Nikon View software provided with your COOLPIX 300, you will now be able to use the software to view the contents of the camera's memory - Nikon 25040 | User Manual - Page 94
Note: While your COOLPIX 300 is being controlled by Nikon View, the camera's touch-panel display will not respond to the stylus and the record and shutter-release buttons will be deactivated. Note: Remove the serial cable from the camera and computer only after both devices have been turned off. - Nikon 25040 | User Manual - Page 95
Making a SCSI Connection If your computer supports SCSI, you can achieve high-speed data transfer using the optional SS-E300 SCSI cable available separately from Nikon. This section describes how to set your camera's SCSI ID and how to connect your camera to a computer using the SS-E300. Setting the - Nikon 25040 | User Manual - Page 96
you have chosen an SCSI ID for the COOLPIX 300, use the stylus to choose a setting for the camera's built-in terminator. Because the COOLPIX 300 has only one SCSI connector, the camera will be the last item in the SCSI chain. In most circumstances, therefore, the terminator should be set to - Nikon 25040 | User Manual - Page 97
computer, are turned off. Open the cover that protects your camera's SCSI and serial connectors (the cover is labeled "DIGITAL") and connect the optional SCSI cable as shown below. Be sure to use only the SS-E300 cable, available separately from Nikon as part of the SCSI Kit. Attach the other end - Nikon 25040 | User Manual - Page 98
to male D-sub 25-pin adaptor (SSAD1) for connection to Macintosh computers. If you are connecting your camera to a device with half-pitch or 25-pin connector, attach the appropriate adaptor to the camera's SCSI cable as shown below. Note: The COOLPIX 300 does not provide termination power (note that - Nikon 25040 | User Manual - Page 99
or to transfer images and recordings to disk for longterm storage. Refer to the Nikon View User's Manual. Note: While your COOLPIX 300 is being controlled by Nikon View, the camera's touch-panel display will not respond to the stylus and the record and shutter-release buttons will be deactivated - Nikon 25040 | User Manual - Page 100
in a dry, well-ventilated environment, away from electronic equipment such as televisions or radios which produce strong magnetic fields. Do not store your camera where the temperature exceeds 60°C (140°F) or goes below -20°C (-4°F), or where the humidity exceeds 60%. If you are not going to use - Nikon 25040 | User Manual - Page 101
Troubleshooting If you should notice any problems with your COOLPIX 300, check the list below before consulting your retailer or Nikon representative. General problems Nothing shows in the touch-panel display Checklist: • Is the camera in sleep mode? Touch the main window with the stylus to - Nikon 25040 | User Manual - Page 102
for more than three seconds after the camera is turned on). The following screen will appear in the display. Red square Note: If the camera is turned off when the calibration screen is displayed, the screen will appear again when the camera is next turned on. 88 Troubleshooting : General Problems - Nikon 25040 | User Manual - Page 103
power off automatically while the calibration screen is displayed. You should avoid leaving the camera on for extended periods while it is in calibration mode. The touch-panel display is display with a soft, dry cloth as described in "Caring for Your Camera." Troubleshooting : General Problems 89 - Nikon 25040 | User Manual - Page 104
is full. The camera can still be used to play back items stored in memory, but you will not be able store further images or sound recordings until you have deleted one or more items from memory as described in "Deleting Images and Recordings from Memory." 90 Troubleshooting : General Problems - Nikon 25040 | User Manual - Page 105
Menu"). If the battery level is low, before using the flash you will need to replace the batteries as described in "Putting Batteries in Your Camera." Troubleshooting : General Problems 91 - Nikon 25040 | User Manual - Page 106
: The camera is in setup mode • Close the display cover to return the camera to recording mode. Indication: READY lamp is flickering • The camera is currently recording a photograph. Wait until the READY lamp glows steadily before making a sound recording. 92 Troubleshooting : General Problems - Nikon 25040 | User Manual - Page 107
the camera. Your television will not broadcast sounds when audio data are played back • Be sure that the audio lead on the camera's AV cable is correctly connected to the television's or VCR's audio jack. See "Connecting the COOLPIX 300 to a Television Set." Troubleshooting : General Problems 93 - Nikon 25040 | User Manual - Page 108
that the data transfer rate you have chosen is supported by your computer, and that the computer's port settings are "8-bit, no parity, one stop bit." • Is Nikon View properly installed on your computer? Consult the documentation provided with the software. 94 Troubleshooting : General Problems - Nikon 25040 | User Manual - Page 109
code will appear in the main window of the touch-panel display. ERROR = xxxx To clear the display, turn the camera off and then on again. If the code is still displayed when the camera is turned back on, contact your retailer or Nikon representative for servicing. Troubleshooting : Error Codes 95 - Nikon 25040 | User Manual - Page 110
sensor: Resolution: Sensitivity: Lens: Optical viewfinder: Magnification: Field of view: Display: White balance: Metering system: Exposure control: 96 Digital camera combining digital audio recording system and electronic memo with pen input Any combination of still photographs, audio data, and - Nikon 25040 | User Manual - Page 111
Shutter: Speed: Modes: Charge-coupled electronic shutter 1/30 - 1/2,500 sec. Single frame, continuous Built-in flash: Guide number 9 (IS0 100, m) Flash control: Automatic, controlled by external photocell with a range of 1.2 - 2.25 meters (1.3 - 2.46 yards) Settings: Automatic, on, off Red - Nikon 25040 | User Manual - Page 112
gain control 1 AV cable 59 AV OUT 6, 59 B Batteries iv, v, 3, 14, 86, 87 battery level 21-22 low battery warning 22 putting batteries in your camera 15- 16 Battery cover 15, 16 Battery level indicator 21, 27 C CANCEL key 8 Carrying case 3, 13 Cautions ii, 12-14 Charge-coupled device (CCD) 1, 96 - Nikon 25040 | User Manual - Page 113
to 45 annotating photographs and audio clips 45 creating 33-34 viewing 42-43 MENU key 8, 39 Microphone 6, 38, 69, 92, 97 MODE 38 N Next 8 Nikon View 4, 79, 85, 94 Note mark 41, 53 NTSC 60, 93 Number of exposures remaining 26, 32, 68 O ON/OFF switch 6, 19, 20 P Page down - Nikon 25040 | User Manual - Page 114
, 12, 13, 86, 87 adjusting brightness of 73 framing photographs in vii, 29-30 language of viii-ix, 73 main window 8 Troubleshooting 87-95 Turning the camera off 20 Turning the camera on 19 V Video cable. See AV cable Viewfinder iv, vi, 6, 11, 30, 86, 96 framing photographs in vii, 29-32 W Wrist - Nikon 25040 | User Manual - Page 115
House, 380 Richmond Road, Kingston, Surrey KT2 5PR, UK déclarons que ce produit Nom du produit: Nikon Digital Camera E300, AC Adaptor EH-10E Nom du fabricant: Nikon Corporation Adresse du fabricant: Fuji Bldg., 2-3, Marunouchi 3-chome, Chiyoda-ku, Tokyo 100, Japon est conforme aux normes - Nikon 25040 | User Manual - Page 116
380 Richmond Road, Kingston, Surrey KT2 5PR, UK erklären hiermit, daß das folgende Produkt Produktbezeichnung: Nikon Digital Camera E300, AC Adaptor EH-10E Name des Herstellers: Nikon Corporation Anschrift des Herstellers: Fuji Bldg., 2-3, Marunouchi 3-chome, Chiyoda-ku, Tokyo 100, Japan den
-
 1
1 -
 2
2 -
 3
3 -
 4
4 -
 5
5 -
 6
6 -
 7
7 -
8
-
9
-
10
-
11
-
12
-
13
-
14
-
15
-
16
-
17
-
18
-
19
-
20
-
21
-
22
-
23
-
24
-
25
-
26
-
27
-
28
-
29
-
30
-
31
-
32
-
33
-
34
-
35
-
36
-
37
-
38
-
39
-
40
-
41
-
42
-
43
-
44
-
45
-
46
-
47
-
48
-
49
-
50
-
51
-
52
-
53
-
54
-
55
-
56
-
57
-
58
-
59
-
60
-
61
-
62
-
63
-
64
-
65
-
66
-
67
-
68
-
69
-
70
-
71
-
72
-
73
-
74
-
75
-
76
-
77
-
78
-
79
-
80
-
81
-
82
-
83
-
84
-
85
-
86
-
87
-
88
-
89
-
90
-
91
-
92
-
93
-
94
-
95
-
96
-
97
-
98
-
99
-
100
-
101
-
102
-
103
-
104
-
105
-
106
-
107
-
108
-
109
-
110
-
111
-
112
-
113
-
114
-
115
-
116
 |
 |