Nikon Coolpix 2000 User Manual - Page 42
Making the Connection: Connecting to Your Computer, Install Nikon View 5, Use a Reliable Power Source - cable
 |
UPC - 000308071016
View all Nikon Coolpix 2000 manuals
Add to My Manuals
Save this manual to your list of manuals |
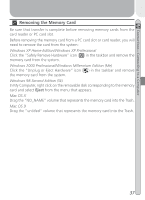
Page 42 highlights
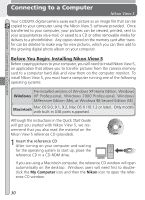
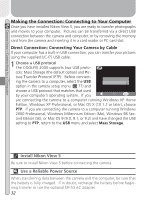
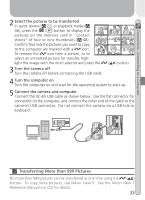
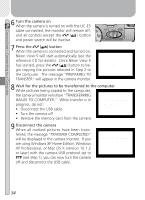
Connections-Connecting to a Computer Making the Connection: Connecting to Your Computer Once you have installed Nikon View 5, you are ready to transfer photographs and movies to your computer. Pictures can be transferred via a direct USB connection between the camera and computer, or by removing the memory card from the camera and inserting it in a card reader or PC card slot. Direct Connection: Connecting Your Camera by Cable If your computer has a built-in USB connection, you can transfer your pictures using the supplied UC-E5 USB cable. 1 Choose a USB protocol The COOLPIX 2000 supports two USB proto- USB cols: Mass Storage (the default option) and Pic- ture Transfer Protocol (PTP). Before connecting the camera to a computer, select the USB option in the camera setup menu ( 77) and PTP Mass Storage choose a USB protocol that matches that used by your computer's operating system. If you BK Set OFF are connecting the camera to a computer running Windows XP Home Edition, Windows XP Professional, or Mac OS X (10.1.2 or later), choose PTP. If you are connecting the camera to a computer running Windows 2000 Professional, Windows Millennium Edition (Me), Windows 98 Sec- ond Edition (SE), or Mac OS 9 (9.0, 9.1, or 9.2) and have changed the USB setting to PTP, return to the USB menu and select Mass Storage. Install Nikon View 5 Be sure to install Nikon View 5 before connecting the camera. Use a Reliable Power Source When transferring data between the camera and the computer, be sure that the battery is fully charged. If in doubt, recharge the battery before beginning transfer or use the optional EH-53 AC adapter. 32
-
 1
1 -
2
-
3
-
4
-
5
-
6
-
7
-
8
-
9
-
10
-
11
-
12
-
13
-
14
-
15
-
16
-
17
-
18
-
19
-
20
-
21
-
22
-
23
-
24
-
25
-
26
-
27
-
28
-
29
-
30
-
31
-
32
-
33
-
34
-
35
-
36
-
 37
37 -
 38
38 -
 39
39 -
 40
40 -
 41
41 -
 42
42 -
 43
43 -
 44
44 -
 45
45 -
 46
46 -
 47
47 -
48
-
49
-
50
-
51
-
52
-
53
-
54
-
55
-
56
-
57
-
58
-
59
-
60
-
61
-
62
-
63
-
64
-
65
-
66
-
67
-
68
-
69
-
70
-
71
-
72
-
73
-
74
-
75
-
76
-
77
-
78
-
79
-
80
-
81
-
82
-
83
-
84
-
85
-
86
-
87
-
88
-
89
-
90
-
91
-
92
-
93
-
94
-
95
-
96
-
97
-
98
-
99
-
100
-
101
-
102
-
103
-
104
 |
 |