Nikon Coolpix 2000 User Manual - Page 44
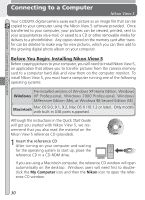
are using Windows XP Home Edition, Windows, XP Professional, or Mac OS X version 10.1.2
 |
UPC - 000308071016
View all Nikon Coolpix 2000 manuals
Add to My Manuals
Save this manual to your list of manuals |
Page 44 highlights
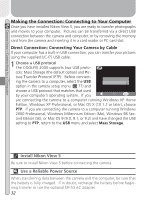
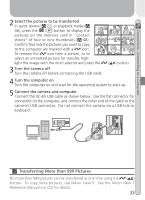
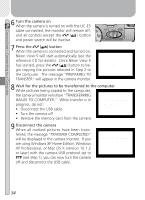
Connections-Connecting to a Computer 6 Turn the camera on When the camera is turned on with the UC-E5 cable connected, the monitor will remain off, and all controls except the ( ) button and power switch will be inactive. 7 Press the ( ) button When the camera is connected and turned on, Nikon View 5 will start automatically (see the reference CD for details). Once Nikon View 5 has started, press the ( ) button to begin copying the pictures selected in Step 2 to the computer. The message "PREPARING TO TRANSFER" will appear in the camera monitor. PREPARING TO TRANSFER 8 Wait for the pictures to be transferred to the computer While pictures being copied to the computer, the camera monitor will show "TRANSFERRING IMAGE TO COMPUTER." While transfer is in progress, do not: • Disconnect the USB cable TRANSFERRING IMAGE TO COMPUTER • Turn the camera off • Remove the memory card from the camera 9 Disconnect the camera When all marked pictures have been transferred, the message "TRANSFER COMPLETED" will be displayed in the camera monitor. If you are using Windows XP Home Edition, Windows XP Professional, or Mac OS X (version 10.1.2 or later) with the camera USB protocol set to PTP (see Step 1), you can now turn the camera off and disconnect the USB cable. TRANSFER COMPLETED 34
-
 1
1 -
2
-
3
-
4
-
5
-
6
-
7
-
8
-
9
-
10
-
11
-
12
-
13
-
14
-
15
-
16
-
17
-
18
-
19
-
20
-
21
-
22
-
23
-
24
-
25
-
26
-
27
-
28
-
29
-
30
-
31
-
32
-
33
-
34
-
35
-
36
-
37
-
38
-
 39
39 -
 40
40 -
 41
41 -
 42
42 -
 43
43 -
 44
44 -
 45
45 -
 46
46 -
 47
47 -
 48
48 -
 49
49 -
50
-
51
-
52
-
53
-
54
-
55
-
56
-
57
-
58
-
59
-
60
-
61
-
62
-
63
-
64
-
65
-
66
-
67
-
68
-
69
-
70
-
71
-
72
-
73
-
74
-
75
-
76
-
77
-
78
-
79
-
80
-
81
-
82
-
83
-
84
-
85
-
86
-
87
-
88
-
89
-
90
-
91
-
92
-
93
-
94
-
95
-
96
-
97
-
98
-
99
-
100
-
101
-
102
-
103
-
104
 |
 |
