Nokia 6820 User Guide - Page 97
Saving multiple numbers and text items per name, Details, Options
 |
View all Nokia 6820 manuals
Add to My Manuals
Save this manual to your list of manuals |
Page 97 highlights
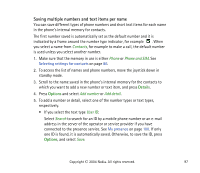
Saving multiple numbers and text items per name You can save different types of phone numbers and short text items for each name in the phone's internal memory for contacts. The first number saved is automatically set as the default number and it is indicated by a frame around the number type indicator, for example . When you select a name from Contacts, for example to make a call, the default number is used unless you select another number. 1. Make sure that the memory in use is either Phone or Phone and SIM. See Selecting settings for contacts on page 96. 2. To access the list of names and phone numbers, move the joystick down in standby mode. 3. Scroll to the name saved in the phone's internal memory for the contacts to which you want to add a new number or text item, and press Details. 4. Press Options and select Add number or Add detail. 5. To add a number or detail, select one of the number types or text types, respectively. • If you select the text type User ID: Select Search to search for an ID by a mobile phone number or an e-mail address in the server of the operator or service provider if you have connected to the presence service. See My presence on page 100. If only one ID is found, it is automatically saved. Otherwise, to save the ID, press Options, and select Save. Copyright © 2004 Nokia. All rights reserved. 97
-
 1
1 -
2
-
3
-
4
-
5
-
6
-
7
-
8
-
9
-
10
-
11
-
12
-
13
-
14
-
15
-
16
-
17
-
18
-
19
-
20
-
21
-
22
-
23
-
24
-
25
-
26
-
27
-
28
-
29
-
30
-
31
-
32
-
33
-
34
-
35
-
36
-
37
-
38
-
39
-
40
-
41
-
42
-
43
-
44
-
45
-
46
-
47
-
48
-
49
-
50
-
51
-
52
-
53
-
54
-
55
-
56
-
57
-
58
-
59
-
60
-
61
-
62
-
63
-
64
-
65
-
66
-
67
-
68
-
69
-
70
-
71
-
72
-
73
-
74
-
75
-
76
-
77
-
78
-
79
-
80
-
81
-
82
-
83
-
84
-
85
-
86
-
87
-
88
-
89
-
90
-
91
-
 92
92 -
 93
93 -
 94
94 -
 95
95 -
 96
96 -
 97
97 -
 98
98 -
 99
99 -
 100
100 -
 101
101 -
 102
102 -
103
-
104
-
105
-
106
-
107
-
108
-
109
-
110
-
111
-
112
-
113
-
114
-
115
-
116
-
117
-
118
-
119
-
120
-
121
-
122
-
123
-
124
-
125
-
126
-
127
-
128
-
129
-
130
-
131
-
132
-
133
-
134
-
135
-
136
-
137
-
138
-
139
-
140
-
141
-
142
-
143
-
144
-
145
-
146
-
147
-
148
-
149
-
150
-
151
-
152
-
153
-
154
-
155
-
156
-
157
-
158
-
159
-
160
-
161
-
162
-
163
-
164
-
165
-
166
-
167
-
168
-
169
-
170
-
171
-
172
-
173
-
174
-
175
-
176
-
177
-
178
-
179
 |
 |
