Nokia 9290 PC Suite Guide
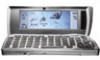
Nokia 9290 Manual
 |
View all Nokia 9290 manuals
Add to My Manuals
Save this manual to your list of manuals |
Nokia 9290 manual content summary:
- Nokia 9290 | PC Suite Guide - Page 1
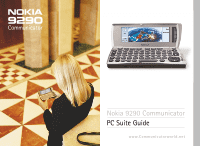
Nokia 9290 Communicator PC Suite Guide www.Communicatorworld.net - Nokia 9290 | PC Suite Guide - Page 2
- Nokia 9290 | PC Suite Guide - Page 3
your PC 32 Administrator Suite Main view 34 To connect the Nokia 9290 Communicator 35 To create a new connection 36 To define default connections 37 Internet access point settings 38 E-mail settings 39 WAP settings 40 SMS settings 41 Personal data items File operations 42 45 1 - Nokia 9290 | PC Suite Guide - Page 4
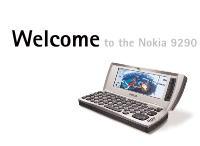
Welcome to the Nokia 9290 - Nokia 9290 | PC Suite Guide - Page 5
Nokia 9290 Communicator This guide explains how to install the PC connectivity software on a compatible PC, how to connect your Nokia 9290 Communicator to the PC and how to use the connectivity programs. You can connect your Nokia 9290 Communicator to a compatible PC with the PC Suite for Nokia 9290 - Nokia 9290 | PC Suite Guide - Page 6
a PC. • Back up and synchronize manually, at predefined times or on every connect. • Copy, move and convert files between the devices with Windows Explorer. • Copy phone book and calendar information from other Nokia phones to the Nokia 9290 Communicator. For more information on compatibility issues - Nokia 9290 | PC Suite Guide - Page 7
Nokia 9290 Communicator in the "Software for PC" section. Select the program and click Install. The installation wizard will guide you through the installation process. Tip: You can find the online help in the Help menu of the PC Suite main window. The online help also includes a troubleshooting - Nokia 9290 | PC Suite Guide - Page 8
disks" and "Problems with connection" online help titles for details. 6 Tip: You can also use the cable and infrared connections with the Advanced Desktop Stand DCH-10. For more information, see Accessories Guide. Tip: PC folders containing information about your Nokia 9290 Communicator will also - Nokia 9290 | PC Suite Guide - Page 9
, contacts or e-mail can be updated to the PC or Nokia 9290 Communicator that requires the update. For more information, see online help using the index keywords Online and Offline. Tip: You can also use the optional desktop stand for easy PC connectivity. See the Accessories Guide for details. 7 - Nokia 9290 | PC Suite Guide - Page 10
Connection status The icon on the right side of the status bar and on the Windows taskbar displays the connection status as follows: • Disconnected • Transferring Data • Connected For more information, see online help using the index keyword Connection icon. 8 - Nokia 9290 | PC Suite Guide - Page 11
and select Programs> Windows Explorer to browse, move, copy, delete and rename Nokia 9290 Communicator files and folders the same way as you would manage your PC's files and folders. Right-click the Nokia 9290 Communicator icon, drive, folder or file and select Properties to view information about - Nokia 9290 | PC Suite Guide - Page 12
: Currently open application Toolbar shortcuts to menu options Menu commands Application bar Application area Figure 1 Information about the selected command The name of the connected Nokia 9290 Communicator Connection status 10 - Nokia 9290 | PC Suite Guide - Page 13
88xx phones, Nokia 9110/9110i Communicator, Outlook 97/98/2000 and Palm organizers to the Nokia 9290 Communicator. Administrator Suite - Lets you configure the settings of your Nokia 9290 Communicator with your PC. You can find the Upgrade software and the Administrator Suite on the sales package - Nokia 9290 | PC Suite Guide - Page 14
can prevent loss of data in case your Nokia 9290 Communicator is lost, stolen or the memory is reset. For more detailed information about backing up, see online help using the index keyword Backing up. Using Task Scheduler, you can run a backup task manually or automate the backup process. To open - Nokia 9290 | PC Suite Guide - Page 15
step 6. To change them, click Advanced. 5 In Advanced settings, select the Nokia 9290 Communicator drives that you want to back up and the number Click Finish to complete the task creation. To back up your Nokia 9290 Communicator manually 1 Click the Task Scheduler icon on the application bar. 2 - Nokia 9290 | PC Suite Guide - Page 16
purpose of Archive Manager is to restore files from your PC if you have lost all data on your Nokia 9290 Communicator. With the help of Archive Manager, you can also review and restore selected previously backed-up files. For more detailed information about restoring files, see online help using the - Nokia 9290 | PC Suite Guide - Page 17
of the data on a memory card and/or the internal memory of your Nokia 9290 Communicator and you want to restore a full backed-up version of data. 1 Click card before file restoration. Formatting is recommended to prevent future problems of possibly corrupted data left in internal memory or memory - Nokia 9290 | PC Suite Guide - Page 18
To restore selected files 1 Select the files you want to restore from the list. Press the Ctrl and Shift keys to select multiple files. 2 Click Restore Selected. Restoring starts and a dialog box indicates the status with a progress bar. You will be notified when the restoration has been completed. - Nokia 9290 | PC Suite Guide - Page 19
-down box. 5 Click Find to start the search. Matching files are added to the list as they are found. 6 To reset the list of found files and start again, click Reset list. To restore all or some of the found files, see "To restore selected files" on page 16. List views You - Nokia 9290 | PC Suite Guide - Page 20
contacts up-to-date with your PC address book. With Task Scheduler you can automate important repetitive tasks like file synchronization between the Nokia 9290 Communicator and the PC or backing up. For information about taking backups, see "Backups" on page 12. To open the Task Scheduler, click the - Nokia 9290 | PC Suite Guide - Page 21
dialog box, select the Nokia 9290 Communicator file to be synchronized. Click Browse to locate the file, if necessary. 5 Click Change... to change the synchronization settings displayed in the dialog box, if necessary. For more information about application-specific advanced settings, see "Advanced - Nokia 9290 | PC Suite Guide - Page 22
for synchronization and you do not have to modify advanced settings. For more detailed information about advanced settings, click Help on the Advanced settings page you are viewing. 1 Click Change... in Task Scheduler Wizard to enter the Advanced settings dialog box. The dialog box has from two to - Nokia 9290 | PC Suite Guide - Page 23
. The default setting is "All details." Messages page Select the size and the date range of the messages that you want to synchronize and the folders included in the synchronization. You can also select whether or not to synchronize attachments or remove old Nokia 9290 Communicator mail messages - Nokia 9290 | PC Suite Guide - Page 24
Unify" on page 27. 3 If you have selected "At scheduled time" scheduling, you can click Change... to view Advanced settings. The Advanced Settings dialog box is similar to the Advanced Settings dialog box used in Task Scheduler Wizard. For details, see page 20. 22 Tip: You can also open the Task - Nokia 9290 | PC Suite Guide - Page 25
other devices to Nokia 9290 Communicator The Upgrade software lets you copy the contacts or calendar information of your Nokia 51XX, 61XX, 71XX, 82XX, 88XX phone, Nokia 9110/9110i Communicator, MS Outlook 97/98/2000 or Palm organizer to your Nokia 9290 Communicator. Nokia phone 1 Click the Upgrade - Nokia 9290 | PC Suite Guide - Page 26
PC Suite for Nokia 9110/9110i Communicator and connect your Nokia 9290 Communicator to your PC. Note: If PC Suite for Nokia 9290 Communicator and PC Suite for Nokia 9110/9110i Communicator use the same communication port, you may have to exit PC Suite for Nokia 9290 Communicator before starting PC - Nokia 9290 | PC Suite Guide - Page 27
the application bar of PC Suite. Select Palm as the data source and click Next >. 2 Follow the instructions on the screen. Tip: If you go back to Outlook to add folders before you start the copying, with a PC application and then synchronizing PC application with your Nokia 9290 Communicator. 25 - Nokia 9290 | PC Suite Guide - Page 28
. 2 Select the Enable Scheduled tasks check box to make scheduled tasks run automatically. 3 Tasks that have been set to run on connection are executed immediately when you connect your Nokia 9290 Communicator to your PC. To add a delay and a chance to cancel the task before it starts, select the - Nokia 9290 | PC Suite Guide - Page 29
To run several tasks simultaneously You can run several tasks at once by clicking the Unify button on the PC Suite standard toolbar, providing your Nokia 9290 Communicator and the PC are connected. All tasks that can be run this way must be Unify enabled. For details on how to make tasks Unify - Nokia 9290 | PC Suite Guide - Page 30
different settings of PC Suite. For more detailed information about Control Panel, see online help using the index keywords Control Panel. To enable or disable clipboard synchronization and sounds Clipboard synchronization means that if you cut or copy something on your Nokia 9290 Communicator you - Nokia 9290 | PC Suite Guide - Page 31
OK to close the dialog box. To choose the connection port To make the connection between your Nokia 9290 Communicator and PC Suite work properly, the communication port used must match the PC Suite settings. To check the port, proceed as follows: 1 Double-click the Connection icon. 2 Select the port - Nokia 9290 | PC Suite Guide - Page 32
is connected and logged on to PC Suite; it cannot be done offline. 1 Double-click the Conversion Settings icon. The Conversion Settings dialog box opens, displaying a list of Nokia 9290 Communicator file formats. Select a file type in the list. The File type details: field shows the PC format - Nokia 9290 | PC Suite Guide - Page 33
with a check mark next to the currently selected default conversion type. 3 Select in the list the file type you want to convert to, and click Set Default. 4 If you do not want to see the conversion types when PC Suite converts files, clear the Display choice of converters when copying check - Nokia 9290 | PC Suite Guide - Page 34
PC Suite again later you will be able to back up, restore and synchronize using the same settings as before. To remove PC Suite, proceed as follows: 1 Click the Windows Start button, select Settings and click Control Panel. 2 Double-click Add/remove programs. 3 Select "PC Suite" from the list of - Nokia 9290 | PC Suite Guide - Page 35
with a PC and then send them to the Nokia 9290 Communicator. One configuration file can be used to configure several devices. You can configure the basic settings for a number of devices to make getting started quicker and easier for the users. Administrator Suite is a plug-in for PC Suite - Nokia 9290 | PC Suite Guide - Page 36
sections concerning Internet Access Point, E-mail, SMS and WAP settings contain mainly notes 34 specific to modifying the settings in Administrator Suite. For general descriptions of these settings, see the corresponding sections in Nokia 9290 Communicator User's Guide or Administrator Suite Help. - Nokia 9290 | PC Suite Guide - Page 37
To connect the Nokia 9290 Communicator You can transfer the settings via cable or infrared. See "To connect your Nokia 9290 Communicator to a PC" on page 6 of this guide for detailed information on creating a connection between your Nokia 9290 Communicator and a PC. 35 - Nokia 9290 | PC Suite Guide - Page 38
to add to the configuration set. 4 To accept any changes you make, click another item or press Enter. To discard the changes, click Cancel or press Esc on your keyboard. 5 Check that you have selected all the settings that you want to set to the Nokia 9290 Communicator and select Tools> Configure - Nokia 9290 | PC Suite Guide - Page 39
To define default connections If there are several connections available, you can define the default connection by clicking the Preferred Connection/Default Mailbox item and selecting the connection you want to use by default. 37 - Nokia 9290 | PC Suite Guide - Page 40
see "To set up your Internet access point" in the Nokia 9290 Communicator User's Guide. Additional information: Connection name: The name you type here will be given to the new connection folder. Note: You must enter the name for the new connection before you can continue. Phone number: Phone number - Nokia 9290 | PC Suite Guide - Page 41
." To define a new connection, see "Internet Access Point Settings" in the Nokia 9290 Communicator User's Guide. Server options/Retrieve mail For detailed description, see "Mail settings" in the Nokia 9290 Communicator User's Guide. Advanced Custom signature: If you choose the Custom option for - Nokia 9290 | PC Suite Guide - Page 42
WAP settings In WAP settings you can choose an existing WAP connection or create a new WAP connection from the "New connection" settings folder. For description of settings, see "To set up WAP connections" in the Nokia 9290 Communicator User's Guide. Additional information: Secure connection: Field - Nokia 9290 | PC Suite Guide - Page 43
can choose an existing SMS connection or create a new SMS connection from the "New connection" settings folder. For general description of SMS settings, see "SMS settings" in the Nokia 9290 Communicator User's Guide. Service center in use: Choose the SMS connection that you prefer to use. To create - Nokia 9290 | PC Suite Guide - Page 44
Personal data items With Personal data items you can transfer voice mailbox numbers, WWW bookmarks and WAP bookmarks to your Nokia 9290 Communicator. Voice mailbox numbers In the main view, select Voice mailbox number and type the voice mailbox number in the text box. WWW bookmarks To add a - Nokia 9290 | PC Suite Guide - Page 45
close the dialog. The total number of bookmarks is displayed next to the setting item. Netscape: 1 Select the Netscape and click OK. All the bookmarks close the dialog. The total number of bookmarks is displayed next to the setting item. File: 1 Select File to import bookmarks from a file. 2 Click - Nokia 9290 | PC Suite Guide - Page 46
. See "WWW Bookmarks" in the Nokia 9290 Communicator User's Guide. Additionally, when you add a bookmark, you must define the following options: Username: Type in your user name. Password: Type in a password. The password is often case-sensitive. WAP access: Select the WAP you want to use for - Nokia 9290 | PC Suite Guide - Page 47
can transfer ringing tones, background images, software installation files and other files to your Nokia 9290 Communicator. Ringing tones This option allows you to customize the ringing tones of your Nokia 9290 Communicator. The supported file formats are Nokia sounds (i.e., beep tones) and *.wav - Nokia 9290 | PC Suite Guide - Page 48
supported image files and click Open to return to the list dialog. Selected files are shown in the list. 4 Click OK to close the dialog and return to main view. Software installation files You can use Administrator Suite to install add-on software on your Nokia 9290 Communicator. Note: Only software - Nokia 9290 | PC Suite Guide - Page 49
close the dialog and return to main view. To remove software installation files 1 In main view, open the Files folder. Software Installation files setting item is displayed. 2 Double-click the Software Installation files item. Software Installation files dialog opens. 3 Select the files you want to - Nokia 9290 | PC Suite Guide - Page 50
files You can also copy any other files to the default folders of the Nokia 9290 Communicator's File manager. To add files 1 In the main view, open the Files folder in the setting items treelist. Files setting item is displayed. 2 Double-click the Files item. Files dialog opens. 3 Click Add. File - Nokia 9290 | PC Suite Guide - Page 51
THE ACCURACY, RELIABILITY OR CONTENTS OF THIS DOCUMENT. NOKIA RESERVES THE RIGHT TO REVISE THIS DOCUMENT OR WITHDRAW AT ANYTIME WITHOUT PRIOR NOTICE. All rights reserved. Important Safety Notes All the safety instructions in your phone's user guide and computer also apply when this product is used - Nokia 9290 | PC Suite Guide - Page 52
Phones. Nokia, Connecting People, the Model 9290 Communicator, and the Original Nokia Accessories logo are registered trademarks and/or trademarks of Nokia Corporation and/or its affiliates. Some features are network dependent. Nokia reserves the right to make changes to products or specifications
-
 1
1 -
 2
2 -
 3
3 -
 4
4 -
 5
5 -
 6
6 -
 7
7 -
8
-
9
-
10
-
11
-
12
-
13
-
14
-
15
-
16
-
17
-
18
-
19
-
20
-
21
-
22
-
23
-
24
-
25
-
26
-
27
-
28
-
29
-
30
-
31
-
32
-
33
-
34
-
35
-
36
-
37
-
38
-
39
-
40
-
41
-
42
-
43
-
44
-
45
-
46
-
47
-
48
-
49
-
50
-
51
-
52
 |
 |

Nokia 9290 Communicator
PC Suite Guide
www.Communicatorworld.net