Nokia 9290 PC Suite Guide - Page 11
Your Nokia 9290 Communicator on your PC's desktop
 |
View all Nokia 9290 manuals
Add to My Manuals
Save this manual to your list of manuals |
Page 11 highlights
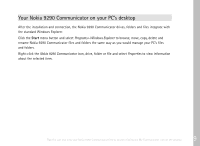
Your Nokia 9290 Communicator on your PC's desktop After the installation and connection, the Nokia 9290 Communicator drives, folders and files integrate with the standard Windows Explorer. Click the Start menu button and select Programs> Windows Explorer to browse, move, copy, delete and rename Nokia 9290 Communicator files and folders the same way as you would manage your PC's files and folders. Right-click the Nokia 9290 Communicator icon, drive, folder or file and select Properties to view information about the selected item. Tip: You can also view your Nokia 9290 Communicator files by double-clicking the My Communicator icon on the desktop. 9
-
 1
1 -
2
-
3
-
4
-
5
-
 6
6 -
 7
7 -
 8
8 -
 9
9 -
 10
10 -
 11
11 -
 12
12 -
 13
13 -
 14
14 -
 15
15 -
 16
16 -
17
-
18
-
19
-
20
-
21
-
22
-
23
-
24
-
25
-
26
-
27
-
28
-
29
-
30
-
31
-
32
-
33
-
34
-
35
-
36
-
37
-
38
-
39
-
40
-
41
-
42
-
43
-
44
-
45
-
46
-
47
-
48
-
49
-
50
-
51
-
52
 |
 |

9
After the installation and connection, the Nokia 9290 Communicator drives, folders and files integrate with
the standard Windows Explorer.
Click the
Start
menu button and select
Programs> Windows Explorer
to browse, move, copy, delete and
rename Nokia 9290 Communicator files and folders the same way as you would manage your PC’s files
and folders.
Right-click the
Nokia 9290 Communicator
icon, drive, folder or file and select
Properties
to view information
about the selected item.
Tip:
You can also view your Nokia 9290 Communicator files by double-clicking the My Communicator icon on the desktop.
Your Nokia 9290 Communicator on your PC’s desktop