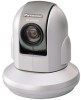
Panasonic BB-HCE481A Pro-line Network Cam - Page 23
Using the Operation Bar - pan tilt zoom
 |
UPC - 037988845095
View all Panasonic BB-HCE481A manuals
Add to My Manuals
Save this manual to your list of manuals |
Page 23 highlights
1.5.4 Using the Operation Bar Operating Instructions (1) (1) End Display and Preset Display: When the pan/tilt has reached the end of its range, the End Display (Left End, Right End, Up End or Down End) appears. When (2) the zoom or focus operation has reached the end, Wide End, Tele End, Near End, or Far End appears. When you select a preset, the preset name appears. (3) (2) Pan Scan/Tilt Scan: Moves the lens throughout the horizontal ( ) or vertical ( ) range, and returns to the (4) original position. (3) Pan/Tilt/Home Position: Controls lens direction. (5) Pan ( : Left, : Right), Tilt ( : Up, : Down) and Home Position ( : Center [Default]) (6) (4) Zoom Buttons: Zooms in or out on the camera image. (5) Focus Buttons: Used to adjust the focus. (6) Home Position, Alarm Position, Preset Position: Applies the camera direction to a preset position. You can preset 20 positions (see page 30-page 33). When the External I/O detects a signal, the camera can be set up to turn to the position of Alarm 1 or Alarm 2. Only an administrator can operate it (see page 30). 23
-
 1
1 -
2
-
3
-
4
-
5
-
6
-
7
-
8
-
9
-
10
-
11
-
12
-
13
-
14
-
15
-
16
-
17
-
 18
18 -
 19
19 -
 20
20 -
 21
21 -
 22
22 -
 23
23 -
 24
24 -
 25
25 -
 26
26 -
 27
27 -
 28
28 -
29
-
30
-
31
-
32
-
33
-
34
-
35
-
36
-
37
-
38
-
39
-
40
-
41
-
42
-
43
-
44
-
45
-
46
-
47
-
48
-
49
-
50
-
51
-
52
-
53
-
54
-
55
-
56
-
57
-
58
-
59
-
60
-
61
-
62
-
63
-
64
-
65
-
66
-
67
-
68
-
69
-
70
-
71
-
72
-
73
-
74
-
75
-
76
-
77
-
78
-
79
-
80
-
81
-
82
-
83
-
84
-
85
-
86
-
87
-
88
-
89
-
90
-
91
-
92
-
93
-
94
-
95
-
96
-
97
-
98
-
99
-
100
-
101
-
102
-
103
-
104
-
105
-
106
-
107
-
108
-
109
-
110
-
111
-
112
-
113
-
114
-
115
-
116
-
117
-
118
-
119
-
120
-
121
-
122
-
123
-
124
-
125
-
126
-
127
-
128
-
129
-
130
-
131
-
132
-
133
-
134
-
135
-
136
-
137
-
138
-
139
-
140
-
141
-
142
-
143
-
144
-
145
-
146
-
147
-
148
-
149
-
150
-
151
-
152
-
153
-
154
-
155
-
156
-
157
-
158
-
159
-
160
-
161
-
162
-
163
-
164
-
165
-
166
-
167
-
168
-
169
-
170
-
171
-
172
-
173
-
174
-
175
-
176
-
177
-
178
-
179
-
180
-
181
-
182
-
183
-
184
-
185
-
186
-
187
-
188
-
189
-
190
-
191
-
192
-
193
-
194
-
195
-
196
-
197
-
198
 |
 |
