Panasonic KX-HNC505 HomeHawk App Users Guide - Page 143
Recording settings, Bit rate settings for Amazon Echo Show and Google Home, Time adjustment
 |
View all Panasonic KX-HNC505 manuals
Add to My Manuals
Save this manual to your list of manuals |
Page 143 highlights
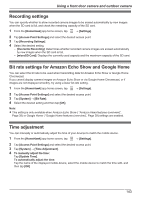
Using a front door camera and outdoor camera Recording settings You can specify whether to allow recorded camera images to be erased automatically by new images when the SD card is full, and check the remaining capacity of the SD card. 1 From the [HomeHawk] app home screen, tap ® [Settings]. 2 Tap [Access Point Settings] and select the desired access point. 3 Tap [Recording Settings]. 4 Select the desired setting. - [Overwrite Recording]: Determines whether recorded camera images are erased automatically by new images when the SD card is full. - [microSD Card]: Displays the currently used capacity and the maximum capacity of the SD card. Bit rate settings for Amazon Echo Show and Google Home You can select the bit rate to be used when transmitting data for Amazon Echo Show or Google Home Chromecast. If you cannot display camera images on Amazon Echo Show or via Google Home Chromecast, or if images are not displayed smoothly, try using a lower bit rate setting. 1 From the [HomeHawk] app home screen, tap ® [Settings]. 2 Tap [Access Point Settings] and select the desired access point. 3 Tap [System] ® [Bit Rate]. 4 Select the desired setting and then tap [OK]. Note: R This setting is only available when Amazon Echo Show ( "Amazon Alexa features (overview)", Page 35) or Google Home ( "Google Home features (overview)", Page 38) settings are enabled. Time adjustment You can manually or automatically adjust the time of your devices to match the mobile device. 1 From the [HomeHawk] app home screen, tap ® [Settings]. 2 Tap [Access Point Settings] and select the desired access point. 3 Tap [System] ® [Time Adjustment]. 4 To manually adjust the time: Tap [Update Time]. To automatically adjust the time: Tap the name of the displayed mobile device, select the mobile device to match the time with, and then tap [OK]. 143
-
 1
1 -
2
-
3
-
4
-
5
-
6
-
7
-
8
-
9
-
10
-
11
-
12
-
13
-
14
-
15
-
16
-
17
-
18
-
19
-
20
-
21
-
22
-
23
-
24
-
25
-
26
-
27
-
28
-
29
-
30
-
31
-
32
-
33
-
34
-
35
-
36
-
37
-
38
-
39
-
40
-
41
-
42
-
43
-
44
-
45
-
46
-
47
-
48
-
49
-
50
-
51
-
52
-
53
-
54
-
55
-
56
-
57
-
58
-
59
-
60
-
61
-
62
-
63
-
64
-
65
-
66
-
67
-
68
-
69
-
70
-
71
-
72
-
73
-
74
-
75
-
76
-
77
-
78
-
79
-
80
-
81
-
82
-
83
-
84
-
85
-
86
-
87
-
88
-
89
-
90
-
91
-
92
-
93
-
94
-
95
-
96
-
97
-
98
-
99
-
100
-
101
-
102
-
103
-
104
-
105
-
106
-
107
-
108
-
109
-
110
-
111
-
112
-
113
-
114
-
115
-
116
-
117
-
118
-
119
-
120
-
121
-
122
-
123
-
124
-
125
-
126
-
127
-
128
-
129
-
130
-
131
-
132
-
133
-
134
-
135
-
136
-
137
-
 138
138 -
 139
139 -
 140
140 -
 141
141 -
 142
142 -
 143
143 -
 144
144 -
 145
145 -
 146
146 -
 147
147 -
 148
148 -
149
-
150
-
151
-
152
-
153
-
154
-
155
-
156
-
157
-
158
-
159
-
160
-
161
-
162
-
163
-
164
-
165
-
166
-
167
-
168
-
169
-
170
-
171
-
172
-
173
-
174
-
175
-
176
-
177
-
178
-
179
-
180
-
181
-
182
-
183
-
184
-
185
-
186
-
187
-
188
-
189
-
190
-
191
-
192
-
193
-
194
-
195
-
196
-
197
-
198
-
199
-
200
 |
 |
