Panasonic PT-D7700U-K Dlp Projector - English/ French - Page 11
<When the operation mode selector, set to Computer>, Operation mode selector Computer/Numeric
 |
UPC - 791871111000
View all Panasonic PT-D7700U-K manuals
Add to My Manuals
Save this manual to your list of manuals |
Page 11 highlights
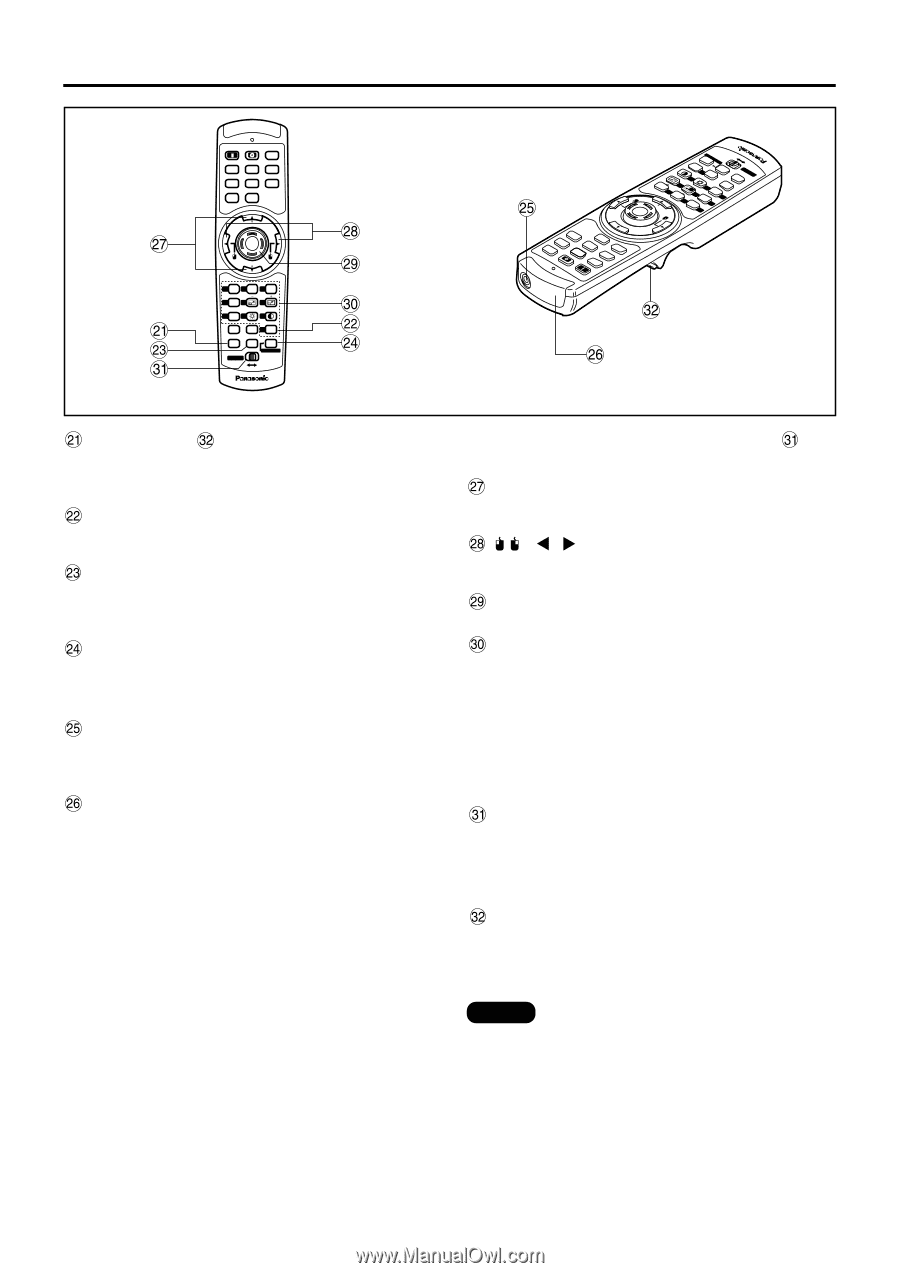
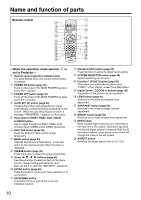
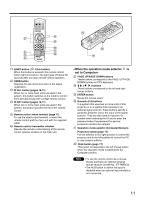
ProjLeAcStEoRrONI/DOFSFET NuCometmripcutLIerGHT ID ALL ASPECT 0 USER 9 CONTRAST 7 NEXT LENS 8 BRIGHT D.ZOOM SSYESLTEM 6 1FUNC 5 4 STD OOSNDSCREEN PAGE DOWN ENTER 2 3 1 PAGE UP MPEANGUE VPIADGEEO FREEZE S-VIDEO 2RGB SHSUHTUTTERAUX SETAUUTPO ON POWER OFF AUTO SETUP RGB 1 VIDEO RGB 2 S-VIDEO AUX SHUTTER SHUT MENU FREEZE PAGE UP ENTER PAGE DOWN ON SCREEN 1 STD 2 OSD 3 SYSTEM SEL D.ZOOM 4 FUNC 1 5 6 BRIGHT CONTRAST 7 LENS 8 9 NEXT ASPECT 0 USER LIGHT ID ALL ID SET Computer Numetric LASER ON/OFF Projector 1RGB POWEROFF ON LIGHT button ( Click button) When this button is pressed, the remote control button light is turned on.The light goes off about 30 seconds after you stop remote control operation. USER button Displays the sub-memory screen of the signal registration. ID ALL button (pages 16,71) When two or more main units are used in the system, this button switches to the mode to control them simultaneously with a single remote control. ID SET button (pages 16,71) When two or more main units are used in the system, this button specifies the ID of the remote control. Remote control wired terminal (page 17) To use the wired output terminal, connect the remote control and the main unit with the supplied cable. Remote control transmitter window Operate the remote control aiming at the remote control receiver window on the main unit. PAGE UP/PAGE DOWN buttons These buttons correspond to the PAGE UP/PAGE DOWN buttons on PC's keyboard. ( ) buttons These buttons correspond to the left and right mouse buttons. ENTER button Moves the mouse cursor. Numeric (0-9) buttons In a system that uses two or more units of this projector or in a system that connects to an optional signal selector, these buttons specify a particular projector unit or the input of the signal selector. They are also used to input the ID number when selecting the ID and to enter the password when the password for service personnel needs to be entered. Operation mode selector (Computer/Numeric, Projector) switch (page 17) Put this selector to the right position to control the projector and to the left position to control the PC or use numeric buttons. Click button (page 17) This button corresponds to the left mouse button when the operation mode is switched to the Computer position. Note • To use the remote control as a mouse, please purchase an optional wireless mouse receiver (model No.: ET-RMRC2). • The AUX button to switch the input is disabled when an optional input module is not connected. 11
-
 1
1 -
2
-
3
-
4
-
5
-
 6
6 -
 7
7 -
 8
8 -
 9
9 -
 10
10 -
 11
11 -
 12
12 -
 13
13 -
 14
14 -
 15
15 -
 16
16 -
17
-
18
-
19
-
20
-
21
-
22
-
23
-
24
-
25
-
26
-
27
-
28
-
29
-
30
-
31
-
32
-
33
-
34
-
35
-
36
-
37
-
38
-
39
-
40
-
41
-
42
-
43
-
44
-
45
-
46
-
47
-
48
-
49
-
50
-
51
-
52
-
53
-
54
-
55
-
56
-
57
-
58
-
59
-
60
-
61
-
62
-
63
-
64
-
65
-
66
-
67
-
68
-
69
-
70
-
71
-
72
-
73
-
74
-
75
-
76
-
77
-
78
-
79
-
80
-
81
-
82
-
83
-
84
-
85
-
86
-
87
-
88
-
89
-
90
-
91
-
92
-
93
-
94
-
95
-
96
-
97
-
98
-
99
-
100
-
101
-
102
-
103
-
104
-
105
-
106
-
107
-
108
-
109
-
110
-
111
-
112
-
113
-
114
-
115
-
116
 |
 |