Panasonic PT-D7700U-K Dlp Projector - English/ French - Page 74
Rs232c Setting (procedure Of Setting Communication Conditions), Position Of On-screen Indications
 |
UPC - 791871111000
View all Panasonic PT-D7700U-K manuals
Add to My Manuals
Save this manual to your list of manuals |
Page 74 highlights
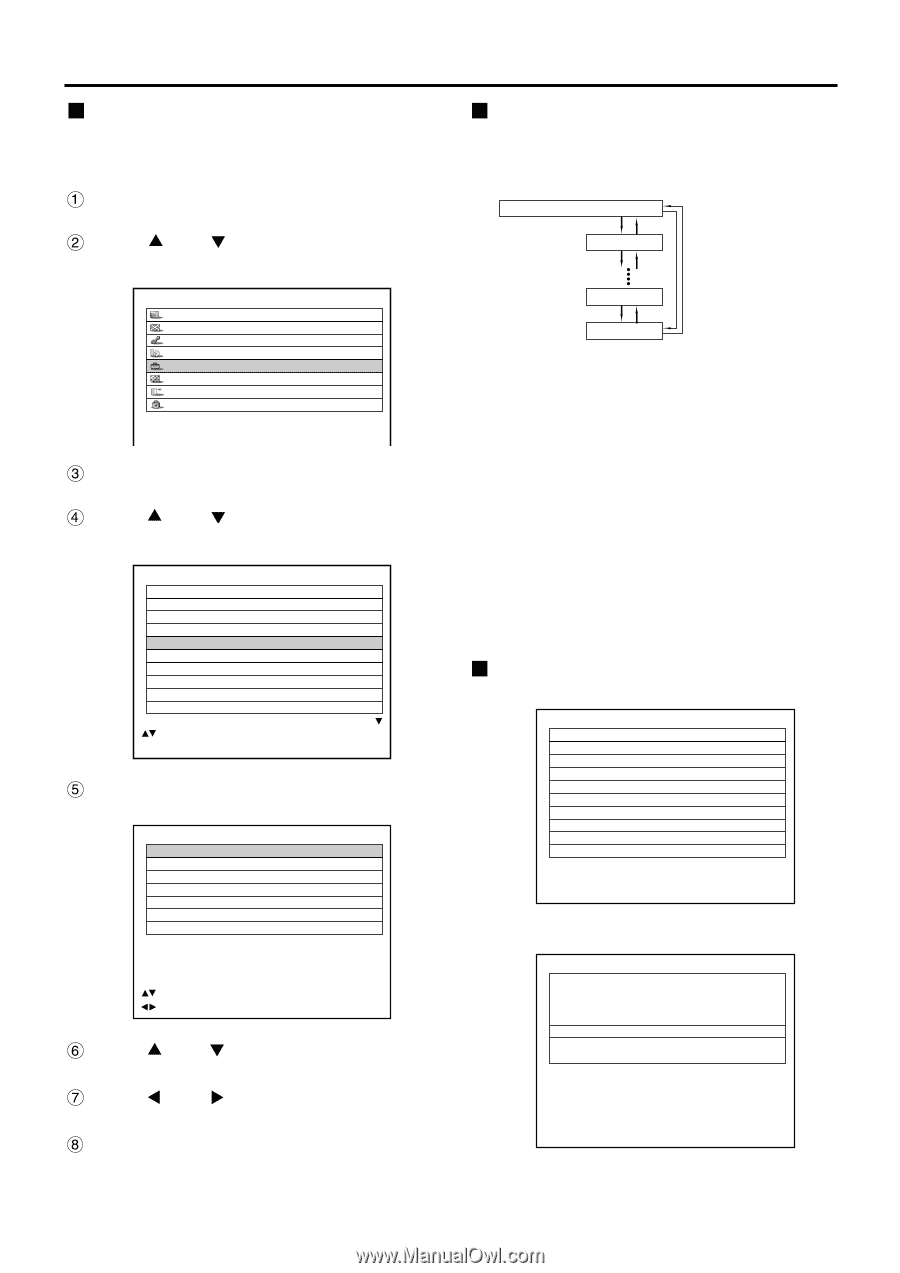
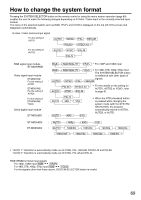
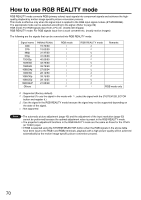
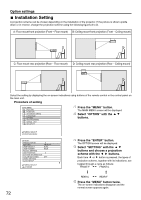
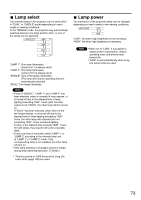
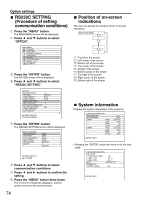
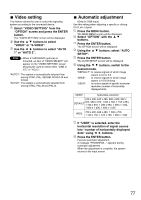
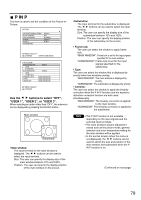
Option settings RS232C SETTING (Procedure of setting communication conditions) Press the "MENU" button. The MAIN MENU screen will be displayed. Press and buttons to select "OPTION". MAIN MENU PICTURE POSITION ADVANCED MENU LANGUAGE OPTION TEST PATTERN SIGNAL LIST SECURITY Press the "ENTER" button. The OPTION screen will be displayed. Press and buttons to select "RS232C SETTING". OPTION PROJECTOR ID SETTING LAMP SELECT LAMP POWER RS232C SETTING OSD POSITION SYSTEM INFORMATION COLOR MATCHING VIDEO SETTING AUTO SETUP 2 FRONT-F DUAL HIGH 2 OFF :MENU SELECT ENTER:SUB MENU Press the "ENTER" button. The RS232C SETTING screen will be displayed. RS232C SETTING (IN) BAUDRATE (IN) PARITY (OUT) BAUDRATE (OUT) PARITY VPS SYSTEM GROUP 38400 EVEN 38400 EVEN MASTER A MASTER :MENU SELECT :CHANGE Press and buttons to select communication conditions Press and buttons to confirm the setting. Press the "MENU" button three times. The on-screen indications disappear, and the system returns to the normal screen. 74 Position of on-screen indications The user can specify the position of the on-screen indications OSD POSITION 1 2 8 9 "1": Top left of the screen "2": Left center of the screen "3": Bottom left of the screen "4": Top center of the screen "5": Center of the screen "6": Bottom center of the screen "7": Top right of the screen "8": Right center of the screen "9": Bottom right of the screen System information Displays the system information of the projector. SYSTEM INFORMATION ROM VERSION: SET RUNTIME: LAMP1 TYPE: LOW: HIGH: TOTAL: LAMP2 TYPE: LOW: HIGH: TOTAL: 1.00 1200h LAD7700 300h 0h 300h LAD7700 300h 0h 300h ENTER: NEXT • Pressing the "ENTER" button will move on to the next page. SYSTEM INFORMATION ON COUNT POWER ON TIMES: 100 LAMP 1 ON: 50( 1) LAMP 2 ON: 50( 1) AUX: MD75NT: NT NUMBER OF ENTRY SIGNAL: 1/64 ENTER: NEXT
-
 1
1 -
2
-
3
-
4
-
5
-
6
-
7
-
8
-
9
-
10
-
11
-
12
-
13
-
14
-
15
-
16
-
17
-
18
-
19
-
20
-
21
-
22
-
23
-
24
-
25
-
26
-
27
-
28
-
29
-
30
-
31
-
32
-
33
-
34
-
35
-
36
-
37
-
38
-
39
-
40
-
41
-
42
-
43
-
44
-
45
-
46
-
47
-
48
-
49
-
50
-
51
-
52
-
53
-
54
-
55
-
56
-
57
-
58
-
59
-
60
-
61
-
62
-
63
-
64
-
65
-
66
-
67
-
68
-
 69
69 -
 70
70 -
 71
71 -
 72
72 -
 73
73 -
 74
74 -
 75
75 -
 76
76 -
 77
77 -
 78
78 -
 79
79 -
80
-
81
-
82
-
83
-
84
-
85
-
86
-
87
-
88
-
89
-
90
-
91
-
92
-
93
-
94
-
95
-
96
-
97
-
98
-
99
-
100
-
101
-
102
-
103
-
104
-
105
-
106
-
107
-
108
-
109
-
110
-
111
-
112
-
113
-
114
-
115
-
116
 |
 |