Panasonic PT-D7700U-K Dlp Projector - English/ French - Page 43
Automatic Adjustment (auto Setup
 |
UPC - 791871111000
View all Panasonic PT-D7700U-K manuals
Add to My Manuals
Save this manual to your list of manuals |
Page 43 highlights
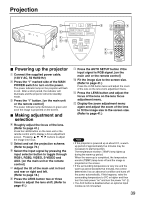
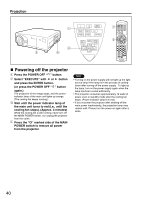
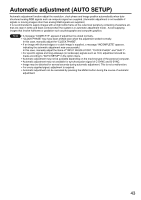
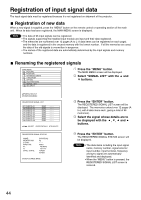
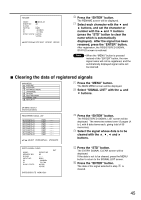
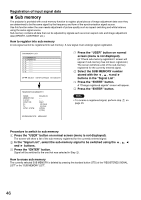
Automatic adjustment (AUTO SETUP) Automatic adjustment function adjust the resolution, clock phase and image position automatically when dotsstructured analog RGB signals such as computer signal are supplied. (Automatic adjustment is not available if signals or moving images other than analog RGB signals are supplied.) It is recommended to supply images with a bright white frame at the outermost periphery containing characters etc. that are clear in white and black contrast when the system is in automatic adjustment mode. Avoid supplying images that involve halftones or gradation such as photographs and computer graphics. Note • A message "COMPLETE" appears if adjustment is ended normally. • "CLOCK PHASE" may have been shifted even when the adjustment ended normally. In this case, manually adjust the "CLOCK PHASE". • If an image with blurred edges or a dark image is supplied, a message "INCOMPLETE" appears, indicating the automatic adjustment was unsuccessful. In this case, manually adjust the items of "INPUT RESOLUTION", "CLOCK PHASE" and "SHIFT". • For specific signals and long-sideways (or landscape) signals such as 16:9, adjustment should be made according to "AUTO SETUP" in the option menu. • Automatic adjustment may not be available depending on the machine type of the personal computer. • Automatic adjustment may not available for synchronization signal of C-SYNC and G-SYNC. • Image may be distorted for several seconds during automatic adjustment. This is not a malfunction. • For every supplied signal, adjustment is required. • Automatic adjustment can be cancelled by pressing the MENU button during the course of automatic adjustment. 43
-
 1
1 -
2
-
3
-
4
-
5
-
6
-
7
-
8
-
9
-
10
-
11
-
12
-
13
-
14
-
15
-
16
-
17
-
18
-
19
-
20
-
21
-
22
-
23
-
24
-
25
-
26
-
27
-
28
-
29
-
30
-
31
-
32
-
33
-
34
-
35
-
36
-
37
-
 38
38 -
 39
39 -
 40
40 -
 41
41 -
 42
42 -
 43
43 -
 44
44 -
 45
45 -
 46
46 -
 47
47 -
 48
48 -
49
-
50
-
51
-
52
-
53
-
54
-
55
-
56
-
57
-
58
-
59
-
60
-
61
-
62
-
63
-
64
-
65
-
66
-
67
-
68
-
69
-
70
-
71
-
72
-
73
-
74
-
75
-
76
-
77
-
78
-
79
-
80
-
81
-
82
-
83
-
84
-
85
-
86
-
87
-
88
-
89
-
90
-
91
-
92
-
93
-
94
-
95
-
96
-
97
-
98
-
99
-
100
-
101
-
102
-
103
-
104
-
105
-
106
-
107
-
108
-
109
-
110
-
111
-
112
-
113
-
114
-
115
-
116
 |
 |