Panasonic PT-D7700U-K Dlp Projector - English/ French - Page 60
KEYSTONE DISTORTION CORRECTION, Select the POSITION with
 |
UPC - 791871111000
View all Panasonic PT-D7700U-K manuals
Add to My Manuals
Save this manual to your list of manuals |
Page 60 highlights
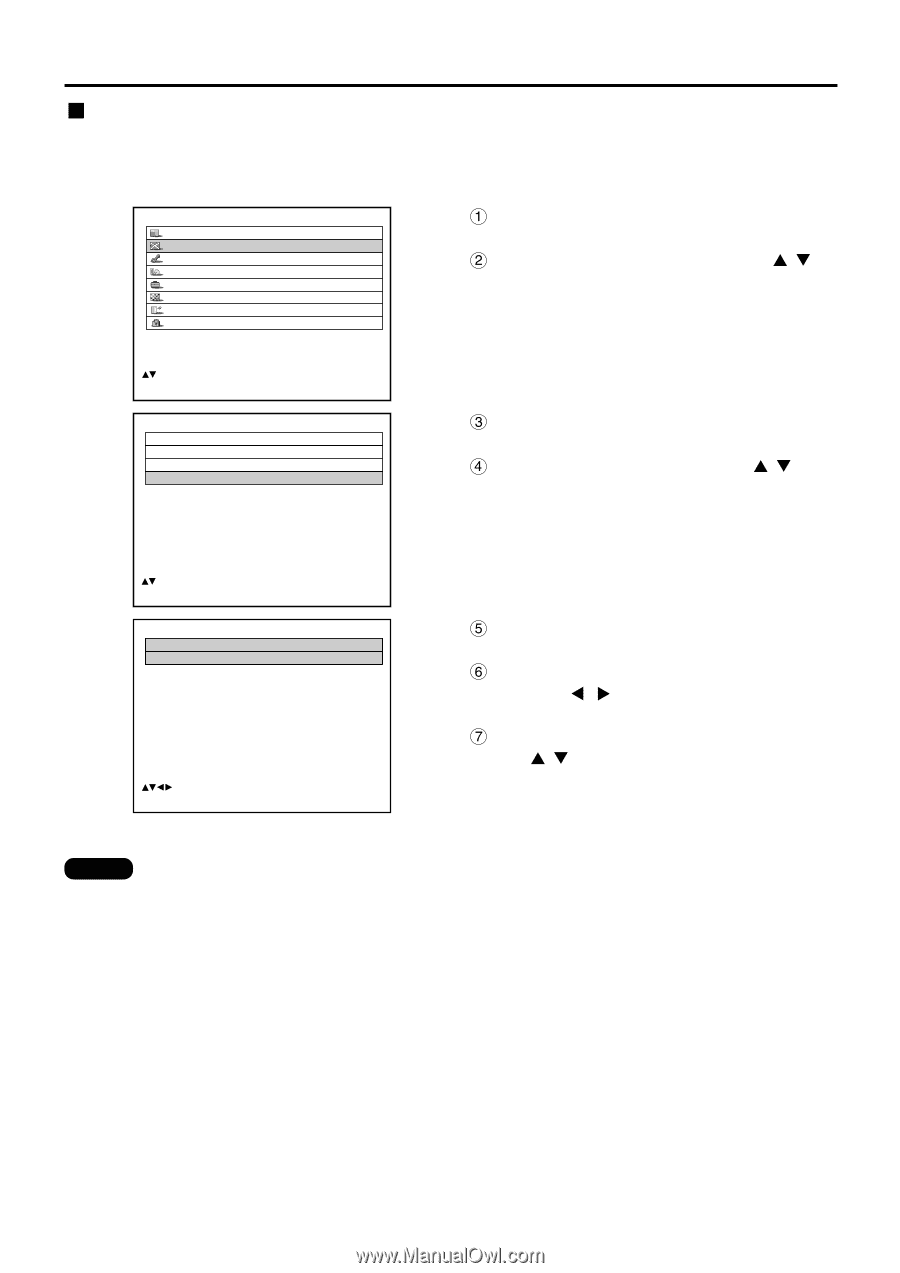
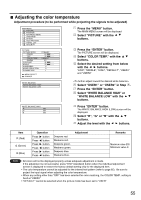
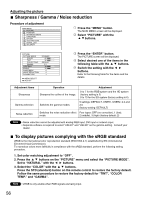
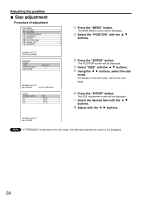
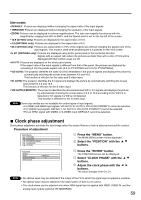
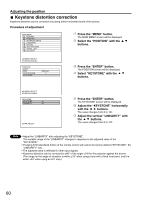
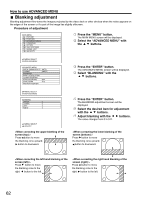
Adjusting the position Keystone distortion correction Keystone distortion can be corrected only along either horizontal bound of the picture. Procedure of adjustment MAIN MENU PICTURE POSITION ADVANCED MENU LANGUAGE OPTION TEST PATTERN SIGNAL LIST SECURITY Press the "MENU" button. The MAIN MENU screen will be displayed. Select the "POSITION" with the buttons. :MENU SELECT ENTER:SUB MENU POSITION SHIFT SIZE CLOCK PHASE KEYSTONE DEFAULT 0 Press the "ENTER" button. The POSITION screen will be displayed. Select "KEYSTONE" with the buttons. :MENU SELECT ENTER:SUB MENU KEYSTONE KEYSTONE 63 LINEARITY 63 :ADJUST Press the "ENTER" button. The KEYSTONE screen will be displayed. Adjust the "KEYSTONE" horizontally with the buttons. The value changes from 0 to 127. Adjust the vertical "LINEARITY" with the buttons. The value changes from 0 to 127. Note • Adjust the "LINEARITY" after adjusting the "KEYSTONE". The variable range of the "LINEARITY" changes in response to the adjusted value of the "KEYSTONE". • Pressing STD (standard) button of the remote control will restore the factory default ("KEYSTONE": 63, "LINEARITY": 63). • The adjusted value is reflected in other input signals. • Keystone distortion can be corrected to ±40° of the angle of tilt for the projector against the screen. (The range for the angle of elevation is within ±19° when using a lens with a fixed focal point, and it is within ±34° when using an LE1 lens.) 60
-
 1
1 -
2
-
3
-
4
-
5
-
6
-
7
-
8
-
9
-
10
-
11
-
12
-
13
-
14
-
15
-
16
-
17
-
18
-
19
-
20
-
21
-
22
-
23
-
24
-
25
-
26
-
27
-
28
-
29
-
30
-
31
-
32
-
33
-
34
-
35
-
36
-
37
-
38
-
39
-
40
-
41
-
42
-
43
-
44
-
45
-
46
-
47
-
48
-
49
-
50
-
51
-
52
-
53
-
54
-
 55
55 -
 56
56 -
 57
57 -
 58
58 -
 59
59 -
 60
60 -
 61
61 -
 62
62 -
 63
63 -
 64
64 -
 65
65 -
66
-
67
-
68
-
69
-
70
-
71
-
72
-
73
-
74
-
75
-
76
-
77
-
78
-
79
-
80
-
81
-
82
-
83
-
84
-
85
-
86
-
87
-
88
-
89
-
90
-
91
-
92
-
93
-
94
-
95
-
96
-
97
-
98
-
99
-
100
-
101
-
102
-
103
-
104
-
105
-
106
-
107
-
108
-
109
-
110
-
111
-
112
-
113
-
114
-
115
-
116
 |
 |