Panasonic PT-D7700U-K Dlp Projector - English/ French - Page 72
INSTALLATION SETTING, Procedure of setting, Press the, button., Select, OPTION, with the, ENTER
 |
UPC - 791871111000
View all Panasonic PT-D7700U-K manuals
Add to My Manuals
Save this manual to your list of manuals |
Page 72 highlights
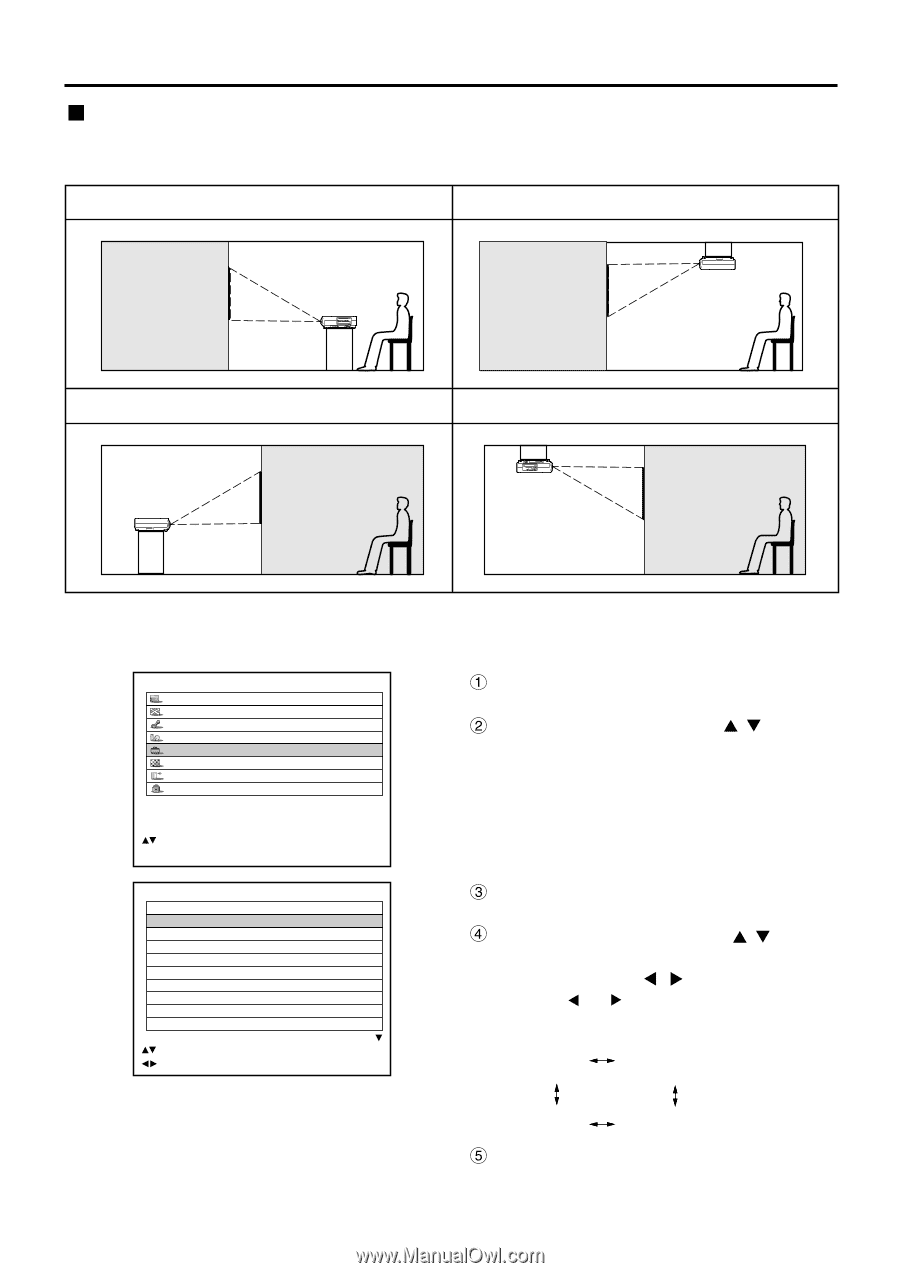
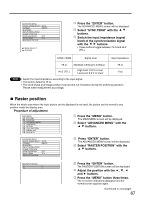
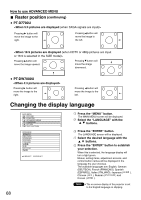
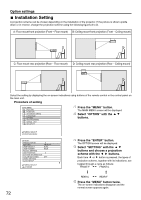
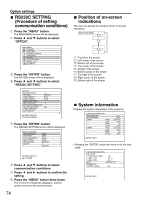
Option settings Installation Setting A projection scheme can be chosen depending on the installation of the projector. If the picture is shown upside down or in reverse, change the projection scheme using the following figures A to D. A: Floor mount front projection (Front - Floor mount) B: Ceiling mount front projection (Front - Ceiling mount) C: Floor mount rear projection (Rear - Floor mount) D: Ceiling mount rear projection (Rear - Ceiling mount) Select the setting by displaying the on-screen indications using buttons of the remote control or the control panel on the main unit. Procedure of setting MAIN MENU PICTURE POSITION ADVANCED MENU LANGUAGE OPTION TEST PATTERN SIGNAL LIST SECURITY Press the "MENU" button. The MAIN MENU screen will be displayed. Select "OPTION" with the buttons. :MENU SELECT ENTER:SUB MENU OPTION PROJECTOR ID SETTING LAMP SELECT LAMP POWER RS232C SETTING OSD POSITION SYSTEM INFORMATION COLOR MATCHING VIDEO SETTING AUTO SETUP 2 FRONT-F DUAL HIGH 2 OFF :MENU SELECT :CHANGE Press the "ENTER" button. The OPTION screen will be displayed. Select "SETTING" with the buttons and choose a projection scheme with the buttons. Each time or button is pressed, the types of projection scheme, together with its indications, are toggled through a cycle as follows: FRONT-F FRONT-C REAR-C REAR-F Press the "MENU" button twice. The on-screen indications disappear and the normal screen appears again. 72
-
 1
1 -
2
-
3
-
4
-
5
-
6
-
7
-
8
-
9
-
10
-
11
-
12
-
13
-
14
-
15
-
16
-
17
-
18
-
19
-
20
-
21
-
22
-
23
-
24
-
25
-
26
-
27
-
28
-
29
-
30
-
31
-
32
-
33
-
34
-
35
-
36
-
37
-
38
-
39
-
40
-
41
-
42
-
43
-
44
-
45
-
46
-
47
-
48
-
49
-
50
-
51
-
52
-
53
-
54
-
55
-
56
-
57
-
58
-
59
-
60
-
61
-
62
-
63
-
64
-
65
-
66
-
 67
67 -
 68
68 -
 69
69 -
 70
70 -
 71
71 -
 72
72 -
 73
73 -
 74
74 -
 75
75 -
 76
76 -
 77
77 -
78
-
79
-
80
-
81
-
82
-
83
-
84
-
85
-
86
-
87
-
88
-
89
-
90
-
91
-
92
-
93
-
94
-
95
-
96
-
97
-
98
-
99
-
100
-
101
-
102
-
103
-
104
-
105
-
106
-
107
-
108
-
109
-
110
-
111
-
112
-
113
-
114
-
115
-
116
 |
 |