Panasonic SA-BX500 Operating Instructions - Page 25
Panasonic SA-BX500 Manual
 |
View all Panasonic SA-BX500 manuals
Add to My Manuals
Save this manual to your list of manuals |
Page 25 highlights
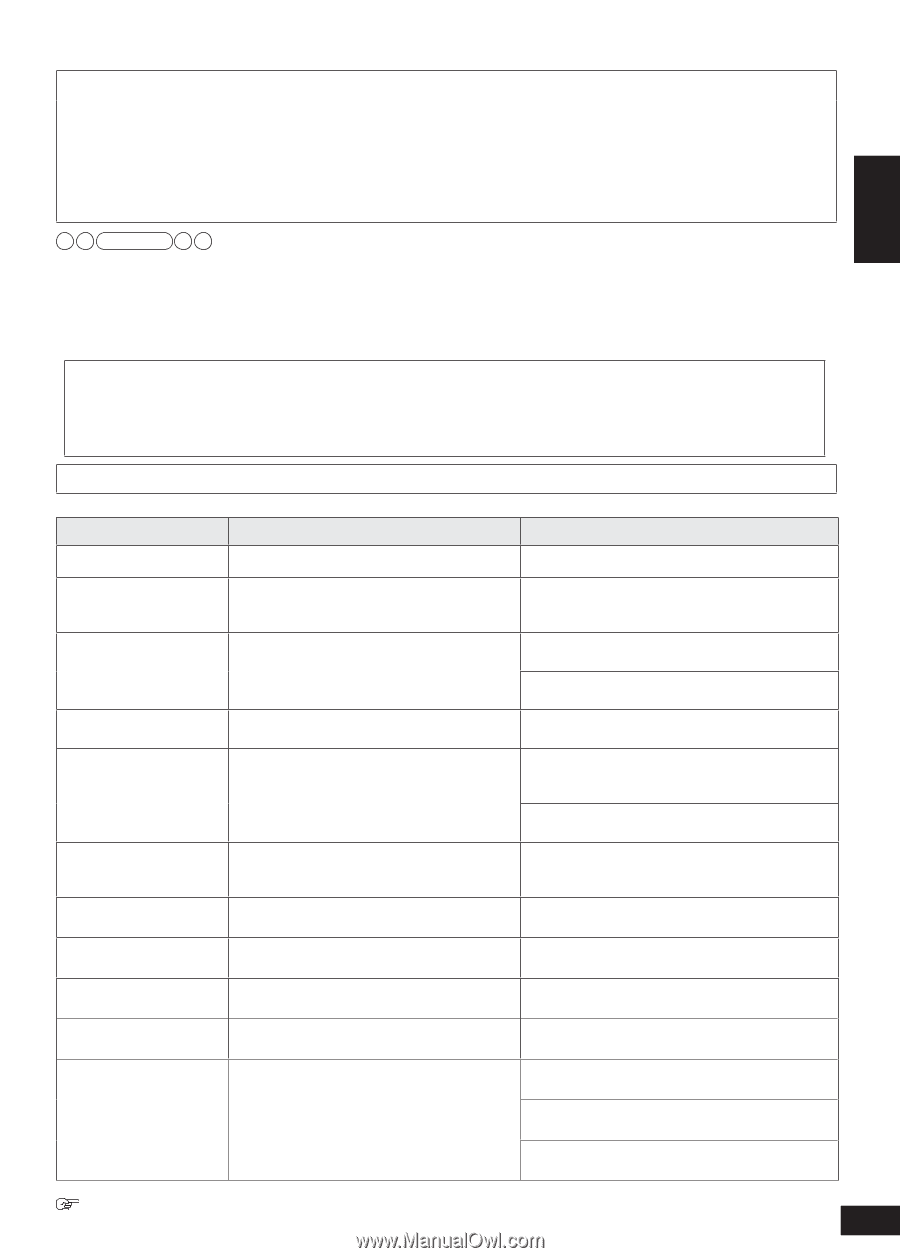
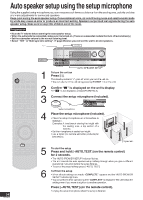
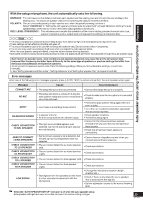
With the setup microphone, the unit automatically sets the following. DISTANCE : The unit measures the distance between each speaker and the seating area and corrects the sound delay in the seating area. The maximum speaker distance for correcting the delay is 15 meters (45 feet). POLARITY : The unit checks the polarity of each speaker and, when the polarity is wrong, corrects it. Select "CHECK NO " in "Setting the unit against automatic polarity adjustment" (➔ page 38) before starting the auto speaker setup when you do not want the unit to adjust polarity automatically. SIZE / LEVEL / FREQUENCY : The unit measures acoustic characteristics of the room including speaker characteristics (size, speaker connection status, output level and lowpass filter settings) and adjusts them. Note • The setup microphone is sensitive to heat. Keep it away from direct sunlight and avoid placing it on top of the unit. • These settings remain effective after the unit goes off. • The setup microphone jack is for use with the setup microphone only. Do not connect other microphones. • The volume may reach an extremely high level when you repeat the auto speaker setup. When the auto speaker setup is finished, check the volume before starting playback. • Setting the connection status and adjusting the level are the only available adjustment for the subwoofer through the auto speaker setup. Such factors as speaker types, room conditions and speaker placement may cause the unit to set speaker size, lowpass filter frequency and other items differently for the same type of speakers or produce settings that differ from the actual characteristics of respective speakers. When sound from speakers seems odd, check the following settings. When you find undesirable settings, correct them manually. • See "Setting speakers and their sizes", "Setting distances" and "Setting the lowpass filter" (➔ pages 37 and 38). Error messages When one of the following error messages appears, press [-AUTO, TEST] to cancel and perform the auto speaker setup again. Message CONNECT MIC NO MIC Cause • The setup microphone is not connected. Countermeasure • Connect the setup microphone properly. • The setup microphone comes off during the • Check to make sure the microphone is connected auto speaker setup and correct measurement properly. cannot be achieved. • Loud noise is preventing measurement. • A speaker is too far. • An error occurred from an unknown cause. • The right surround back speaker was detected, but the left surround back speaker was not detected. • Surround back speakers were detected, but left and right surround speakers were not detected. • The unit cannot detect the surround speaker (left). • The unit cannot detect the surround speaker (right). • The unit cannot detect the front speaker (left). • The unit cannot detect the front speaker (right). • Perform the auto speaker setup again when the room is quiet. • Turn off an air-conditioner and other equipment that are producing noise. • Check speaker locations. • Perform the setup again. • Connect to the left surround back speaker terminal when you connect only one surround back speaker. • Check the left surround back speaker's connections. • Connect surround speakers as well when you connect surround back speakers. • Check connections. • Check connections. • Check connections. • Check connections. • Change the microphone location (height, direction etc.). • Check if there is any obstacle near a speaker that is blocking the test signals. • Set the subwoofer volume to the normal listening level. NOISY MEASURING ERROR CHECK CONNECTION TO SBL SPEAKER NEED TO CONNECT LS/RS SPEAKERS CHECK CONNECTION TO LS SPEAKER CHECK CONNECTION TO RS SPEAKER CHECK CONNECTION TO L SPEAKER CHECK CONNECTION TO R SPEAKER LOW SIGNAL • Test signals from the speakers are too weak to allow accurate measurement with the microphone. When the "AUTO SPEAKER SETUP" indicator is off after the auto speaker setup: Auto speaker settings have been cancelled as a result of various setting changes. 25 RQT9223 Auto speaker setup using the setup microphone Preparations
-
 1
1 -
2
-
3
-
4
-
5
-
6
-
7
-
8
-
9
-
10
-
11
-
12
-
13
-
14
-
15
-
16
-
17
-
18
-
19
-
 20
20 -
 21
21 -
 22
22 -
 23
23 -
 24
24 -
 25
25 -
 26
26 -
 27
27 -
 28
28 -
 29
29 -
 30
30 -
31
-
32
-
33
-
34
-
35
-
36
-
37
-
38
-
39
-
40
-
41
-
42
-
43
-
44
-
45
-
46
-
47
-
48
-
49
-
50
-
51
-
52
-
53
-
54
-
55
-
56
-
57
-
58
-
59
-
60
 |
 |