Panasonic SA-BX500 Operating Instructions - Page 36
Panasonic SA-BX500 Manual
 |
View all Panasonic SA-BX500 manuals
Add to My Manuals
Save this manual to your list of manuals |
Page 36 highlights
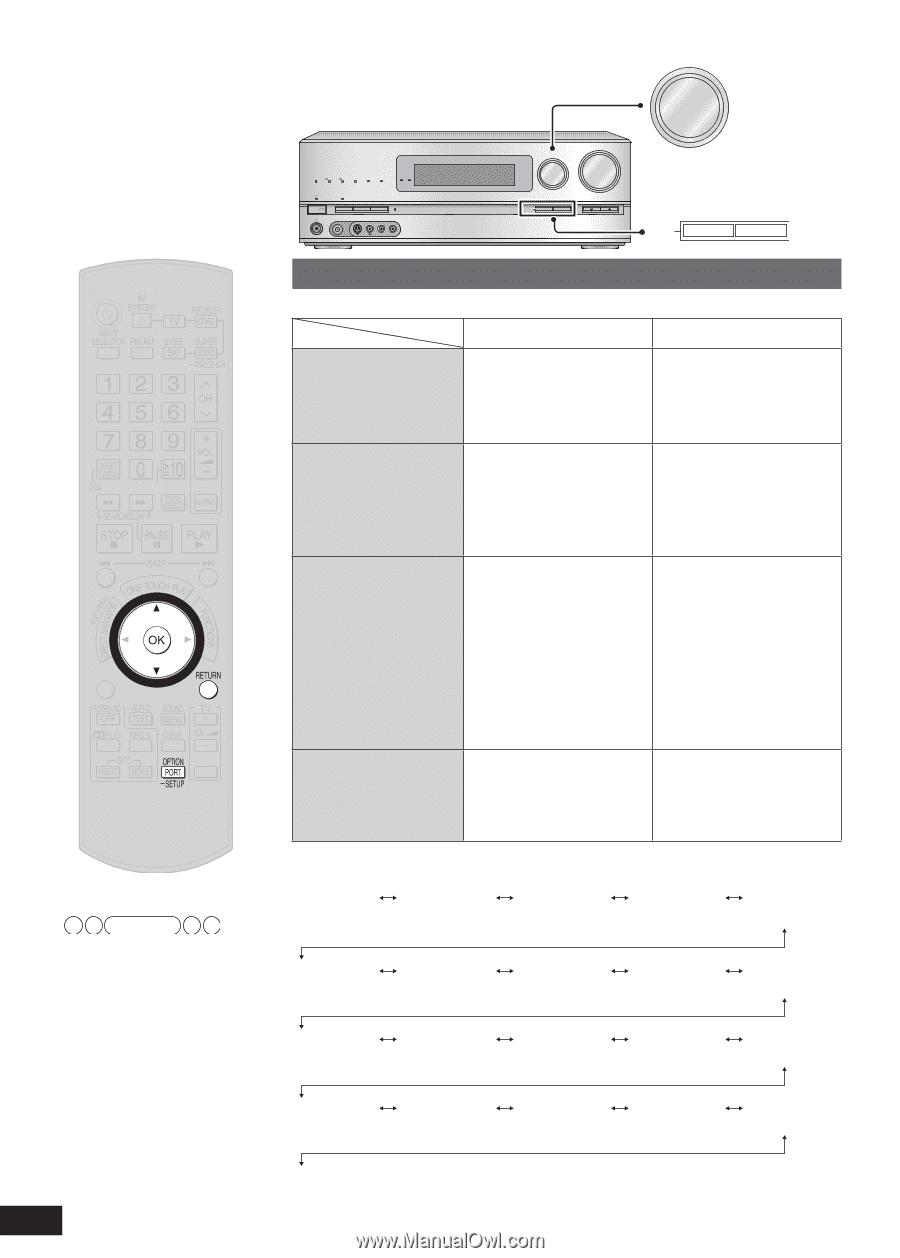
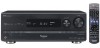
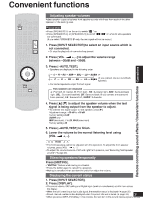
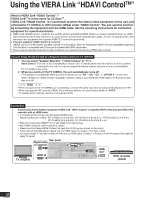
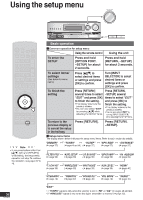
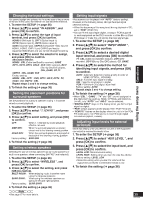
Using the setup menu VOLUME INPUT SELECTOR WIRELESS READY MULTI CH PROCESSING TrueHD D+ DTS-HD MULTI CH LPCM BI-AMP SURROUND M.ROOM INPUT SELECTOR _ + POWER SURROUND SPEAKERS A SPEAKERS B AUTO SPEAKER SETUP RETURN -SETUP OK TUNE SETUP MIC AUX S VIDEO VIDEO L - AUDIO - R RETURN -SETUP OK Basic operation g Common operation for setup menu Using the remote control To enter the SETUP Press and hold [OPTION PORT, -SETUP] for about 2 seconds. Press [e][r] to select desired items or settings and press [OK] to confirm. Press [RETURN] several times to select "EXIT " and press [OK] to finish the setting. • The display returns to the previous screen. • You can also select "EXIT " by pressing [e][r] while selecting the SETUP items. TV/VIDEO Using the unit Press and hold [RETURN, -SETUP] for about 2 seconds. Turn [INPUT SELECTOR] to select desired items or settings and press [OK] to confirm. Press [RETURN, -SETUP] several times to select "EXIT " and press [OK] to finish the setting. • The display returns to the previous screen. • You can also select "EXIT " by turning [INPUT SELECTOR] while selecting the SETUP items. ENTER To select items/ settings (See below for menu items.) To finish the setting SUB MENU S To return to the previous display or to cancel the setup in the halfway g Setup menu items ∗1 Press [RETURN]. Press [RETURN, -SETUP]. The display shown below indicates the setup menu items. Refer to each section for details. "DIMMER" Note • If you press buttons other than [e][r], [OK] and [RETURN] while setting, the setup menu operation will stop. To continue the operation, see pages 37 to 40. (➔ page 37) "TUNER" (➔ pages 48 and 49) (➔ page 37) "SLEEP" "SPK SIZE" (➔ page 37) (➔ page 37) "DISTANCE" "FILTER FRQ" (➔ page 38) "AUTO SETUP" (➔ page 38) "LR BI-WIRE" (➔ page 38) "SPKR IMP" (➔ page 38) (➔ page 39) "IN ASSIGN" "7.1CH VS" (➔ page 39) ∗2 "WIRELESS" (➔ page 39) "INPUT MODE" (➔ page 39) "AUX LEVEL" (➔ page 39) "HDMI" (➔ page 40) "ATTENUATOR" (➔ page 40) "REMOTE" (➔ page 42) "SOUND DLY" (➔ page 40) "VOL MODE" (➔ page 40) "RESET" (➔ page 40) "EXIT" 36 RQT9223 ∗1 "TUNER " appears only when the selector is set to "FM " or "AM " (➔ pages 48 and 49). ∗2 "WIRELESS " appears only when the digital transmitter is inserted (➔ page 23).
-
 1
1 -
2
-
3
-
4
-
5
-
6
-
7
-
8
-
9
-
10
-
11
-
12
-
13
-
14
-
15
-
16
-
17
-
18
-
19
-
20
-
21
-
22
-
23
-
24
-
25
-
26
-
27
-
28
-
29
-
30
-
 31
31 -
 32
32 -
 33
33 -
 34
34 -
 35
35 -
 36
36 -
 37
37 -
 38
38 -
 39
39 -
 40
40 -
 41
41 -
42
-
43
-
44
-
45
-
46
-
47
-
48
-
49
-
50
-
51
-
52
-
53
-
54
-
55
-
56
-
57
-
58
-
59
-
60
 |
 |